Jun 16, 2025
Version 3
Step-by-Step Rabies Virus Genome Sequencing Protocol Using Nanopore (MinION) V.3
This protocol is a draft, published without a DOI.

- Kirstyn Brunker1,
- Gurdeep Jaswant1,2,
- Criselda Bautista1,3
- 1University of Glasgow;
- 2University of Nairobi;
- 3Research Institute for Tropical Medicine



Protocol Citation: Kirstyn Brunker, Gurdeep Jaswant, Criselda Bautista 2025. Step-by-Step Rabies Virus Genome Sequencing Protocol Using Nanopore (MinION). protocols.io https://dx.doi.org/Version created by Martha Luka
Manuscript citation:
Whole Genome Sequencing for Rapid Characterization of Rabies Virus Using Nanopore Technology
Rapid in-country sequencing of whole virus genomes to inform rabies elimination programmes
Wellcome Open Research. https://doi.org/10.12688/wellcomeopenres.15515.1
License: This is an open access protocol distributed under the terms of the Creative Commons Attribution License, which permits unrestricted use, distribution, and reproduction in any medium, provided the original author and source are credited
Protocol status: Working
We use this protocol and it's working
Created: January 31, 2024
Last Modified: June 16, 2025
Protocol Integer ID: 94455
Keywords: rabies virus, nanopore sequencing, amplicon sequencing, ARTIC, step rabies virus genome sequencing protocol, sequence protocol for rabies virus, rabies genomic epidemiology, oxford nanopore minion platform, genome sequencing, sequencing protocol, oxford nanopore, using nanopore, genome, field deployments to diagnostic laboratory, sequence protocol, whole genome, virus, rabv, diagnostic laboratory, minion, lab, whole genome sequencing, sequencing
Funders Acknowledgements:
Medical Research Council
Grant ID: MR/X002047/1
Abstract
‱ Background
This is a comprehensive sample-to-sequence protocol for rabies virus (RABV) whole genome sequencing using the Oxford Nanopore MinION platform (also adaptable for Illumina). Developed by the RAGE (Rabies Genomic Epidemiology) network (led by Dr Kirstyn Brunker), the pipeline is designed for low-resource settings using a “lab-in-a-suitcase” approach. It has been successfully applied in a wide range of environments—from field deployments to diagnostic laboratories—across East Africa, the Philippines, and Peru. The protocol is intentionally detailed to provide step-by-step guidance for users with varying levels of experience, including additional ‱ info ,‱hint & tips , and ‱warnings/important notes.
Image Attribution
RAGE logo designed by the RAGE project team
Guidelines
- Please ensure you keep a good record of sample processing, including a detailed record of sample ids, their specific barcodes, concentrations etc
- Do not rush this protocol! Estimated timings for each step are indicated, based on preparing a batch of 24 samples. These steps may be split across several working days if required, please refer to Brunker et al, 2019 for advice on timings for each stage and how to divide the workload. Suitable pause points are also indicated in the protocol.
Materials
‱ A full list of required materials is available in our JoVE publication. You can access it directly here.
Note that this version of the protocol uses V14 chemistry kits (for V9 kits see V1 of protocol) from Nanopore:
Native Barcoding Kit 24 V14 (SQK-NBD114.24)
Flow Cell Wash Kit (EXP-WSH004)
‱ In low-resource settings where standard laboratory equipment is unavailable this protocol can be undertaken using a lab-in-a-suitcase with portable, battery-powered equipment. See the ARTIC network's kit list for a suggested list of portable equipment.
Safety warnings
Note that specific safety measures must be undertaken during sample extraction, details can be found in the sub-protocol listed.
Before start
To minimise the risk of contamination, maintain strict physical separation between pre-PCR and post-PCR activities. In space-limited or field-based settings, use portable glove boxes or clearly marked, makeshift workstations to preserve workflow integrity.
In this protocol, designate the following areas:
- ‱ Sample Extraction Area Use a BSL-2 or BSL-3 cabinet/glove box to handle biological materials. Perform sample inactivation and RNA extraction here.
- ‱ Template Area Set up a BSL-1 cabinet or glove box for adding RNA or cDNA templates to pre-prepared reaction mixes.
- ‱ Master Mix Area Use a clean, template-free BSL-1 space to prepare reagent mastermixes. This area must remain free of RNA, cDNA, or PCR products at all times.
- ‱ Post-PCR Area Allocate a separate area for handling amplified DNA and sequencing library preparation. This prevents cross-contamination from high-copy products.
Note
All areas should be cleaned with a surface decontaminant and ultraviolet (UV)-sterilized before and after use.
Pre-Run Setup & Laboratory Best Practices
13m
Before beginning the protocol, ensure that all reagents, equipment, and workspace are prepared appropriately to maintain sample integrity and prevent contamination. The following tips outline good laboratory practices that support consistent and reliable results.
Tips and Good Practice:
- ‱ Generally- buffers can be vortexed, but never enzymes.
- ‱ Reagents containing detergents may froth—mix gently using pipette tip, by inversion, or a soft flick.
- ‱ Use incubation time efficiently: prepare tubes, aliquot reagents, or set up the next mastermix.
- ‱ Record lot numbers of reagents for QC and traceability in case of contamination.
- ‱ Prepare single-use aliquots of reagents (e.g. enough for 12 samples) to avoid repeated freeze/thaw cycles and reduce contamination risk.
‱ Sample Sheet Preparation
Prepare a sample sheet to track your library IDs and relevant information.
An example template:
- Number of samples:
- Primer scheme: (e.g., EA_2024 for East African RABV
| Tube ID | Sample ID | Ct Value | Notes | |
Field descriptions:
• Tube ID: Label used during sequencing library prep (may differ from Sample ID)
• Sample ID: Original sample identifier
• Ct Value: Real-time quantification (if known)
• Notes: Any other relevant information
‱ RNA Sample Handling
Remove RNA samples from -80°C storage and place them On ice to thaw ~10 minutes before use.
Note
‱RNA is highly sensitive to degradation—keep it On ice as much as possible.
‱ Reagent & Consumables Setup
- Remove SPRI beads from storage (4 °C or frozen) and allow them to equilibrate to Room temperature (~20 °C). Vortex thoroughly to resuspend.
- Prepare 80% ethanol: use 10 ml if performing the optional DNA clean-up step, or 500 μl if skipping it. Bring to Room temperature .
- Aliquot 1 ml of nuclease-free water and warm to Room temperature .
- Ensure you have sufficient filter tips, especially 200 μl tips.
‱Tube/Plate Labelling
- Label fresh PCR strip tubes (one per sample) clearly with sample ID.
- If storing DNA later, ensure batch identification is clear.
Note
Using a plate?
- Record your sample layout using a plate grid.
- Clearly mark the starting well (e.g., A1) to maintain sample order.
RNA Extraction
3h
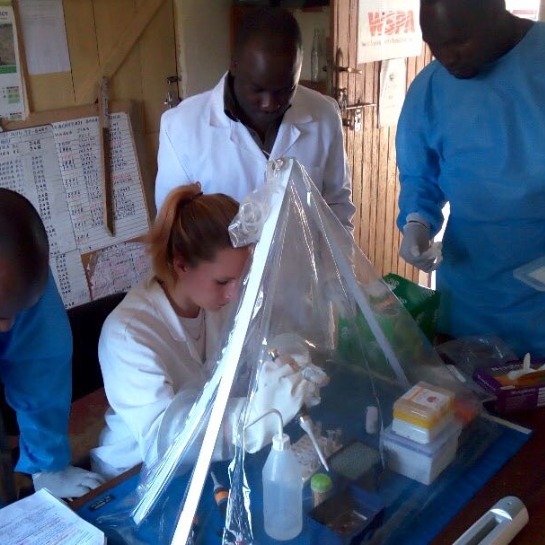
‱ Extract RNA from brain tissue sample in a dedicated Sample Extraction Area (biosafety cabinet/portable glove box) using the protocol linked below.
Protocol
CREATED BY
Martha Luka
Brain tissue samples collected in the field may be stored in glycerol-saline, RNA Later or DNA/RNA shield according to the resources available to the sample collector. Instructions to process commonly received samples for use with the Zymo Research Quick-RNA miniprep kit are indicated below (for other sample types please refer to the kit instruction manual)
Note
DNase I should be included in the kit (R1054/R1055) but please confirm this is the case before beginning - we have experienced that this is not always the case for certain versions of the kit that may still be in distribution.
Homogenised samples stored in DNA/RNA shield
- Transfer 350 µL of homogenised sample to a new 2 mL screw cap tube using a pipette or disposable plastic pastette
- Add 350 µL of RNA Lysis Buffer (1:1) and mix well
Samples stored in RNA later/glycerol-saline
- Prepare a homogeniser tube by adding 1.4mm ceramic beads (use a 0.2ml PCR tube to measure approx. amount of beads) to a 2 mL reinforced tube and then add ~1 mL of RNA/DNA shield using a pipette or disposable plastic pastette
- Remove a small piece of tissue* (50-100mg) from RNA later/glycerol using a wooden applicator stick/toothpick/forceps and dab excess liquid on filter paper
Note
*If the sample has liquefied:
- Transfer 200 µL of liquid to a new 2ml screw cap tube using a pipette or disposable plastic pastette
- Add 200 µL of RNase-free water or PBS to the sample (1:1). Then add 4 volumes of RNA Lysis Buffer (4:1) and mix.
- Add tissue to the prepared homogeniser tube and ensure the lid is screwed on securely
- Insert tube into the lysis chamber on the Terralyzer and replace chamber shield
- Homogenise the sample for 00:02:00 approx. and then in 00:00:30 pulses (if required) until the sample is fully homogenised.
Note
Notes on homogenisation:
- Tissue samples harden in RNA later, therefore may require a longer homogenisation
- If the Terralyzer gets hot, leave to cool for few minutes before using again
- It may be difficult to see if the sample is fully homogenised due to foam- leave so settle for a few minutes and homogenise again if required
- Leave for 00:02:00 to allow sample inactivation.
- Transfer 350 µL of homogenised sample to a new 2ml screw cap tube
- Add 350 µL of RNA Lysis Buffer (1:1) and mix well.
RNA extraction and purification is performed using the Zymo Research Quick-RNA miniprep kit. The following steps summarise the manufacturer's instructions:
Note
All centrifugation steps should be performed at 10000 x g - 16000 x g for 00:00:30 unless otherwise specified.
Transfer the sample lysed in RNA Lysis Buffer (700 µL ) into a Spin-Away Filter column (yellow) in a collection tube and centrifuge to remove the majority of genomic DNA. Save the flow-through.
Note
To process samples >700 μl, Zymo-Spin columns may be reloaded
Add a 1:1 volume of ethanol (95-100%) to the sample flow-through and mix well by pipetting up and down
Transfer the mixture to a Zymo-Spin IIICG column (green) in a collection tube and centrifuge. Discard the flow-through.
Perform an on-column DNase I treatment:
Note
Prior to use, reconstitute the lyophilized DNase I as indicated on the vial. Store frozen aliquots.
- Add 400 µL RNA Wash Buffer to the column and centrifuge. Discard the flow-through.
- In an RNase-free tube, add 5 µL DNase I to 75 µL DNA Digestion Buffer* and mix. Add the mix directly to the column matrix (try not to touch the filter matrix with the pipette tip).
- Incubate the column at room temperature for 00:15:00
Note
*If preparing multiple samples make a mastermix
Add 400 µL RNA Prep Buffer to the column and centrifuge. Discard the flow- through.
Add 700 µL RNA Wash Buffer to the column and centrifuge. Discard the flow-through.
Add 400 µL RNA Wash Buffer and centrifuge the column for 00:02:00 to ensure complete removal of the wash buffer. Transfer the column carefully into a 1.5 mL eppendorf tube (you can discard the collection tube).
Add 50 µL DNase/RNase-Free Water directly to the column matrix and centrifuge. Keep the flow-through: this is the purified RNA!
Note
The eluted RNA can be used immediately or stored at ≤-70 °C .
Pre-PCR
20m
‱ Primer Pool Stock Preparation (If required)
This step is only necessary if making new stocks from individual primers, after which pre-prepared stock solutions can be used.
Note
‱ Primers should be prepped and aliquoted in a sterile PCR cabinet. At no stage should primers or PCR reagents be anywhere near the template until cDNA addition.
In the Master Mix Area resuspend the lyophilized primers in 1x tris-EDTA (TE) buffer or NFW at a concentration of 100 micromolar (µM) each. Vortex thoroughly and spin down.
Note
‱ In the following steps, primers are divided into two separate pools—odd-numbered primers into Pool A and even-numbered primers into Pool B—to minimise interactions between primers flanking overlapping amplicons. The multiplex PCR protocol uses two reactions per sample (one with each pool), generating overlapping amplicons that span the target genome.
Generate primer pool stocks by adding 5 µL of each primer pair to a 1.5 mL Eppendorf labelled with the primer scheme name and the relevant = “Pool A (100µM)” or “Pool B (100µM)”. These are your 100 micromolar (µM) stocks of each primer pool.
Dilute the 100 micromolar (µM) primer pool stock 1:10 in the same buffer used in Step 4.1 (either 1× Tris-EDTA (TE) buffer or nuclease-free water) to prepare 10 µM working stocks.
Note
‱It is recommended to prepare multiple aliquots of each primer pool for freezer storage to reduce the risk of degradation or contamination.
‱ Reverse Transcription with LunaScript SuperMix
We use 2 µL LunaScript SuperMix in a 10 µL reaction—half the recommended volume—which reliably yields enough cDNA for downstream steps.
In the Master Mix Area, prepare a reaction mastermix with enough volume for all samples plus at least one extra reaction to account for pipetting error.
Before use, briefly spin the LunaScript RT SuperMix tube in a microcentrifuge to collect reagent at the bottom—this reagent tends to gather around the cap and tube walls. Also, take care with pipetting as this reagent is viscous and slow to dispense from pipette tips.
Important: A negative control must be included here and taken right through to sequencing stage.
| Reagent | Per reaction volume | No of reactions plus 20% excess | Mastermix: volumes required (μl) | |
| Lunascript RT supermix | 2 | 0 | 0 | |
| Nuclease-free water (NFW) | 3 | 0 | 0 |
Note
‱LunaScript is blue, making it easy to visually track through to the PCR prep stage. It is a ready-to-use mix that includes random hexamer and oligo(dT) primers; dNTPs; RNase inhibitor and reverse transcriptase.
Aliquot 5 µL of mastermix into each pre-labelled 0.2 mL PCR tube prepared for reverse transcription.
Take the prepared tubes to the Template Area. Add 5 µL of RNA to each tube. Mix gently by pipetting or gently tapping the tube and pulse centrifuge to collect liquid at the bottom of the tube. Incubate the reaction as follows on a thermocycler:
25 °C 00:02:00
55 °C 00:10:00
95 °C 00:01:00
Hold at 4 °C
Note
‱Get ahead- while samples are incubating, label tubes for PCR reaction (see step 9.1)!
OPTIONAL PAUSE POINT: cDNA can be stored at-20 °C for up to a month if necessary but it is better to continue to PCR setup if possible.
Rabies Virus Primer Schemes
Multiplex primer schemes have been developed for whole genome sequencing of dog-associated rabies virus (RABV) using Primal Scheme. These generate overlapping amplicons (~400 bp or ~700 bp) optimised for Oxford Nanopore sequencing and reflect regional RABV diversity (e.g. East Africa, Philippines, Peru).
A summary of active primer schemes is provided below. Full primer sequences and reference files are available in the artic-rabv GitHub repository, along with archived schemes no longer in use.
‱ Current Primer Schemes:
| Regional coverage | Scheme name | Version | Amplicon length (bp) | Description | |
| East Africa | EA_2024 | V1 (2024) | ~ 700 | Updated for Tanzania, Kenya, Malawi | |
| Peru | rabvPeru2 | V3 (2023) | ~400 | Edited version with alt primers and patch for 40R | |
| Southeast Asia | rabvSEasia | V1 (2019) | ~400 | Designed for SE Asia lineages, prioritising the Philippines | |
| Nigeria | rabvNig | V1 (2022) | ~400 | Based on Nigeria 2011 genome (Africa 2 clade) |
Overview of actively used rabies virus primer sets for amplicon-based sequencing, including design region, version, amplicon size, and per-reaction volume.
Multiplex PCR
5h
‱ Set Up Multiplex PCR Mastermixes (Q5)
In the Master Mix Area, prepare two separate mastermixes of the components below—one for Pool A and one for Pool B—according to the number of reactions required. Always include 1 extra reaction to account for pipetting error, and prepare a minimum of 3 reactions per mix for pipetting accuracy.
In order to minimise reagent costs we use a 12.5 µL total reaction volume, which halves the manufacturer's recommended reaction volume. If you choose to increase the reaction volume, ensure that mastermix volumes, include primer volumes, are adjusted accordingly.
---
Primer reaction volumes
Important: Adjust primer volume below according to the scheme used and make up to 10ul with water, example shown is for scheme rabvSEasia
Note
‱ Primers need to be used at a final concentration of 0.015 micromolar (µM) per primer. Reaction volumes have been calculated for our RABV primer schemes above, to calculate for new schemes follow the formula below:
Primer volume (µL) =
Number of primers × Reaction volume × Final concentration (0.015 µM)
÷ Primer stock concentration (e.g. 10 µM)
‱ Example (Pool A, 42 primers, 25 µL reaction):
42 × 25 × 0.015 ÷ 10 = 1.575 µL
| Scheme | # of Primers per Pool | Volume per 12.5 µL Reaction (µL) | |
| rabvSEasia | 41 | 0.77 | |
| rabvPeru2 | 41 | 0.77 | |
| rabvNig | 41 | 0.77 | |
| EA_2024 | 23 | 0.43 |
Active primer schemes for RABV and required volume per reaction
---
Mastermix components
| Component | Pool A reaction | Pool B reaction | |
| NEB Q5® Hot Start Polymerase 2X MasterMix (10µM) | 6.25 | 6.25 | |
| Nuclease-free water | 3 | 3 | |
| Primer Pool A (10µM) | 0.75 | 0 | |
| Primer Pool B (10µM) | 0 | 0.75 | |
| Total | 10 | 10 |
Note
‱ Use Q5 Hot Start High-Fidelity 2X Master Mix (or equivalent Q5 enzyme). Q5 polymerase is required for its ability to handle high melting temperatures as necessary in this protocol; other polymerases may not be suitable.
Aliquot 10 µL of mastermix into labelled 0.2mL 8-strip PCR tubes for each of primer pool A and B
In the Template Area add 2.5 µL cDNA to each tube and mix well by pipetting. Pulse centrifuge the tubes to collect the contents at the bottom of the tube.
Note
‱Store excess cDNA at -20°C. It can be a useful starting point if you have to repeat PCR.
Set-up the following program on the thermal cycler:
Step Temperature Time Cycles
Heat Activation 98 °C 00:00:30 1
Denaturation 98 °C 00:00:15 25-35 *
Annealing 65** °C 00:05:00 25-35 *
Hold 4 °C hold 1
*Cycle number should be 25 for Ct 18-21 up to a maximum of 35 cycles for Ct 35 (if unknown a cycle number of 32 could be used as a starting point)
**Option to lower the Tm to 63°C to help with problematic regions, or perform a "touchdown PCR" where Tm is decreased from 65°C by 0.1°C every cycle for first 25 cycles then remaining cycles at 62.5°C
Note
- Samples do not need to be refrigurated immediately after PCR - in fact the DNA will be stable for a few days at Room temperature without suffering from degradation (e.g. see here).
- This also means that a holding step at 4 °C is not entirely necessary if e.g. this temperature setting is unavailable (e.g. using a MiniPCR machine), or you have limited access to power
OPTIONAL PAUSE POINT: PCR products can be stored in the fridge for up to a month or longer term at-20 °C .
‱ Proceed to a designated post-PCR area for the next steps.
- If you are performing DNA clean-up and normalisation please go to Optional Normalisation section: , otherwise proceed to ONT Library Preparation I
‱ To normalise or not to normalise?
Normalisation and clean-up can improve sequencing efficiency and read coverage per sample but is a very time-consuming and laborious step.
We have found that omitting this step (i.e. going directly to ONT library prep) makes little difference to outputs and makes the whole protocol much easier.
You might want to consider normalisation if:
- your samples have highly variable amplification profiles
- for the first few runs in your lab so you can compare sequencing results with and without
[Optional] Normalisation
21m 30s
Clean and normalise amplicons
‱This is an optional step, which we do not perform routinely. If you are sure you want to normalise, follow these instructions; otherwise, skip to .
For each biological sample, combine the Pool A and Pool B amplicons
- If using a magnetic rack (1.5 mL Eppendorf tubes) combine into a LoBind Eppendorf tube
- If using a 96-well magnetic plate, combine into 0.2ml PCR tubes/plate
Add SPRI beads at a 1:1 ratio to your DNA sample (e.g. for a 25 µL pool, add 25 µL beads). Mix thoroughly by pipetting up and down or gently flicking the tube to ensure even distribution.
Note
‱Beads should be at Room temperature - using cold beads will affect your DNA recovery.
Incubate at Room temperature for 00:10:00 .
10m
Place on a magnetic rack until beads and solution have fully separated i.e. solution is completely clear and there is a nicely formed pellet at the magnet.
Remove supernatant.
Wash twice with 200 µL of80 % volume ethanol (details below).
Ensure ethanol is at Room temperature
- Keep the tube on the magnetic rack.
- Add 200 µL of 80 % volume ethanol to each tube. Make sure the beads are fully covered—add more ethanol if needed.
- Incubate for 00:00:30 secs, then carefully remove and discard the ethanol without disturbing the beads.
‱ Repeat the ethanol wash once more following the same steps.
30s
After the 2nd wash, remove all traces of ethanol (if necessary, use a P20/10 pipette to remove residual).
Air dry (tube lids open) until residual ethanol has evaporated (~00:01:00 ).
Note
‱ At this stage, the bead pellets are quite small and dry quickly; take care that they do not overdry, as the DNA becomes harder to elute. When overdrying occurs, the bead pellet starts to crack.
The appearance of the beads during the drying step of bead clean-up. Source: https://nonacus.com/blog-spri-technology-tips-for-dna-size-selection-and-effective-cleanup-in-ngs-workflows/
1m
Remove the tube from the rack and resuspend the beads in 15 µL of nuclease-free water by pipetting up & down.
Note
Use a tip to scrape down beads from the side of the tube while resuspending
Incubate atRoom temperature (off the magnetic rack) for 00:10:00 .
10m
Place tubes back on magnetic rack and transfer the supernatant to a new tube: this is the clean DNA!
In fresh PCR tubes, prepare a 1:10 dilution of the clean DNA (2 µL product + 18 µL nuclease-free water). Take care to label all your tubes clearly.
Note
‱ Take extra care to avoid cross-contamination when handling amplicons.
‱Work in a clean area (e.g. mastermix cabinet) and follow these practices:
- Only open one amplicon tube at a time.
- Pre-aliquot 18 µL of nuclease-free water into tubes before adding amplicons.
- Use fresh tips and gloves as needed to prevent contamination.
Quantify1 µL of the dilutions using a fluorometer such as a Qubit or Quantus.
More details on Qubit/ Quantus:
Remove Lambda DNA 400 ng/µL standard from the freezer and leave on ice to thaw. Remove ONE dsDNA dye solution from the fridge and allow to come to room temperature.
QuantiFluor(R) ONE dsDNA System, 500rxnPromegaCatalog #E4870
Set up two 0.5 mL tubes for the calibration and label them 'Blank' and 'Standard'
Add 200 µL ONE dsDNA Dye solution to each tube.
Mix the Lambda DNA standard 400 ng/µL standard by pipetting then add 1 µL to one of the standard tube.
Mix each sample vigorously by vortexing for 00:00:05 and pulse centrifuge to collect the liquid.
Allow both tubes to incubate at room temperature for 00:02:00 before proceeding.
Selection 'Calibrate' then 'ONE DNA' then place the blank sample in the reader then select 'Read Blank'. Now place the standard in the reader and select 'Read Std'.
Set up the required number of 0.5 mL tubes for the number of DNA samples to be quantified.
Note
Use only thin-wall, clear, 0.5mL PCR tubes such as Axygen #PCR-05-C
Label the tubes on the lids, avoid marking the sides of the tube as this could interfere with the sample reading.
Add 199 µL ONE dsDNA dye solution to each tube.
Add 1 µL of each user sample to the appropriate tube.
Note
Use a P2 pipette for highest accuracy.
Mix each sample vigorously by vortexing for 00:00:05 and pulse centrifuge to collect the liquid.
Allow all tubes to incubate at room temperature for00:02:00 before proceeding.
On the Home screen of the Quantus Fluorometer, select `Protocol`, then select `ONE DNA` as the assay type.
Note
If you have already performed a calibration for the selected assay you can continue, there is no need to perform repeat calibrations when using ONE DNA pre diluted dye solution. If you want to use the previous calibration, skip to step 11. Otherwise, continue with step 9.
On the home screen navigate to 'Sample Volume' and set it to 1 µL then 'Units' and set it to ng/µL.
Load the first sample into the reader and close the lid. The sample concentration is automatically read when you close the lid.
Repeat step 16 until all samples have been read.
The value displayed on the screen is the dsDNA concentration in ng/µL, carefully record all results in a spreadsheet or laboratory notebook.
‱ Calculate normalisations
- Use the provided normalisation template to calculate the required dilution volumes based on the recorded sample concentrations.
- Ensure that each sample reaches a final concentration of 200 fmol for optimal sequencing results.
 normalisation-template.xlsx
 Note
Amplicon Normalisation – Excel Tool
- Enter the concentration of your 1:10 diluted sample in Column B.
- The sheet will automatically calculate:
- Concentration in nM
- Volume of diluted DNA needed to obtain 200 fmol
- Volume of water to make up to 5 µL total for optimal end-prep.
- If more than 5 µL of diluted DNA is required, use the neat DNA volumes shown in Columns F–H.
- Notes and warnings (e.g., “Use neat DNA >>>”) will appear when appropriate.
Example row from the sheet:
| Sample ID | Conc of 1:10 DNA dilution (ng/ul) | Conc (nM) | DNA (ul) | Nuclease-free Water (ul) | Notes | Neat DNA (ul) | Nuclease-free Water (ul) | |
| example1 | 20 | 75.757576 | 2.6 | 2.4 | <<<Use diluted DNA | |||
| example2 | 3 | 11.363636 | 17.6 | -12.6 | Use neat DNA>>> | 1.76 | 3.24 |
‱Prepare the normalisations
- Refer to the normalisation sheet to determine the required DNA and water volumes for each sample.
- In fresh PCR tubes, combine DNA and water as indicated (e.g., example 1, 2.6 µL of 1:10 diluted DNA + 2.7 µL of water). For efficiency, add water to all tubes first, then DNA.
- If the required volume of diluted DNA exceeds 5 µL , use undiluted (neat) DNA and adjust volumes according to the template.
- Use discretion: if the volume is slightly over 5 µL , you may round down to 5 µL .
Proceed to nanopore library prep with the normalised DNA
Oxford Nanopore Technologies (ONT) Library Preparation
‱ In the following sections, we provide end-to-end instructions for ONT sequencing library preparation and sequencing, tailored for RABV. While our protocol closely follows ONT’s official guidance, there are some minor modifications.
Our aim is to offer a comprehensive, self-contained protocol for users. However, we strongly encourage consulting ONT’s own protocols, which include detailed figures and video demonstrations that may further support your understanding. Link to ONT community resources: https://nanoporetech.com/support/customer-support
Note
Access to ONT's community resources requires a user account, you can register if first-time user.
ONT Library Preparation I
1h 7m
‱This step (11) assume you did not perform the optional normalisation in Step 10. If you did, skip to
Pool amplicons, i.e. for each biological sample, combine primer pool A and primer pool B amplicons into a fresh, labelled 1.5 mL Eppendorf tube
Note
‱Label with sample name, "pooled amplicons", date etc. And remember these are still "dirty", unpurified amplicon products, so label as such.
[Optional] Run an agarose gel to confirm presence of expected amplicon band and absence of band in negative control
[Optional] Quantify pooled amplicons dilutions using a fluorometer, such as a Qubit or Quantus.
Particularly for your first few PCR batches with a new primer set, you may wish to check the DNA concentration of your reactions to confirm successful amplification—or failure, in the case of the negative control.
To save time in future runs, you can spot-check a few representative samples to confirm amplification success and that the negative control is clean.
Note
‱
- Samples (neat) are typically expected to fall within the range of 5–100 ng/µL.
- Negative controls often give Qubit readings of ~2–3 ng/µL due to residual primers and reagents contributing to background signal.
- For purified negative controls, you should expect <1 ng/µL.
‱ Prepare 1:10 Dilutions of Combined Amplicon Pools
‱ Do not dilute the negative control - use it neat in the End Prep reaction (Step 5).
- Aliquot 45 µL nuclease-free water to a fresh set of PCR tubes (one per biological sample)
- For each sample add 5 µL of pooled amplicons
Note
‱ If you quantified your amplicons in Step 11.1, you can choose the appropriate dilution based on sample concentrations:
- If most samples are >50 ng/µL , use a 1:10 dilution.
- For lower concentrations, use 1:5 or neat (undiluted).
- After a few runs, you’ll get a feel for typical amplification success and can standardise accordingly.
- To save time, aim to use one dilution factor across most samples—use neat only for a few low-yield outliers.
Suggested Dilutions:
| Sample Concentration | Water (µL) | Amplicons (µL) | Dilution | |
| >50 ng/µL | 45 | 5 | 1:10 | |
| <50 ng/µL | 40 | 10 | 1:5 | |
| <20 ng/µL | – | – | Use neat |
‱End prep of amplicons
This protocol uses the ‘One Pot Ligation’ method with reaction volumes reduced to half the standard amount.
Make a master mix containing enough of the following for each sample :
| Component | Per reaction volume (µL) | |
| Nuclease-free water | 5 | |
| Ultra II end prep reaction buffer | 1.2 | |
| Ultra II end prep enzyme | 0.5 |
Aliquot 6.7 µL of mastermix for each sample into a new PCR strip tube
For each sample, add 3.3 µL of the pooled amplicon sample from the previous step (10.15 if normalised or 11.2 if not normalised)
Note
‱ Take care to avoid cross-contamination- change tips each time and only have one tube open at a time.
Mix the contents by gently tapping the tube, then briefly pulse centrifuge to ensure all liquid is at the bottom
Incubate in PCR machine
Temperature Time
20 °C 00:15:00
65 °C 00:15:00
4 °C 00:01:00
31m
‱ Native barcoding of amplicons
Aliquot barcodes into PCR strip tubes at 1.25 µL per tube
‱ Record sample/barcode combinations
Note
‱Rotate barcodes run-to-run as much as possible, i.e. if your first run was BC1-24, use 25-48 next. This helps monitor run-to-run contamination, especially if you reuse flow cells.
Add 0.75 µL of end-prepped sample to the barcode aliquots.
Prepare a mastermix of the following:
| Component | Per reaction volume (µL) | |
| Nuclease-free water | 3 | |
| Blunt/TA Ligase Master Mix | 5 |
Add 8 µL of ligation mix to EP+barcodes, giving a total reaction volume of 10 µL . Mix the contents by gently tapping the tube, then pulse centrifuge to ensure all liquid is at the bottom
Incubate in PCR machine
Temperature Time
20 °C 00:20:00
65 °C 00:10:00
4 °C 00:01:00
31m
‱ SPRI bead cleanup and Qubit
Thaw Short Fragment Buffer (SFB, from nanopore kit) at Room temperature , mix by vortexing, spin down, place On ice
Pool all barcoded samples together in a 1.5 mL LoBind Eppendorf tube (see below)
| Number of Samples | Volume to pool per reaction | Comment | |
| 12 to 24 | 10 µl | Pool full volume of each reaction | |
| 48 | 5 µl | Adjust to avoid large clean-up volumes | |
| 96 | 2.5 µl | Limit pool to 240 µl to manage clean-up size |
Add SPRI Beads (0.4× Volume) to the amplicon pool. Mix gently by flicking or pipetting.
Note
‱ To calculate required SPRI bead volume:
Bead volume = number of barcodes × volume taken per sample × 0.4
Examples:
- For 12 barcodes using 10 µL per sample: 12 × 10 × 0.4 = 48 µL
- For 48 barcodes using 5 µL per sample: 48 × 5 × 0.4 = 96 µL
Incubate at Room temperature for 00:05:00 .
5m
Place samples on magnetic rack until beads have pelleted and supernatant is completely clear (~00:02:00 )
Remove and discard supernatant. Take care not to disturb the beads
..Wash 2× with 250 µL SFB:
- Remove tube from magnetic rack, add 250 µL SFB and fully resuspend the pellet by pipetting mixing.
- Incubate for 00:00:30 at room temperature.
- If needed, pulse-spin briefly to collect the liquid at the bottom of the tube, then place it back on the magnetic rack.
- Once the bead pellet has reformed and the supernatant is clear, carefully remove and discard the supernatant.
‱ Repeat the wash once more following the same steps.
Note
‱You do not need to air dry the pellet with SFB washes.
Add 200 µL of 80 % volume ethanol (warmed to Room temperature ) to bathe the pellet. Carefully remove and discard ethanol, being careful not to touch the bead pellet.
Note
‱Ensure ethanol is at Room temperature , using cold ethanol significantly reduces recovery of DNA
Pulse-spin to collect all liquid at the bottom of the tube and carefully remove as much residual ethanol as possible using a P10 pipette.
Air dry for 00:00:30 or until the pellet has lost its shine.
Resuspend in 35 µL of Nuclease-free water for 00:10:00 at Room temperature
Return to the magnetic rack and pipette the supernatent (i.e. the DNA) into a new 1.5 mL Eppendorf tube.
Quantify 1 µL using a fluorometer such as a Qubit or Quantus.
OPTIONAL PAUSE POINT: The sample can be stored for 1-2 days at4 °C needed.
ONT Library Preparation II
40m
‱ Nanopore Adaptor Ligation and Prime
Retrieve the following ONT and NEB reagents from freezer storage. Prepare as described below and keep On ice :
- Native Adaptor (NA) – Gently tap to mix, then briefly spin down.
- Blunt/TA Ligase – As above: tap gently and spin down.
- Quick T4 DNA Ligase (from NEBNext kit) – Tap gently, spin down.
- Elution Buffer (EB) – Thaw at room temperature, mix by vortexing, then spin down.
- Short Fragment Buffer (SFB) – Same as EB: thaw, vortex to mix, spin down.
- NEBNext Quick Ligation Reaction Buffer – Thaw, vortex to mix, and spin down.
Choose the reaction below that corresponds to the ligation reagent you have available and prepare the reactions in a 1.5 mL LoBind Eppendorf tube:
| Component | Volume per reaction (uL) | |
| Barcoded amplicon pool | 20 | |
| Blunt/TA Ligase Master Mix | 25 | |
| Adapter Mix II (AM II) | 5 | |
| Total | 50 |
Mix by gentle tapping and pulse-spin down
Incubate at room temp for 00:20:00
Note
‱At this point- get your ONT flow cell out of the fridge, to allow it to warm to Room temperature in preparation for
20m
Add 0.4x volume of Room temperature SPRI beads to the samples (for a 50 µL adaptor reaction, add 20 µL beads).
Note
‱ Ethanol is not used in this clean-up (remove it from sight, it's easy to add mistakenly)
Incubate at Room temperature for 00:10:00 , gently tap tube and invert from time to time to help mixing.
10m
Place on a magnetic rack until beads and solution have fully separated (~00:05:00 ).
5m
While still on the rack, remove and dispose of supernatant.
Wash 2× with 125 µL SFB:
- Remove the tube from magnetic rack and add 125 µL SFB, fully resuspending the bead pellet by pipetting and mixing
- Incubate for 00:00:30
- Return to the magnet
- Once the bead pellet has reformed and the supernatant is clear, remove and discard supernatant.
‱ Repeat the SFB wash once more following the same steps.
Note
‱In the final wash step, after removing the majority of the supernatant, spin down, return to the magnet and remove excess SFB from the tube with a 10 or 20µl pipette tip
Resuspend the beads in 15 µL Elution buffer (EB) and incubate for 00:10:00 at Room temperature
Remove and transfer the supernatent to a fresh, labelled 1.5 mL Eppendorf tube.
This is your final DNA library!
Quantify 1 µL using a fluorometer such as a Qubit or Quantus.
Aim for ~50 fmol (which is approximately 15 ng of 400bp DNA) total input for optimal loading onto the flow cell.
Flow cell Quality Check (QC)
10m
It is strongly recommended to perform a flow cell check just before loading your DNA library, in order to assess the number of pores available and ensure the flow cell is still in good condition.
Note
‱
- The number of active pores may be lower than during the initial warranty QC (performed when the flow cell is first received).
- A gradual decrease in pore count is expected over time due to natural degradation. However, a significant drop can be caused by improper storage (e.g. not at 2–8 °C), prolonged storage beyond shelf life, repeated freeze–thaw cycles, or temperature fluctuations—particularly during transit or power outages.
- Always inspect the flow cell packaging for condensation or damage before use.
Remove flow cell from 4 °C storage and allow to equilibriate to Room temperature (~00:10:00 )
10m
Insert flow cell into the MinION machine and connect to laptop.
Open MinKNOW. Navigate to the start homepage and click 'Flow cell check'.
When you see the flow cell type and the flow cell ID is recognised, click 'Start' to begin.
The flow cell QC will run automatically, assessing key metrics such as membrane integrity, pore availability, and overall readiness before sequencing begins.
After the QC is complete, the system will display the active pore count.
If the pore count is significantly lower than the initial QC, check again and consider rebooting the laptop. For new, unwashed flow cells, if the pore count is below a specific threshold (e.g., 1000 pores), it’s advisable not to proceed with sequencing. However, for washed or previously used flow cells, a lower pore count is expected, and they may still be suitable for sequencing.
Priming and Loading Flow Cell
40m
This step constitutes preparing the final 'Priming mix' to load your library on to the sequencer.
Prepare reagents as follows:
- Thaw the following reagents at Room temperature , mix by vortexing, then place On ice
Sequencing Buffer (SB)
Loading Beads (LIB)
Flush Cell Tether (FCT)
Flush Cell Flush (FCF)
- Place Bovine Serum Albumin (BSA) at 50 mg/mL On ice
Prepare the Flow Cell priming mix by combining FCF, FCT and BSA as follows:
| Component | Volume per Flow Cell (µL) | |
| Flow Cell Flush (FCF) | 1170 | |
| BSA | 5 | |
| Flow Cell Tether (FCT) | 30 | |
| Total | 1250 |
Prepare the library mix for loading.
‱Thoroughly mix the Loading Beads (LIB) by pipetting immediately prior to using, as they settle
| Component | Volume (µL) | |
| Sequencing Buffer (SB) | 37.5 | |
| Loading Beads (LIB) | 25.5 | |
| DNA Library | 12 | |
| Total | 75 |
Note
‱If the volume of DNA library required to reach 50 fmol exceeds 12 µL , use the maximum available volume and top up to 12 µL with Elution Buffer (EB).
Flip back the MinION lid and slide the priming port cover clockwise so that the priming port is visible
Carefully remove air bubbles as follows:
‱You must always do this step! Even if you can't see an air bubble, do it anyway!
- Set a P1000 to 200 µL
- Insert the tip into the priming port
- Turn the wheel to draw liquid up until you can see a small volume entering the pipette tip (max turn to 230 µL )
Using a P1000 pipette, load 800 µL of the Flow Cell priming mix into the flow cell via the priming port, taking care to avoid bubbles.
- You can do this slowly and with more controlusing the turn-dial method (used for air bubble removal) if you are worried about pipette control.
Leave for 00:05:00 .
5m
Gently lift the SpotON sample port cover to make the SpotON sample port accessible
Using a P1000 pipette, load 200 µL of priming mix into the flow cell via the Priming port
It is normal to see liquid bubbling out of the SpotON sample port- just make sure to load the priming mix slowly to avoid overspill
Prior to loading, use pipette to mix the library mix, ensuring the loading beads (LB) in the mastermix are resuspended before loading
Load the 75 µL of library mix into the flow cell by the SpotON sample port in a dropwise fashion
Ensure that each drip flows into the port before adding the next
Gently replace the sample port cover making sure the bung enters the sample port
Close the priming port
Install the light shield on your flow cell to protect the library from degradation and ensure optimal sequencing.
- Carefully place the leading edge of the light shield against the clip. Note: Do not force the light shield underneath the clip.
- Gently lower the light shield onto the flow cell. The light shield should sit around the SpotON cover, covering the entire top section of the flow cell.
Close the device lid and set up a sequencing run on MinKNOW.
MinION Sequencing
5m
‱ Configuring your sequencing experiment.
Ensure your MinION device is connected to the laptop and MinKNOW is open. In MinKNOW, navigate to the Start page and click Start Sequencing.
Choose the MinION device (there will only be one option unless you have more than one machine connected)
Follow the Setup wizard to configure your run. Guidance on settings is provided in the table below, leave default setting if not specified below.
‱Only use live basecalling if you have adequate computational power — for example, a GPU configured to support MinKNOW basecalling. If unsure, it’s best to disable live basecalling and perform basecalling post-run using MinKNOW's 'Post-sequencing analysis' option or standalone Guppy/Dorado.
| Parameter | Setting | Notes | |
| Experiment Name | [Enter run name] | Do not add spaces in the experiment name | |
| Sample ID | Leave blank | ||
| Kit | SQK-NBD114.24 | Edit if different kit was used e.g. 96 barcode kit | |
| Basecalling | On* | *Set to ‘on’ if computational power and GPU configuration has been set. | |
| Barcoding | On | ||
| Run Length (hours) | 6 | After 6 hours you should have adequate genome coverage for amplicons. Leave default (72hours) if you wish to stop the run yourself. | |
| Bias Voltage (mV) | -180 | Only adjust if the flow cell has already been used. See ONT protocols. | |
| Output Format | pod5, fastq | Only pod5 if live basecalling is turned off. |
On the final tab, check settings and then start the run.
The sequencing run begins with another flow cell QC, including a ‘Mux scan’ to select the optimal pores for sequencing.
- QC is performed at 37 °C to assess pore availability and membrane integrity.
- Once complete, sequencing will automatically start at the optimal temperature of 34 °C .
- MinKNOW allows up to 00:05:00 to reach this temperature before starting the run, even if it hasn’t been fully reached.
5m
‱‱ Key Metrics to Monitor During the Run in MinKNOW
MinKNOW provides real-time metrics and the run can be paused, stopped and re-started if necessary.
- Pore Occupancy: the ratio of "Sequencing" to "Pore available" states, indicating the percentage of sequencing pores actively processing DNA. A high occupancy reflects efficient sequencing and good library preparation. This can be observed in the flow cell 'Health' plot shown in the 'Sequencing Overview' or 'Experiments' tab.
- Yield (Total Bases or Reads) Shows how much data has been generated. This is cumulative and can be monitored in real time. It helps assess whether you’re on track to achieve sufficient sequencing depth for your experiment.
- Read Length (Mean/Median/N50) Shows the fragment lengths being sequencing. For amplicon sequencing you should see a peak at the expected amplicon length (400 or 700bp).
- Read Quality (Q-score) A measure of sequencing accuracy. ONT reads typically show modal Q-scores around Q10–Q15 (90–97% accuracy). Drops in average Q-score might suggest instrument or sample issues and may affect downstream analysis quality.
- Temperature Stability Ensures the flow cell operates within the optimal temperature range (typically ~34 °C during sequencing). Monitoring temperature stability can help explain fluctuations in read quality, especially if there is a drop in Q-scores at specific time points. This is particularly important when sequencing in warmer environments or when the sequencer is moved between locations. Any temperature deviations could impact enzyme activity and, consequently, sequencing performance.
‱ Sequencing Completion
The sequencing run will automatically stop after the set duration (e.g. 6 hours), unless manually terminated earlier. To stop the run manually, select the appropriate flow cell in the MinKNOW interface and click Stop — be sure to choose “Stop sequencing” (not “Stop sequencing and basecalling”, which halts both processes).
‱ Some basecalling may continue briefly after sequencing ends, as MinKNOW completes processing of remaining data.
Note
‱ Choosing when to stop the run
Washing Flow Cell
1h 5m
After the sequencing run, you can clean the flow cell for reuse using the Nanopore wash kits EXP-WSH004 or EXP-WSH004XL. You can either use the flow cell again immediately or store it for future use (which is typically the preferred option).
Prepare reagents as follows:
| Component | Instruction | |
| Wash Mix (WMX) | Place the tube on ice. Do not vortex the tube. | |
| Wash Diluent (DIL) | Thaw one tube at room temperature |
Note
Reagents in the kit may be supplied in either tube or bottle format, depending on the kit version. If the DIL reagent comes in a bottle, it’s a good idea to pre-aliquot it into single-use volumes (398 µL per tube) to avoid repeat freeze-thaw cycles.
In a fresh 1.5 mL LoBind Eppendorf tube prepare the following mixture:
| Component | Volume per flow cell | |
| Wash Mix (WMX) | 2 μl | |
| Wash Diluent (DIL) | 398 μl |
Mix well by pipetting and place On ice (do not vortex)
Stop or pause the sequencing run in MinKNOW and leave the flow cell in the MinION device
With the SpotON sample port cover and Priming port cover closed take a P1000 and remove all liquid from the waste channel through waste port 1 (adjacent to the priming port cover)
Open the priming port cover and remove any excess air (air bubbles) from the port.
Even if you can't see anything- do this step anyway.
- Set a P1000 to 200 µL
- Insert the tip into the priming port
- Turn the wheel slowly until the dial shows 220-230 µL and you can see a small volume in the tip
Very slowly, load 200 µL of the prepared wash mix into the flow cell priming port, avoiding the introduction of air bubbles. You can use the turn dial method to dispense liquid to help with pipette control.
Close the priming port and leave for a 00:05:00 incubation
5m
Very slowly, add the remaining 200 µL of wash mix into the flow cell priming port, again avoiding the introduction of air bubbles.
Close the priming port and leave to incubate for 01:00:00
1h
After the incubation, use a P1000 to remove all liquid from the waste channel via waste port 1.
Using a P1000, remove all liquid from the waste channel through waste port 1
Note
Note: Ensure both the priming port and spot on port are closed before removing any liquid
There are several options in terms of how to use your flow cell after washing:
Protocol references
‱ References
This protocol builds on foundational work from the ARTIC Network and has been published in:
- Brunker et al., 2019
Rapid in-country sequencing of whole virus genomes to inform rabies elimination programmes
Wellcome Open Research. https://doi.org/10.12688/wellcomeopenres.15515.1
A detailed methods paper with video demonstrations of key steps is also available:
- Bautista et al., 2022
Whole Genome Sequencing for Rapid Characterization of Rabies Virus Using Nanopore Technology