Sep 08, 2025
REVA #9: Computed Tomography (CT) of Excised Cadaveric Human Vagus Nerves
- Noa B Nuzov1,
- Nicole A. Pelot2,
- Andrew J. Shoffstall1,3
- 1Department of Biomedical Engineering, Case Western Reserve University, Cleveland, OH, USA, 44106;
- 2Department of Biomedical Engineering, Duke University, Durham, NC, USA, 27708;
- 3APT Center, Louis Stokes Cleveland Department of Veterans Affairs Medical Center, Cleveland, OH
- Noa B Nuzov: ORCID: 0000-0001-8187-2115;
- Nicole A. Pelot: ORCID: 0000-0003-2844-0190;
- Andrew J. Shoffstall: ORCID: 0000-0002-0881-2180


Protocol Citation: Noa B Nuzov, Nicole A. Pelot, Andrew J. Shoffstall 2025. REVA #9: Computed Tomography (CT) of Excised Cadaveric Human Vagus Nerves. protocols.io https://dx.doi.org/10.17504/protocols.io.3byl46w72go5/v1
Manuscript citation:
License: This is an open access protocol distributed under the terms of the Creative Commons Attribution License, which permits unrestricted use, distribution, and reproduction in any medium, provided the original author and source are credited
Protocol status: Working
We use this protocol and it's working
Created: July 15, 2025
Last Modified: September 08, 2025
Protocol Integer ID: 225841
Keywords: Human anatomy, Gross anatomy, Vagus nerve, Cranial nerves, Peripheral nervous system, Autonomic nervous system, Neuroanatomy, Computed tomography, CT, MicroCT, cadaveric human vagus nerves this protocol, excised cadaveric human vagus nerves this protocol, computed tomography, conducting computed tomography, cadaveric human vagus nerve, excised cadaveric human vagus nerve, nerve for microct imaging, human cadaver, embalmed human cadaver, nerve, cadaver, ct, imaging, microct imaging
Funders Acknowledgements:
NIH SPARC REVA
Grant ID: 75N98022C00018
Disclaimer
DISCLAIMER – FOR INFORMATIONAL PURPOSES ONLY; USE AT YOUR OWN RISK
The protocol content here is for informational purposes only and does not constitute legal, medical, clinical, or safety advice, or otherwise; content added to protocols.io is not peer reviewed and may not have undergone a formal approval of any kind. Information presented in this protocol should not substitute for independent professional judgment, advice, diagnosis, or treatment. Any action you take or refrain from taking using or relying upon the information presented here is strictly at your own risk. You agree that neither the Company nor any of the authors, contributors, administrators, or anyone else associated with protocols.io, can be held responsible for your use of the information contained in or linked to this protocol or any of our Sites/Apps and Services.
Abstract
This protocol describes the process of conducting computed tomography (CT) imaging of a nerve removed from an embalmed human cadaver, after appropriate staining. It also describes the process to prepare the nerve for microCT imaging.
Image Attribution
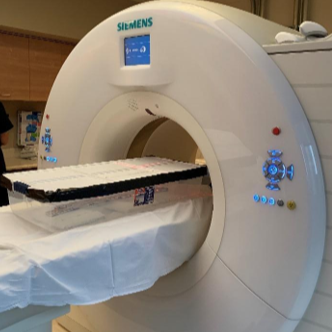
Image taken by Noa Nuzov on Monday, May 8th, 2023, in the University Hospitals Medical Center, Seidman Cancer Center, CT scanning room.
Guidelines
N/A
Materials
1. Phosphate buffered saline (PBS) 10X (Fisher-BP399-4), diluted in DI water to 1X PBS
2. CT scanner (Siemens SOMATOM Definition Flash dual-source scanner)
3. Razor blades
- Company: Fisherbrand, sold by Fisher Scientific. Name: Razor Blades.
4. Duct tape
- Company: VELCRO, sold by Amazon. Size: 20 feet long, 1 inch wide.
- Company: VELCRO, sold by Staples. Size: 20 feet long, 2 inches wide. Item number: 464675.
8. Gauze or cheesecloth
9. Large, enclosed container to store nerve.
- “Hefty Large 13-gallon (52-quart) Clear Case with White Lid Underbed Tote with Latching Lid” from Lowe’s. (Link)
- 6 L capacity container. (VWR Catalog number: 75812-744)
- Lid for the container. (VWR Catalog number: 75812-774)
- Line the bottom of these containers with the Velcro, 2-inch-wide thickness.
11. Dissection probe tool
- Company: Fisherbrand, sold by Fisher Scientific. Name: Seeker with Bent-End
12. Hemostat tool.
- Company: Fisherbrand, sold by Fisher Scientific. Name: Hemostatic Pean Forceps Serrated.
Safety warnings
This protocol might include items and/or substances that may pose hazards (e.g., chemical, physical, biological, or otherwise) to your health upon use or exposure. Before engaging in the processes described in this protocol, familiarize yourself with and follow the safety data sheets, manufacturer safety recommendations, and local regulations.
Ethics statement
Be sure to seek approval for or an exemption from human subjects research from your local regulatory body(ies) as required by local and/or institutional regulations before initiating studies.
This study was determined to be exempt from IRB oversight by the Case Western Reserve University Institutional Review Board (IRB) because it involved de-identified cadaveric tissue and no protected health information was collected from the donors.
Before start
See the protocols for dissecting (dx.doi.org/10.17504/protocols.io.yxmvmb976g3p/v1) and removing (dx.doi.org/10.17504/protocols.io.n2bvje9r5gk5/v1) the human vagus nerve from embalmed cadavers, followed by staining with phosphotungstic acid (dx.doi.org/10.17504/protocols.io.5qpvod95xg4o/v1), resulting in the vagal complex (from brainstem to abdomen) glued to a series of acrylic boards, each 3 cm wide and up to 9 cm long. The nerve on each acrylic board is termed a “sample”. The acrylic boards are secured with Velcro to the bottom of medium containers to be kept in the fridge.
Section 1: Nerve Preparation
Remove the cervical/thoracic and esophageal/sub-esophageal sections of the vagus nerve from the containers used for prior staining or storage.
Reference the photo of the complete vagal complex from the nerve removal protocol (dx.doi.org/10.17504/protocols.io.n2bvje9r5gk5/v1) to arrange the sample boards on the large acrylic sheet in anatomical placement, attached by Velcro.
Place the large acrylic sheet in the large bin, attached by Velcro.
Spray the nerve with 1X PBS and place PBS-soaked gauze or cheesecloth over the nerve. Spray the cloth to soak with 1X PBS.
Use duct tape around the lid to create an airtight seal in the bin.
Place the nerve in the large bin in a walk-in fridge if it will sit Overnight or longer until the CT scan. It can remain at Room temperature for up to 08:00:00 .
Immediately before the CT scan, remove the duct tape and the PBS-soaked gauze or cheesecloth that is covering the nerve. Do not do so sooner to reduce dehydration.
Spray the nerve with 1x PBS.
Place new duct tape along the edge of the lid to create an airtight seal in the bin.
Section 2: CT Scan
Place the nerve in the bin inside the CT scanner. The superior end of the nerve (e.g., the medulla) is at the end of the scanner bed where the patient’s head would be located.
Scan the sample with a slice thickness of 0.3 mm and the number of pixels in the X and Y directions as 512 by 512. In an axial cross section, the pixels are isotropic, but their physical size will vary depending on the width and height of the field of view.
After the scan is complete, again spray the nerve with 1x PBS and reapply the PBS-soaked gauze or cheesecloth.
Section 3: Nerve Preparation for MicroCT
Cut the nerve between each sample (i.e., between each gridded acrylic board).
Use a fresh razor blade and a fast downward motion (not sawing) for each cut.
Immediately after cutting, apply a small amount of glue to both ends of the sample to ensure it is stable with minimal movement. Use a dissection probe to gently push the nerve down on top of the glue while it dries.
For the esophageal and abdominal plexuses, apply glue to the edge of the boards and lay the plexuses down with minimal movement.
After the samples on the grids are separated, some parts of the nerve may have detached from the glue. Re-glue as needed.
Only use the glue on the outer edges of the sample and at the most distal ends of the branches.
When using glue on the main trunk, only place glue on the farthest ends of the grid.
Snap the acrylic boards (where they are pre-thinned) to separate all samples. Push/hold the grid where there isn’t nerve tissue.
The grids can be snapped by lining up the pre-thinned edge with the edge of a table and then pressing down on one side with your thumbs, or pressure from the hands and thumbs in opposing directions can be used (Figure 1).
Figure 1: Two methods for breaking the gridded acrylic boards along their designated edges to separate samples.
Reapply the 1-inch-wide Velcro on the back of any grid boards that have now been separated.
In a smaller container that can fit in a refrigerator, place the samples onto a new Velcro base.
Re-soak the gauze or cheesecloth in 1x PBS and place it over the sample.
Close the container tightly, apply any duct tape if it is not airtight.
Place the container in the fridge. Given the time required to scan all samples with microCT, samples may be required to wait in the fridge for up to 5 days before microCT scanning.
Acknowledgements
The authors thank the donors and staff of the Case Western Reserve University Anatomical Gift Program. Without the selfless donations of the donors and the tireless efforts of the staff of this program, the methods described in this protocol and the insights and advancements that result from studies conducted according to this protocol would not be possible.