Jan 08, 2026
Protocol for Using the HTX MALDI Matrix Sublimator for Mass Spec Imaging Sample Preparation
- Shazia Khan1,2
- 1University of Edinburgh;
- 2Mass Spectrometry Core, Edinburgh Clinical Research Facility, University of Edinburgh


Protocol Citation: Shazia Khan 2026. Protocol for Using the HTX MALDI Matrix Sublimator for Mass Spec Imaging Sample Preparation. protocols.io https://dx.doi.org/10.17504/protocols.io.rm7vzeb74vx1/v1
License: This is an open access protocol distributed under the terms of the Creative Commons Attribution License, which permits unrestricted use, distribution, and reproduction in any medium, provided the original author and source are credited
Protocol status: Working
We use this protocol and it's working
Created: January 07, 2026
Last Modified: January 08, 2026
Protocol Integer ID: 238174
Keywords: automated maldi matrix deposition by sublimation, automated maldi matrix deposition, mass spec imaging sample preparation, mass spectrometry imaging, htx maldi matrix sublimator, mass spectrometry, free matrix deposition, used maldi matrice, maldi matrice, sample preparation, msi experiment, standardised operation of the htx sublimator, htx sublimator, performing recrystallisation, automated recrystallisation, matrix loading, quality msi experiment, sublimation parameter, matrix layer, controlled matrix layer
Disclaimer
This protocol is intended for research use by trained users only. The authors and facility accept no liability for misuse or equipment damage. Users must comply with institutional safety procedures and manufacturer recommendations and validate the method for their specific samples and applications.
Some images and operational steps in this protocol are reproduced / adapted from the HTX TM-Sublimator User Manual (HTX Technologies, LLC). This protocol is not an official HTX document and has not been reviewed or endorsed by HTX Technologies, LLC. All trademarks and copyrights belong to their respective owners.
Abstract
This protocol describes the standardised operation of the HTX Sublimator for automated MALDI matrix deposition by sublimation for mass spectrometry imaging (MSI) sample preparation. It outlines instrument setup, vacuum and temperature control, matrix loading, sublimation parameters, chamber flushing, and cleaning procedures to ensure reproducible and contamination-free matrix deposition.
When performed as described, this protocol produces uniform and controlled matrix layers suitable for high-quality MSI experiments, with stable vacuum performance and minimal matrix carryover. This validated version includes recommended starting parameters for commonly used MALDI matrices and documents the limitation of automated recrystallisation, with guidance for performing recrystallisation manually when required.
Attachments

Image Attribution
Images reproduced are adapted from the HTX Sublimator User Manual (HTX Technologies, LLC) for research and educational use.
Guidelines
- This protocol is intended for research use only and must be performed by trained and authorised users.
- Users must be familiar with the HTX Sublimator User Manual and complete facility-specific training prior to independent operation.
- All work must be conducted in accordance with institutional safety policies, COSHH regulations, and local risk assessments.
- Maintain accurate records of sublimation parameters, vacuum levels, matrix type, and deposition conditions for reproducibility and troubleshooting.
Materials
Matrix solution ~2 mL – depends on protocol
Solvents for cleaning:
100% EtOH in spray bottle for cleaning
Acetone for DAN stain cleaning
Notes:
Matrix type, solvent, amount, and sublimation parameters should be selected according to experimental requirements.
Safety warnings
- High temperatures: The sublimation tray and heating elements become hot during operation. Do not touch heated components and allow sufficient cooling time before handling.
- Vacuum hazard: The system operates under high vacuum. Never attempt to open the chamber while under vacuum; always complete the nitrogen flushing step before opening.
- Chemical hazards: Organic solvents and MALDI matrices (e.g. acetone, methanol, CHCA, DAN) are flammable and/or toxic. Handle all chemicals in a fume cupboard using appropriate PPE.
- Contamination risk: Inadequate cleaning can lead to matrix carryover and compromised MSI data. Thorough cleaning of the chamber, tray, and sealing surfaces is required after each use.
- Instrument limitation: Automated recrystallisation is not supported on this instrument. Recrystallisation must be performed manually where required.
- Sample integrity: Some regions of the glass slide may not be uniformly coated due to the sample holder design; plan sample placement accordingly.
Ethics statement
This protocol describes the operation of the HTX Sublimator for MALDI mass spectrometry imaging sample preparation and does not involve live animal experimentation. Any tissue samples derived from animal studies must originate from experiments conducted in accordance with internationally accepted standards and approved in advance by an Institutional Animal Care and Use Committee (IACUC) or equivalent institutional and national ethics committee(s). Users are responsible for obtaining and documenting all relevant ethical approvals and permit numbers prior to performing experiments involving animal-derived samples.
Before start
- Confirm that all required consumables, matrices, solvents, and PPE are available.
- Ensure the fume cupboard is operational and that appropriate ventilation is active.
- Verify that the Huber water chiller, vacuum pump, and nitrogen supply are functioning correctly and have reached the required operating conditions.
- Clean and dry the sublimation chamber, tray, sample holder, and sealing surfaces to avoid contamination and vacuum instability.
- Check instrument stability before removing samples from −80 °C storage or dry ice.
- Ensure that all samples have been prepared in compliance with relevant institutional safety and ethics approvals.
- Note that this instrument does not support automated recrystallisation; plan any required recrystallisation steps to be performed manually.
Instrumentations:
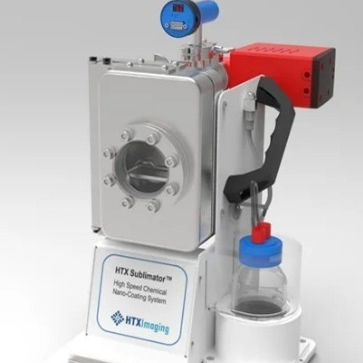
HTX Sublimator
- HTX Sublimator‱ (HTX Technologies, LLC, USA)
- Huber Water Chiller (Minichiller 600 OLÉ, filled with 20% Ethylene Glycol (CAS 107-21-1) as Coolant) operating temperature range: –20 °C to +40 °C
- Vacuum pump
Consumables and Chemicals:
- Matrix solution ~2 mL – depends on protocol
- Water flow at 4-8 oC - Depends on matrix crystal size requirement
- Nitrogen Gas flow at pressure 10 psi
- Sample slide for matrix deposition (Some regions of slide may not be coated properly; it is recommended to plan tissue mounting on slide accordingly and avoid placing samples in those areas).
α-Cyano-4-hydroxycinnamic acid (CHCA) matrix applied to a glass slide by sublimation.
Solvents for cleaning:
- 100% EtOH in spray bottle for cleaning
- Acetone for DAN stain cleaning
Important: Check the stability of the instrument first, before taking out sample slide from -80C freezer or from dry ice to dry in vacuum desiccator
Set up of Instrument:
30m
- Turn on Fume cupboard light and Fan (airflow).
- Connect / switch on tablet cable at the plug, leave for 15 min on charge before turn on tablet.
- Switch on HTX Sublimator‱, Vacuum pump and Huber Chiller at the plug
- Check Huber chiller coolant level. (If level is low then don’t use the sublimator and report to lab manager/relevant person)
- Set the Chiller required temperature i.e. 4 °C and wait (~20 min) until the chiller reaches the setpoint before proceeding.
- Inspect all tubing / connections for leak.
- Turn on Nitrogen flow fully by toggle valve on the fuming hood - Nitrogen for the system is supplied from the building Generator.
- Ensure sublimator is cleaned and dried thoroughly to avoid any cross contamination.
Special attention must be given to the sealing surfaces of the vacuum chamber and the O-ring surrounding the door.
30m
Matrix Deposition (Sample Preparation):
57m 30s
Prepare Matrix solution according to protocol – Make sure matrix is completely dissolved.
15m
Open the software to and press START (see image below).
1m
The water cooling enables automatically.
Set sublimation parameters (temperature and time) in Sublimation [0C] and Timer subl. [sec] according to user requirements / protocol (highlighted on image up)
1m
Set the preheating temperature [°C] to the desired value (mostly 60 0C)
1m
Enable the preheating toggle switch (image below)
1m
The current temperature is displayed in the temperature [°C] indicator, when in range, the In Range? indicator light lights up.
Make sure the sample holder is cooled (if not then check Huber water chiller temperature and flow).
Load the dissolved matrix solution onto the sublimator’s tray evenly. Use pipette or dropper for better control to spread matrix evenly. Handle with care, this surface is hot!.
Use pipette / dropper to spread matrix evenly on tray.
5m
Wait for the matrix substance to dry completely
5m
Insert the sample glass slide into the slide holder, sample facing downward. Ensure the front edge of the slide is in-line with the front face of the slide holder (see image).
1m
Close the chamber and make sure the surrounding O-ring is in place.
1m
Enable the Enable Vacuum toggle switch (see image) and allow for the vacuum to reach the desired value (~0.005-0.006 bar / 5-6 mbar) which can be read on either the digital pressure gauge on top of the chamber or on the Pressure [mBar] readout in the software.
Allow vacuum to reach the value ~0.005-0.006 bar / 5-6 mbar
1m
Set / check the sublimation parameters (Sublimation [°C] and Timer subl. [sec]) according to protocol
1m
When the desired vacuum (~0.005-0.006 bar / 5-6 mbar) has been reached, then Start sublimation toggle switch (image above). Normally it takes 5 min to reach 0.005-0.006 bar.
5m
Sublimation temperature start to rise from preheating temperature (60 0C) to the set temperature gradually within the set time as sublimation progress.
1m
Indicator lights show when the temperature is in range and if the sublimation process is enabled.
5m
The matrix will sublime and deposit onto the sample slide surface as temperature rises.
Once set time reached temperature start to drop gradually.
The condensation of matrix on the inside of the viewpoint can be used as in interpretation if the sublimation process has been taken place (see image below).
Condensation of matrix on the inside of the viewpoint
Wait until the sublimation process completed and temperature reach back to 100 0C in order to aid the condensation of the matrix onto the sample slide.
10m
Please note: it is not possible to perform a recrystallisation step by using the Start crystallization toggle switch due to high vacuum.
To finish the cycle and open the vacuum chamber, enable the Start Flushing toggle switch. Chamber will be thoroughly flushed with nitrogen to remove possible remaining gasses.
1m
The timer flush [sec] box indicates the set flush time (10s) which is sufficient. This value can be changed based on user requirements.
Start Flushing toggle switch on
10s
After the set time, the main vacuum valve is closed and N2 will remain flushing in order to open the vacuum chamber door.
10s
The water cooling can be disabled by checking the water-cooling toggle switch.
10s
A popup window will be displayed, indicating the completion of the cycle.
1m
Open the door and carefully remove the sample slide by holding it by the edges and sliding it out of the sample holder.
1m
Important: Some regions of slide that are covered by the sample holder may not be coated sufficiently; it is recommended not to place samples in this area.
Cleaning and Maintenance:
15m
It is important to clean the device properly after use. Cleaning not only helps the desired vacuum to be achieved faster and more efficient, but also prevents matrix contamination within the sample.
All metal components are preferably cleaned with either 100% ethanol or isopropanol. This includes the inside and outside surfaces of the vacuum chamber, sample holder, sublimation tray, the base plate and the metal frame of the device.
10m
Special attention must be given to the sealing surfaces of the vacuum chamber rear and the vacuum chamber door.
Special care must also be given to the O-ring that forms the seal between these surfaces.
5m
Outside viewport of the vacuum chamber door and the protective cover around the recrystallization bottle are made out of polycarbonate, these are best cleaned with a mild detergent only.
Waste Disposal:
- DAN Waste: Must be collected / disposed of inside fume hood to prevent exposure.
- Cleaning Waste: Dispose of all cleaning residues according to the chemical/matrix SDS
- Solvent Waste: Solvent waste to be disposed to appropriate solvent wasted bottles (Halogenated or Non-halogenated)
Shutdown Procedure:
5m
- Exit the Sublimator software and shut down the tablet completely.
- Turn off the Sublimator, Huber chiller, and vacuum pump.
- Turn off the nitrogen supply (if not already done).
- Clean the fume hood to remove any spills.
- Replace the waste container if it is full.
- Clean all glassware and dispose of vials and gloves according to lab safety guidelines.
5m
Recommended Sublimation Protocols (can be use as starting point):
Optimization of matrix deposition:
You can control deposition quality and quantity using below adjustable parameters:
- Amount of matrix (matrix quantity effect density on slide)
- Sublimation time (longer more deposition)
- Temperature of matrix deposition (temp to fully sublime the matrix)
- Additional manual recrystallisation step (solvent, temp and time)
Acknowledgements
The HTX Sublimator was purchased through a University of Edinburgh Capital Equipment Grant, is housed in the Mass Spectrometry Core Facility of the Edinburgh Clinical Research Facility (CRF).