Mar 31, 2026
Pichia (K phaffii) transformation
This protocol is a draft, published without a DOI.
- Hannah Bott1
- 1University of Cambridge


Protocol Citation: Hannah Bott 2026. Pichia (K phaffii) transformation. protocols.io https://dx.doi.org/
License: This is an open access protocol distributed under the terms of the Creative Commons Attribution License, which permits unrestricted use, distribution, and reproduction in any medium, provided the original author and source are credited
Protocol status: Working
We use this protocol and it's working
Created: March 27, 2026
Last Modified: March 31, 2026
Protocol Integer ID: 314006
Keywords: Pichia pastoris; Komagataella phaffii; transformation, transformation transformation of pichia pastori, pichia pastori, electroporation, pichia, komagataella, transformation transformation, invitrogen
Abstract
Transformation of Pichia pastoris (aka Komagataella phaffii) through electroporation. This protocol was adapted from that described in Invitrogen's EasySelect manual.
Image Attribution
Hannah Bott
Guidelines
- If you would like to transform a lot of different genes, then the protocol can be scaled up to make a bigger volume of competent cells.
- It may not be necessary to conduct the competent cell preparation on ice/at 4 C (Garcia-Ortega (ed.) et al.).
- Transformation efficiency may be increased by increasing the length of the recovery period to 6 hrs post electroporation (Garcia-Ortega (ed.) et al.).
- Plating on higher concentrations of selection marker (e.g. Zeocin) may increase likelihood of multicopy insertions.
- Lower amounts of DNA can be used to transform Pichia using the Lin-Cereghino et al. protocol described here.
Materials
- Your gene/transcription unit of interest in an expression plasmid like pPICZ or one built from the Open Yeast Collection (Reclone).
- Restriction digestion enzyme (e.g. PmeI/MssI for pPIC or NotI for OYC) and corresponding buffer.
- E. coli strain like TOP10 that can replicate plasmids.
- Media and selection marker (i.e. antibiotic) for replicating the expression plasmid in E. coli.
- Midiprep or miniprep kit.
- DNA cleanup kit.
- Nuclease-free water.
- Agarose, DNA-binding dye, TAE buffer, sample loading dye, DNA ladder (gel electrophoresis)
- Yeast extract.
- Peptone.
- D-glucose.
- Yeast selection marker (e.g. Zeocin).
- D-sorbitol.
Equipment
- Autoclave.
- Bunsen burner or MSC.
- Shaking incubator.
- Thermocycler or heat block.
- Oven for incubating plates.
- Centrifuge(s) (compatible with different tube sizes).
- Various culture flasks and centrifuge-compatible tubes.
- Electrophoresis tank & power supply and gel viewer.
- Petri dishes (90 mm).
- E.g. Nanodrop, Qubit or plate reader to measure DNA concentration.
- E.g. spectrophotometer or plate reader to measure OD600.
- Electroporator and compatible cuvettes.
Safety warnings
Electroporation uses high voltage. Make sure that your machine has undergone regular electrical safety checks, that your sample has high resistance, and that your electroporation cuvette does not have any cracks.
Before start
All steps involving cell plating or culture need to be conducted in a sterile environment (e.g. under Bunsen flame or in a MSC hood). Also, all media should be autoclaved or filter-sterilised. Any culture plates, flasks, etc. should also be sterilised by autoclave.
DNA preparation
Overnight Transform Pichia expression plasmid into E. coli strain that produces lots of plasmid (e.g. TOP10, DH5α). Use appropriate selection marker to plate based on your plasmid (e.g. Zeocin or chloramphenicol)
Note
Each transformation requires ~2 μg or more of DNA (may be able to get away with ≤500 ng, though advisable to use the Lin-Cerghino et al. protocol instead), but will need to start with more because some DNA is lost during purification from the restriction reaction.
If you have a glycerol stock of E. coli with your expression plasmid, then you can streak that instead.
Overnight Inoculate 50-100 mL media (e.g. low salt LBZeo for pPIC plasmid or LB + antibiotic for OYC plasmid) with colony from transformation. Incubate overnight at 37 °C, ~220 rpm.
If available, use midiprep kit to extract plasmid from overnight culture. If not, split culture into 5 mL aliquots then use miniprep kit to extract plasmid. It is best to elute using distilled, nuclease free water because the DNA needs to be added to a digestion reaction.
Expected result
This should yield at least several μg of your expression plasmid (exact amount will vary for each plasmid)
Can store plasmid at -20 °C, or continue to next digestion step.
Set up restriction digestion reaction to digest DNA according to manufacturer's guidelines for large-scale digestion. Check that has digested by taking small sample and running on an agarose gel with a small sample of undigested plasmid as a control (see a DNA gel electrophoresis protocol).
Note
Plasmid needs to be digested at place(s) where you want homologous recombination to occur in vivo. For commercial pPIC plasmids, this is in the pAOX1 promoter (e.g. can use MssI/PmeI) and for the OYC plasmids this will be either side of the 5' and 3' homologous recombination parts (use NotI).
It is recommended to digest more plasmid than you need for the transformation (e.g. >4 μg), because some will likely be lost during the subsequent purification step.
For cost efficiency, I find it best to use minimal enzyme and incubate the reaction for a longer time. For example, you can use 5-10 μL of enzyme with 100 μg DNA and incubate for 16 hrs for enzymes with low star activity.
I find the results most reliable when doing multiple 100 μL (or less) reactions in a thermocycler. However, I have also had success with larger volumes (500 μL) in a heat block (just make sure the heat block is reliable for maintaining temperature).
Purify digested DNA from reaction mixture using a DNA clean up kit. Elute using nuclease-free diH2O. Make sure that eluted DNA is relatively pure by measuring the A260/280 and A260/230 ratios. Can store the digested DNA at -20 °C.
Note
You will save time and likely lose less DNA using a high capacity DNA clean up kit. However, this may be more costly than the low capacity kits.
It is also possible to use phenol/chloroform extraction and ethanol precipitation, then resuspend in 10 μL nuclease-free diH2O.
Avoid using elution buffers like TE because for later electroporation want to minimise ions/salts to avoid arcing.
Finally, the DNA needs to be concentrated before addition to the cells. Perhaps the easiest way to do this is to incubate the tube containing your desired amount of digested DNA (e.g. 3 μg) at 60 °C with the cap off until the volume is ≤10 μL. Alternatively, ethanol precipitation then resuspension in nuclease-free diH2O can be used.
Competent cell preparation
2d 5h
48:00:00 Streak your desired Pichia strain onto a YPD plate from a glycerol stock or re-streak onto fresh plate from older plate. Incubate at 30 °C for ~2 days (sometimes can take 3 days).
Note
In this time it is advisable to prepare and sterilise the media, flasks and plates required for the subsequent steps.
2d
Overnight Inoculate 5 mL of YPD (in ≥50 mL flask/tube) with a Pichia colony. Incubate at 28-30 ºC, ~220 rpm, overnight.
05:00:00 Measure OD600 of overnight culture. Then add a volume of this to 50 mL YPD (in ≥250 mL baffled flask with cover that allows aeration) such that the resulting OD600 of the large culture is 0.2. Incubate at 28-30 °C, ~220 rpm until the OD600 reaches ~1.3-1.5.
Note
This typically takes ~5 hrs, but will depend on your Pichia strain.
Alternatively, you can inoculate the 50 mL YPD with 50 μL of overnight culture, then incubate overnight at 28-30 °C, ~220 rpm until the OD600 is reached (check in morning).
5h
Pellet the cells by centrifuging at 1500xg for 10 min, 4 °C in sterile 50 mL centrifuge tube. Discard supernatant.
Resuspend cell pellet in 50 mL cold, sterile ddH2O (e.g. through stripette or gentle vortexing). Centrifuge at 1500xg for 10 min, 4 °C. Discard supernatant.
Resuspend cell pellet in 25 mL cold, sterile ddH2O (e.g. through stripette or gentle vortexing). Centrifuge at 1500xg for 10 min, 4 °C. Discard supernatant.
Resuspend cell pellet in 2 mL cold, sterile 1 M sorbitol (e.g. through pipetting). At this point, can optionally transfer to smaller, sterile centrifuge tube. Centrifuge at 1500xg for 10 min, 4 °C. Discard supernatant.
Resuspend cell pellet in 100 μL cold, sterile 1 M sorbitol (e.g. through pipetting). Optionally, at this point can transfer cells to a smaller, sterile tube. Keep cells on ice.
Expected result
Should yield ~150-250 μL of competent cells.
Transformation
Take 80 μL of the competent cells and combine with the 10 μL of your purified, linear DNA (≥3 μg). Transfer into an electroporation cuvette on ice.
Note
Can use smaller aliquots of competent cells, but will need to use correspondingly smaller volumes of DNA.
Prepare 1 mL of 1 M sorbitol or YPDS for recovery in a >5 mL, sterile tube. Keep at room temperature.
Electroporate using the recommended settings for Pichia(Komagatella) for your machine. As soon as possible afterwards, add some recovery medium to the cuvette, then transfer contents back into tube with recovery medium.
Safety information
Electroporators use high voltages and can 'arc' if the sample does not have sufficiently high resistance. The cells and DNA should be prepared in low salt, high resistance solutions as described. Also, make sure that the cuvette does not contain any cracks, and that the cuvette is inserted into the covered chamber attached to the machine before electroporating.
Note
e.g. Biorad recommends using 1.5 kV, 25 μF and 200-400 Ω with a 0.2 cm cuvette.
If used sorbitol, then recover at 28-30 ºC for 1 hr before adding 1 mL of YPD and recovering at 28-30 °C, ~220 rppm for at least an additional 1 hr (5 hrs if possible). If used YPDS, then recover at 28-30 °C, ~220 rpm for at least 1 hr (6 hrs if possible).
Note
Can take the OD600 at the start and end of recovery to calculate the growth factor.
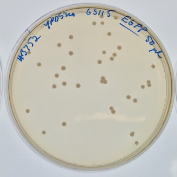
Plate 50 μL onto your selection plate (can additionally plate larger volumes onto more plates) . Incubate in 30 °C oven for ~5 days.
Note
Selection plate could be e.g. YPDSZeo agar for Zeocin selection or RDB agar for histidine selection.
It is good practice to also plate a small volume onto non-selection YPDS plates as a positive control. As a negative control, you can plate cells onto the selection plate that were not incubated with DNA containing the selection marker, but have gone through the same electroporation and recovery process.
Check that colonies have desired construct. Can do this using e.g. colony PCR
Protocol references
Invitrogen. (2010). EasySelect Pichia Expression Kit (MAN0000042) [Manual]. https://assets.fishersci.com/TFS-Assets/LSG/manuals/easyselect_man.pdf
Garcia-Ortega, X., Glieder, A., Kovar, K., Rieder, L. (Ed.). (2026). Pichia pastoris: Methods and Protocols. Humana Press. https://link.springer.com/book/10.1007/978-1-0716-4779-0