Jan 27, 2026
Paraplast Embedding of Prepubertal Rat Ovary Fixed in Bouin's Solution and Preparation of 10 µm Histological Sections
- Eloir Gallegos Pacheco1,
- María Elena Ayala Escobar2,
- Andrés Aragón Martínez1
- 1Laboratorio de Gametos y Desarrollo Tecnológico, Facultad de Estudios Superiores Iztacala, UNAM;
- 2Unidad de Biología de la Reproducción, Laboratorio de Pubertad, Facultad de Estudios Superiores Zaragoza, UNAM
- Andrés Aragón Martínez: Andrés Aragón Martínez: Correspondence [email protected];


Protocol Citation: Eloir Gallegos Pacheco, María Elena Ayala Escobar, Andrés Aragón Martínez 2026. Paraplast Embedding of Prepubertal Rat Ovary Fixed in Bouin's Solution and Preparation of 10 µm Histological Sections. protocols.io https://dx.doi.org/10.17504/protocols.io.e6nvwn5m2vmk/v1
License: This is an open access protocol distributed under the terms of the Creative Commons Attribution License, which permits unrestricted use, distribution, and reproduction in any medium, provided the original author and source are credited
Protocol status: Working
We use this protocol and it's working
Created: January 05, 2026
Last Modified: January 27, 2026
Protocol Integer ID: 237062
Keywords: Prepubertal rat ovary, Bouin’s fixative, Paraplast embedding, ovarian histology, Histology, fixation of prepubertal rat ovary, prepubertal rat ovary, optimal structural preservation of ovarian tissue, ovarian tissue, paraplast, careful tissue handling, bouin, preparation, procedure
Funders Acknowledgements:
This work was supported by UNAM-DGAPA-PAPIIT
Grant ID: IN218920
This work was supported by UNAM-DGAPA-PAPIIT
Grant ID: IN221018
This work was supported by UNAM-DGAPA-PAPIIT
Grant ID: IN224925
This work was supported by UNAM-DGAPA-PAPIIT
Grant ID: IN226017
Disclaimer
This protocol is intended for research and educational use only and is provided as-is.
All procedures involving animals must be conducted in accordance with applicable institutional, national, and international ethical guidelines and must be approved by the appropriate animal care and use committees.
Bouin’s solution contains hazardous chemicals (including picric acid and formaldehyde) and must be handled, stored, and disposed of following relevant safety regulations.
Users are responsible for ensuring appropriate training, safety measures, and compliance with all regulations.
The authors assume no responsibility for misuse of this protocol or for outcomes resulting from deviations from the described procedures.
The biological samples used for the photographs included in this protocol were obtained from projects funded by the Dirección General de Asuntos del Personal Académico (grants UNAM-DGAPA-PAPIIT IN226017, IN218920, IN221018, and IN224925.
Abstract
This protocol describes the fixation of prepubertal rat ovaries (32–35 days of age) in Bouin’s solution, followed by dehydration and Paraplast embedding. The procedure emphasizes careful tissue handling, gradual solvent exchanges, and controlled embedding conditions to ensure optimal structural preservation of ovarian tissue.
Image Attribution
All images were generated by the authors of this protocol.
Guidelines
- This protocol is intended for use by trained personnel with experience in histological techniques and animal tissue handling.
- Strict temperature control during Paraplast infiltration and embedding (56–58 °C) is essential to ensure proper tissue support and section quality.
- Proper orientation of ovaries during embedding is critical for obtaining consistent serial sections suitable for morphometric analysis.
- Avoid tissue drying at all stages of the procedure, particularly during ethanol storage and solvent exchanges.
- All reagent and solvent waste generated the process that cannot be reused is disposed of in accordance with the Mexican regulations established in the Ley General para las Prevención y Gestión Integral de los Residuos (General Law for the Prevention and Integral Managementof Waste) and in compliance with NOM-052-SEMARNAT-2005.
- For countries other than Mexico, the applicable local regulations must be verified.
Materials
Materials
- Straight blunt surgical scissors
- Fine straight dissecting scissors
- Toothed dissecting forceps
- Adson Tissue Forceps
- Straight or dental forceps (for embedding)
- Glass test tubes (12 × 75 mm / 6 mL)
- Gauze
- Parafilm
- Cotton
- Beakers (10 mL)
- Beakers (250 mL or 500 mL)
- Filter paper
- PVC/Alu capsule blister packs (one cavity per ovary)
- Dental forceps
- Lighter or matches
- Alcohol burner
- Glass Petri dishes
- Cardboard rectangles (dividers)
- Dissecting needles
- Quantitative cellulose filter paper with fast filtration rate in sheets
Equipment
- Embedding oven
Protocol materials
Absolute EthanolJ.T. BakerCatalog #2606
Bouin’s solutionSigma aldrich.comCatalog #HT101128-4L
Surgipath ParaplastLeica BiosystemsCatalog #39601006
ChloroformMerck MilliporeSigma (Sigma-Aldrich)Catalog #1024452500
Safety warnings
- Bouin’s solution contains picric acid and formaldehyde, which are hazardous; all handling must be performed in a chemical fume hood while wearing appropriate personal protective equipment.
- Picric acid must always be kept moist due to its explosive potential when dry; storage and disposal must follow institutional safety regulations.
- Chloroform is toxic and volatile; avoid inhalation and skin contact and handle exclusively in a fume hood.
- Ethanol, ether, and the use of an alcohol burner pose fire hazards; keep flammable reagents away from open flames and heat sources.
- Microtome blades are extremely sharp; handle with care to prevent injury.
Ethics statement
All experiments were conducted in accordance with the guidelines established by the Technical Specifications for the Production, Care, and Use of Laboratory Animals (NOM-062-ZOO-1999). The experimental protocols were reviewed and approved by the Bioethics Committee of the Facultad de Estudios Superiores Zaragoza, Universidad Nacional Autónoma de México (approval letter FESZ/DEPI/CE/001/21).
Before start
- Ensure that all required ethical approvals for animal experimentation have been obtained prior to sample collection.
- Prepare fresh Bouin’s solution or verify that the fixative is within its recommended storage period.
- Confirm availability of all reagents (graded ethanol series, chloroform, Paraplast) and verify their quality and expiration dates.
- Preheat the embedding oven to 58 °C and allow sufficient time for complete melting and filtration of Paraplast.
- Prepare labeled containers, labels and embedding molds in advance to ensure smooth workflow.
Sample collection and fixation
1d
Obtaining biological samples, fixation and preservation until embedding in Paraplast.
Label glass test tubes with the sample identifier, use medical tape and pencil. Then fill the tubes to 2/3 of their capacity (4 mL) with Bouin’s fixative.Bouin’s solutionSigma aldrich.comCatalog #HT101128-4L
Note
If preparation of Bouin’s solution is required, it should be prepared using the following quantities: 1500 mL of saturated aqueous picric acid solution, 500 mL of 37% formaldehyde, and 100 mL of glacial acetic acid. The reagents should be mixed carefully in accordance with appropriate safety guidelines.
Dissect the ovaries, completely removing the oviducts and trimming away surrounding adipose tissue.
Figure 1. The dissected uterus and ovaries of a prepubertal rat are shown, surrounded by adipose tissue, which must be removed before fixing the ovaries in Bouin’s solution. Care must always be taken to identify which ovary is left and which is right.
Using forceps, place the left ovary directly into the tube containing fixative. Wrap the right ovary in a piece of gauze and place it in the same tube. Seal the tube with Parafilm. Maintain the ovaries in the fixative for 24 h.24:00:00
Figure 2. Two assay tubes in which the left ovaries can be observed, while the right ovaries are covered with gauze. Note the label written in pencil on surgical tape (important to prevent it from being erased by the action of the solvents that will be used later).
1d
Decant the fixative and rinse the ovaries three times with 70% ethanol, gently agitating each time to remove as much fixative as possible. Absolute EthanolJ.T. BakerCatalog #2606
Fill the tube to 2/3 of its capacity with 70% ethanol, seal with Parafilm, and store until processing for embedding.
Note
Monitor the samples to prevent drying due to ethanol evaporation.
Preparation of the oven and containers for embedding
Preparation of the embedding oven prior to the inclusion of biological samples.
Set the embedding oven to 58 °C58 °C
Note
Paraplast melting temperature is 56-58 °C
Fill a 250 mL beaker with Paraplast and place it inside the oven to melt. Maintain inside the oven during 24 hours before use. Surgipath ParaplastLeica BiosystemsCatalog #39601006
Place three 500 mL beakers inside the oven, each topped with a filter paper funnel (Quantitative, fast-filtering cellulose filter paper), prepared from an approximately 20 cm diameter circular filter paper folded into quarters for Paraplast filtration. Perform three successive filtrations to remove impurities.
Note
Ensure that all beakers are prepared and that sufficient filtered Paraplast is available before beginning ovary dehydration.
Figure 3. We remove the steel inner trays of the oven conformably handle the beakers. We use a customized wood base layered to get ready access to the beakers. A thermometer was hanged to monitor the temperature at a specific site of the oven.
Inside the oven, place 10 mL beakers filled to 2/3 capacity with Paraplast from the third filtration. Insert a cardboard rectangle into each beaker to serve as a divider, aligned with the pouring spout; the left ovary will be placed on the left side of the divider and the right ovary on the right side.
Figure 4. In the beakers used for embedding, a cardboard rectangle is placed aligned with the pouring spout to separate and avoid confusion between the right ovary and the left ovary.
Dehydration of the samples
1d
Processing of biological samples for embedding in paraplast.
Decant the 70% ethanol and rinse the tissues three times with 80% ethanol, agitating as in step 1.5. Fill the tube to 2/3 capacity with 80% ethanol and incubate for 2 h.02:00:00
2h
Decant the 80% ethanol and rinse the tissues three times with 100% ethanol, agitating as above. Fill the tube to 2/3 capacity with 100% ethanol and incubate for 2 h.02:00:00
2h
Decant the 100% ethanol and rinse the tissues three times with used chloroform (previously employed in tissue processing and possibly containing traces of ethanol), agitating each time. Fill the tube to 2/3 capacity with used chloroform and incubate for 2 h.02:00:00
2h
Decant the used chloroform and rinse the tissues three times with pure chloroform, agitating as before. Fill the tube to 2/3 capacity with pure chloroform and incubate for 16–18 h.18:00:00 ChloroformMerck MilliporeSigma (Sigma-Aldrich)Catalog #1024452500
Figure 5. At the end of dehydration, the ovaries float in the chloroform. Throughout all dehydration steps, the tubes are kept covered with sufficient cotton to prevent excessive solvent loss by evaporation (remember that they will remain in chloroform 16-18 h).
18h
Paraplast embedding of ovaries
2h
Embedding of biological samples in Paraplast in PVC/Alu capsule blister packs.
Prepare a glass Petri dish by placing a circular piece of gauze at the bottom to serve as a support for arranging the ovaries. Add a small amount of pure chloroform to moisten the gauze.
Note
Perform the following steps in front of the embedding oven.
Figure 6. Materials needed to organize the ovaries before placing them into the beakers for embedding. Organizing the ovaries beforehand makes placement into the embedding beakers easier and faster, reducing heat loss from the oven. It is important to do this in front of the oven, since once the ovaries are organized in the Petri dish, movement may cause the ovaries to mix.
Transfer the ovaries from the first tube into the Petri dish along with the chloroform. Remove the right ovary from the gauze and arrange both ovaries side by side. Repeat with subsequent tubes, placing ovaries beneath the previous ones until all ovaries are organized.
Note
Avoid allowing the ovaries to float, as they may mix. If necessary, collect excess cloroform into a beaker and store it labeled as used cloroform.
Figure 7. Arrangement of the ovaries in a Petri dish. Gauze placed at the bottom and the dish contains sufficient chloroform to keep the ovaries moist without floating, allowing them to remain in position. For each rat, the left ovary is placed on the left side and the right ovary (which was wrapped in gauze) is removed from the gauze and placed on the right side, maintaining the established order.
Remove the first pair of 10 mL beakers containing Paraplast from the oven. Place the left ovary on the left side of the divider and the right ovary on the right side. Return the beakers to the oven, remove the next pair, and repeat the process.
Note
Minimize oven opening time to prevent heat loss.
Figure 8. Handling and orientation of beakers used for embedding during ovary inclusion. Two beakers are removed at a time to prevent Paraplast solidification. Ovaries are positioned as shown, with the left ovary placed on the left side of the cardboard rectangle and the right ovary on the right side. The cardboard is aligned with the pouring spout, which is oriented toward the front for ovary identification. Ovaries are placed into the beakers using forceps without contacting the Paraplast, and the molds are returned to the oven before repeating the procedure with the next pair.
Once all ovaries are placed in Paraplast, maintain them in the oven for 2 h.02:00:00
2h
Prepare the materials for embedding the tissues in capsule blister molds. Bring the alcohol burner, embedding forceps, lighter or matches, and sufficient blister molds close to the oven.
Figure 9. Materials required for ovary embedding. Capsule blister packs, as needed according to the number of ovaries, with one ovary placed per cavity; when more than one blister is used, they are numbered at the top, with ovaries arranged sequentially downward. One label per ovary indicating animal number, age, experimental group, and laterality (left or right). Additional materials include an alcohol burner with alcohol, dental forceps, a dissecting needle, and a lighter.
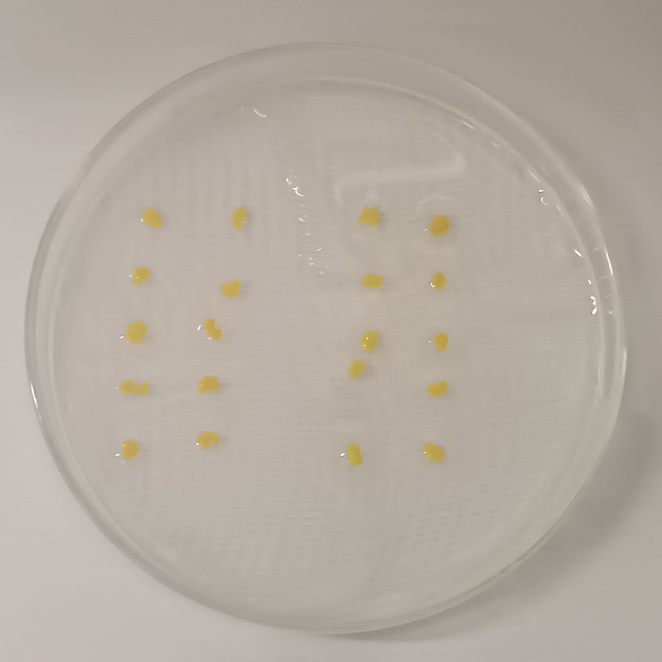
After the 2 h incubation, fill eight blister cavities with Paraplast from the third filtration beaker, avoiding bubble formation.
Note
To prevent bubbles, pour the Paraplast as close as possible to the cavity. If bubbles appear, remove them with forceps or a heated needle.
Light the burner and heat the tip of the forceps. Remove the first pair of beakers from the oven and place one ovary at a time in the center of each cavity. Repeat the process until all samples are embedded.
Note
If the Paraplast solidifies, it can be remelted using the heated forceps.
Figure 10. The alcohol burner is kept lit while ovaries are placed into Paraplast-filled blisters. If Paraplast solidifies, forceps are heated and used to remelt the Paraplast at the center of the cavity before ovary placement. Forceps are also heated to remove each ovary from the embedding mold, preventing Paraplast solidification around the forceps and ovary. The procedure must be performed rapidly; if Paraplast hardens excessively and cannot be easily remelted, those cavities are skipped and the process continues.
Label the blocks either by embedding the label into the side of the block while the Paraplast is molten or by attaching the label to the cooled block using adhesive tape.
Figure 11. Labeling and storage of Paraplast blocks. Labels are applied by melting Paraplast at the edge of each block using a heated dissecting needle and inserting the label with all information visible. Blocks are allowed to cool for 24 h before demolding and are stored at environmental temperature until histological sectioning is performed.
Protocol references
Megías M, Molist P, Pombal MA. Atlas of Plant and Animal Histology. Retrieved (16/01/2026) from : http://mmegias.webs.uvigo.es/index.html
Suvarna, K. S., Layton, C., & Bancroft, J. D. (2018). Bancroft's theory and practice of histological techniques E-Book. Elsevier health sciences.
Hewitson, T. D., & Darby, I. A. (Eds.). (2010). Histology protocols (p. 229). Totowa^ eNJ NJ: Humana Press.
Acknowledgements
This work was supported by the Programa de Becas Posdoctorales de la Dirección General de Asuntos del Personal Académico (DGAPA), UNAM to the postdoctoral fellow Eloir Gallegos Pacheco.