Dec 19, 2025
Version 2
Optical tissue clearing of mouse organs and zebrafish using CUBIC (H)L/CUBIC RA and ScaleCUBIC-1/ScaleCUBIC-2 reagents V.2
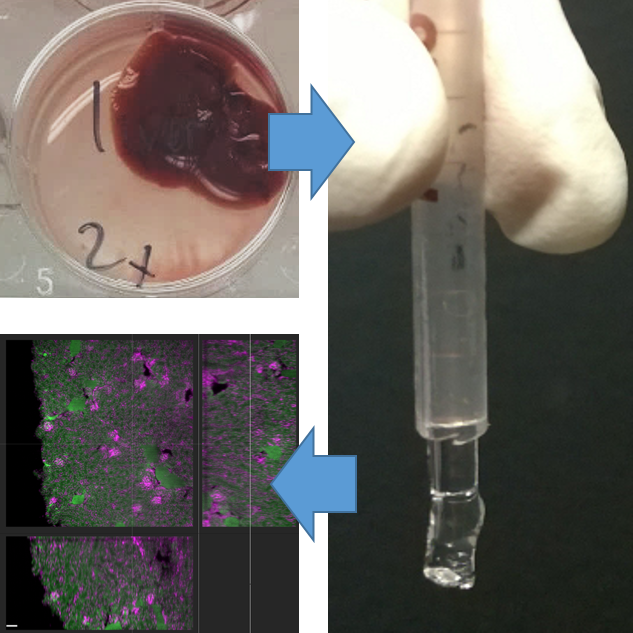
- Wolf Heusermann1,
- Roland Pohlmeyer2,
- Dagmar Diekhoff2,
- Oliver Biehlmaier1,
- Sergiy V Avilov2
- 1Biozentrum, University of Basel, Spitalstrasse 41, CH-4056 Basel, Switzerland;
- 2Max Planck Institute of Immunobiology and Epigenetics, Stuebeweg 51, D-79108 Freiburg, Germany



Protocol Citation: Wolf Heusermann, Roland Pohlmeyer, Dagmar Diekhoff, Oliver Biehlmaier, Sergiy V Avilov 2025. Optical tissue clearing of mouse organs and zebrafish using CUBIC (H)L/CUBIC RA and ScaleCUBIC-1/ScaleCUBIC-2 reagents. protocols.io https://dx.doi.org/10.17504/protocols.io.yxmvm9kr5l3p/v2Version created by Sergiy V Avilov
License: This is an open access protocol distributed under the terms of the Creative Commons Attribution License, which permits unrestricted use, distribution, and reproduction in any medium, provided the original author and source are credited
Protocol status: Working
We use this protocol and it's working
Created: December 08, 2025
Last Modified: December 19, 2025
Protocol Integer ID: 234466
Keywords: Tissue clearing, light sheet fluorescence microscopy, CUBIC, murine tissue, zebrafish, CUBIC L, CUBIC RA, CUBIC HL, cubic tissue clearing, optical tissue clearing, zebrafish tissue, tissue clearing, light sheet fluorescence microscope, cubic hl delipidation reagent, fluorescent protein, cubic ra reagent, cubic hl reagent, tissue fixation, mouse organ, cubic method, lymph node, nuclei stain, decolorization, refractive index, refractive index matching, ScaleCUBIC-1, ScaleCUBIC-2, SYBR Gold, propidium iodide, agarose embedding, delipidation, optical tissue clearing, Tissue optical clearing, optical tissue clearing of mouse organ, optical tissue clearing, optical tissue clearing of murine tissue, cubic ra refractive index, suitable for 3d light sheet fluorescence microscopy, 3d light sheet fluorescence microscopy, cubic ra treatment, cubic hl delipidation reagent, light sheet fluorescence microscopy, refractive index matching, refractive index, using cubic, immunofluorescence, tissue fixation, tissue autofluorescence, cubic method, 1st version
Disclaimer
It is not the intention of this protocol to supplant the need for independent professional judgement, advice, diagnosis or treatment. Any action taken or withheld on the basis of the information presented here is undertaken at the user's own risk. The user agrees that neither the company nor any of the authors, contributors, administrators, or other individuals associated with protocols.io can be held liable for any injuries, damages or losses incurred as a result of the user's use of the information contained in or linked to this protocol or any of our websites, applications, or services.
Abstract
The protocol describes optical tissue clearing of murine tissue with CUBIC L or CUBIC HL delipidation reagents and CUBIC RA refractive index matching reagent (developed by Tainaka et al., 2018); CUBIC L followed by CUBIC RA can be used for adult zebrafish as well. The present updated version also describes optical tissue clearing with ScaleCUBIC-1 delipidation reagent and ScaleCUBIC-2 refractive index matching reagent (the 1st version of the CUBIC method (Susaki, Etsuo A. et al., 2014), with adaptations and modifications.
The protocol covers the steps of solutions preparation, tissue fixation, delipidation, refractive index matching, optional nuclei staining and embedding the samples in agarose for light sheet fluorescence microscopy. Handling and manipulations with live animals, immunofluorescence staining, image acquisition and analysis are beyond the scope of the present protocol. The expected results of the protocol are: cleared, decolorized and optionally stained with a nuclei stain (propidium iodide or SYBR Gold) murine tissues (brain, liver, kidney, intestine, thymus, spleen and others), or whole body adult Danio rerio (only CUBIC L/CUBIC RA treatment), suitable for 3D light sheet fluorescence microscopy, using emission of fluorescent proteins (except the samples treated with CUBIC HL), emission of nuclei stains and tissue autofluorescence
Materials
Reagents
- Paraformaldehyde (PFA) (for example, AlfaAesar)
- N-butyldiethanolamine (Sigma-Aldrich)
- Triton X-100 (Nacalai Tesque)
- Antipyrine (Tokyo Chemical Industry)
- N-methylnicotinamide (Tokyo Chemical Industry)
- Phosphate buffered saline (PBS), pH 7.4 (for example, GIBCO)
- 1,3-bis(aminomethyl)cyclohexane (Tokyo Chemical Industry)
- Sodium dodecylbenzenesulfonate (Tokyo Chemical Industry)
- p-toluenesulfonic acid (Sigma-Aldrich)
- Propidium iodide (Thermo Fischer Scientific)
- SYBR Gold (Thermo Fisher Scientific)
- Urea (Nacalai Tesque, 35904-45, Japan)
- ,N,N’,N’-tetrakis(2-hydroxypropyl)ethylenediamine (Tokyo Chemical Industry CO., T0781, Japan)
- Sucrose (Nacalai Tesque Inc., 30403-55, Japan)
- Triethanolamine (Wako Pure Chemical Industries, 145-05605, Japan)
Equipment:
- Rocking platform
- pH-meter
- 5 ml polypropylene tubes (Eppendorf)
- A temperature-controlled room or cabinet which permits to thermostate the rocking platform at 37 degrees throughout the incubations which may last multiple days
- Non-sharp forceps or spatula
- Standard polystyrene 12-well or 6-well plates
- 1-ml polypropylene “tuberculin” syringe without needle (for example, Becton Dickinson)
- Water bath
Optional equipment:
- Scalpels
- Steel or plastic dissection board
- Parafilm
- Refractometer
- Vacuum pump
- Digital photocamera which can focus at the samples (to document progress of clearing)
- Millimetre paper
- UniCore Punch Kit 3 mm (Merck, WHAWB100039)
- 1.5 ml microcentrifuge tube (Eppendorf)
Safety warnings
Handle all the chemicals with care and use appropriate personal protective equipment (PPE), accoding to manufacturer's instructions and your local regulations.
Follow institutional guidelines for the disposal of hazardous materials.
Ethics statement
Experiments involving animals must be conducted according to internationally-accepted standards and should always have prior approval from ethics committee(s) according to legistaion of your country. Please indicate that prior ethics approval should be obtained before performing these experiments.
Before start
Handle all the chemicals with care and use appropriate personal protective equipment (PPE), accoding to manufacturer's instructions and your local regulations
Follow institutional guidelines for the disposal of hazardous materials.
Preparation of the working solutions:
Fixative solution
Dilute commercial stock solution of paraformaldehyde in PBS to final concentration of 4% (w/w) and store the aliquotes at -20OC.
CUBIC L (delipidation solution 1)
Place N-butyldiethanolamine (10% of the target weight of the final solution), Triton X-100 (10% of the target weight of the final solution) and water (80% of the target weight of the final solution) in a suitable container
Tightly close the container and mix on a rocking platform at a slow rocking rate (below
10 rocking motions per min.) until the solution becomes transparent.
Note
Do not vortex the mixture. Do not sonicate the mixture.
CUBIC HL (delipidation solution 2)
Place 1,3-bis(aminomethyl)cyclohexane (10% of the target weight of the final solution), sodium dodecylbenzenesulfonate (10% of the target weight of the final solution) and water (<80% of the target weight of the final solution) in a suitable container
Tightly close the container and mix on a rocking platform at a slow rocking rate (below
10 rocking motions per min).
Note
Do not vortex the mixture. Do not sonicate the mixture.
Adjust pH of the mixture to 12.0 with 10 M solution of p-toluenesulfonic acid
Add the amount of water required to reach the target weight of the final solution
ScaleCUBIC-1 (delipidation solution 3)
Place urea (25% of the target weight of the final solution), N,N,N’,N’-tetrakis(2-hydroxypropyl) ethylenediamine (25% of the target weight of the final solution) and a small amount of water (4-5% of the target weight of the final solution) in a suitable container. Do not close it tightly
Incubate on a water bath at +80OC until complete dissolution of the components
Let the mixture to cool down to room temperature and then add Triton-X100 (15% of the target weight of the final solution)
Add the amount of water required to reach the target weight of the final solution (weight the solution after step 4.3 and calculate the required amount of water. Note that portion of water added at the step 4.1 could have evaporated during the step 4.2)
Tightly close the container and mix on a rocking platform at a slow rocking rate (below 10 rocking motions per min) until the solution becomes transparent
CUBIC RA (refractive index (RI) matching solution 1)
Place antipyrine (45% of the target weight of the final solution), N-methylnicotinamide (30% of the target weight of the final solution)) and water (< 25% of the target weight of the final solution) in a suitable container
Tightly close the container and mix on a rocking platform at a slow rocking rate (below 10 rocking motions per min) until the solution becomes transparent.
If nuclear staining with propidium iodide or SYBR Gold is planned, then add propidium iodide to CUBIC RA solution to final concentration of 10 mkg/ml, or dilute the commercial SYBR Gold stock solution 1:1000 in CUBIC RA and mix on a rocking platform
Note
Light sheet image acquisition should be performed in a dye-free refractive index matching solution, so nuclei stains should not be added to the aliquot of CUBIC RA solution which will be used to fill the light sheet microscope sample chamber.
ScaleCUBIC-2 (refractive index matching solution 2)
Place sucrose (50% of the target weight of the final solution), urea (25% of the target weight of the final solution), triethanolamine (10% of the target weight of the final solution) and water (< 5% of the target weight of the final solution) in a suitable container
Incubate on a water bath at +80OC until complete dissolution of the components
Let the mixture to cool down to room temperature and then add Triton-X100 (0.1% of the target weight of the final solution)
Add the amount of water required to reach the target weight of the final solution (weight the solution after step 6.2 and calculate the required amount of water. Note that portion of water added at the step 6.1 could have evaporated during the step 6.2)
Fixation
Place the dissected murine organ or fragment of tissue in a well of 12-well or 6-well plate on ice
Rinse the sample with cold PBS on ice to remove residual blood. Repeat rinsing with PBS until it is not getting colored with blood anymore.
Replace PBS with the fixative solution (4% PFA) and incubate overnight at +4°C in darkness
Move samples from fixative solution to cold PBS and rinse with cold PBS several times
Cut the specimen into the pieces using a scalpel on a dissection board, or or excise a cylindrical tissue core from the specimen, using a 3-mm UniCore punch kit
Note
Cutting the organ in pieces or excising a tissue core is only recommended if it does not compromise the morphology of the structure of interest. The present protocol is suitable for clearing whole adult mouse organs, such as brain or kidney. Thus we recommend cutting in pieces or excision of a tissue core because the thickness of the sample strongly influences the time required for delipidation, refractive index matching and staining steps. Moreover, the larger the sample, the more difficult mounting in LSFM sample chamber and acquisition of the 3D iamge datasets are.
Delipidation
Put the sample in the well of 6-well or 12-well plate, add PBS, place millimeter paper under the plate, take a photograph
Note
This is an optional step, recommended for documentation purposes
Add 3 ml of one of pre-warmed delipidation solutions (CUBIC L, CUBIC HL or ScaleCUBIC-1) into a 5 ml Eppendorf test tube
Note
In the original publication (Susaki et al 2018), CUBIC HL was used to clear large fragments of human tissue. We observed that murine tissues which are not optimally cleared in CUBIC L or ScaleCUBIC-1 can be cleared more efficiently with CUBIC HL. Thus we recommend to use CUBIC HL in such cases
Note
CUBIC HL bleaches fluorescent proteins, so this reagent should not be used if emission of a fluorescent protein will be acquired
Put each sample into individual 5 ml Eppendorf tube containing 3 ml of CUBIC L, CUBIC HL or ScaleCUBIC-1 solution.
Figure 1. A fragment of murine liver prepared for delipidation step
Fix the 5-ml Eppendorf tubes on a rocking platform (kept at +37OC) in a tilted or horizontal position.
Switch on slow rocking (below 60 rocking motions per min), keep the rocking platform at +37OC; protect the samples from light
Every day, visually inspect each tube with the sample. If CUBIC L, CUBIC HL or ScaleCUBIC-1 solution in the tube becomes colored or turbid, then replace it with fresh pre-warmed aliquot. Optionally take a photograph as described in the step 10. When the sample gets partially transparent, then proceed to the next step.
Figure 2. Expected result: fragments of murine organs after 9 days of delipidation.
Refractive index matching (optionally combined with nuclei staining)
Transfer the sample to PBS (pH 9.15)
Place sample in a well of 12-well plate, put the plate on millimeter paper, take a photograph
Rinse the sample in PBS (pH 9.15) 3 times, 15 min each time, on a rocking platform
Put the sample in a 5-ml Eppendorf tube containing 3 ml of a pre-warmed refractive index matching solution (CUBIC RA or ScaleCUBIC-2) which may optionally contain propidium iodide or SYBR Gold, if staining of the nuclei is needed
Fix the Eppendorf tubes on a rocking platform in a tilted or horizontal position
Switch on slow rocking (below 60 rocking motions per min), keep the rocking platform at +37OC; protect the samples from light
Visually inspect the tubes with samples every day. If refractive index matching solution became colored or opaque, then discard it, add fresh warm aliquot and continue incubation as described in the step 21. Optionally take a photograph as described in the step 10. If the sample appears transparent, then proceed to the next section. If the sample does not appear transparent, then continue incubation as described in the step 21.
Figure 3. Expected result. Fragments of murine organs (the same samples as on the Figure 2) after delipidation and refractive index matching combined with propidium iodide staining.
If a nuclear stain (propidium iodide or SYBR Gold) was present in a RI-matching solution at the steps 19-22, then transfer the sample to respective dye-free solution and incubate overnight at room temperature
Embedding samples in agarose for image acquisition on Zeiss Lightsheet.Z1 microscope
Cut the needle adapter off the barrel of 1 ml tuberculin syringe, such that the remaining part of the barrel has uniform diameter (as shown on the picture)
Figure 4. 1 ml syringe with needle adapter cut off, which can be used for embedding the samples in agarose
Dissolve agarose in PBS (pH 7.4), to obtain 2% solution (w/w).
Note
Do not dissolve agarose in a RI-matching solution
Put approximately 5 ml of the 2% agarose solution into the 15-ml falcon tube
Put the sample into the tube with the mentioned solution while it is still liquid
Aspirate the sample together with agarose solution into the 1 ml syringe pre-cut as shown on Figure 4
Leave the syringe at +4OC in darkness until agarose solidifies (The syringe serves as a mold in which cylinder of agarose will be formed)
Prepare a test tube whose inner diameter is several mm larger than the outer diameter of the 1 ml syringe (for example, 15 ml Falcon tube) half-filled with an RI-matching solution
- Optional. Building a plug-in sleeve (visible in the upper part of Figure 5) to fix the 1 ml syringe in the test tube: cut an opening in the cap of a 1.5 ml microcentrifuge (Eppendorf) tube. Remove the bottom (conical) portion of the tube; adjust the diameters of the openings so that they match the outer diameter of the syringe; insert the syringe through both openings of the microcentrifuge tube.
Immerse the syringe with agarose-embedded sample into the tube containing a RI-matching solution (CUBIC RA or ScaleCUBIC-2) and fix the syrninge such that its tip is at least 1 cm above the bottom of the tube, as shown on Figure 5
Push the plunger such that the cylinder of solidified agarose with the embedded sample partially exits the syringe and becomes immersed in the RI-matching solution
Note
Do not push the agarose cylinder completely out of the syringe. The cylinder should "hang" below the syringe
Seal the tube with syringe using Parafilm to minimize evaporation
Leave the syringe with the sample in the RI-matching at room temperature until the agarose cylinder becomes nearly invisible (overnight or longer)
Figure 5. Syringe with a cleared sample embedded in agarose, immersed in CUBIC RA solution.
When the agarose cylinder becomes transparent, pull it inside the syringe and proceed to installation of the syringe in the light sheet microscope sample holder for image acquisition
Note
When the sample is mounted as described above, it can be stored (before or after image acquisition) for at least several days, at +4OC, protected from light
Protocol references
1. Chemical Landscape for Tissue Clearing Based on Hydrophilic Reagents. Tainaka, Kazuki et al.
Cell Reports, Volume 24, Issue 8, 2196 - 2210.e9. DOI: 10.1016/j.celrep.2018.07.056
2. Whole-Brain Imaging with Single-Cell Resolution Using Chemical Cocktails and Computational Analysis. Susaki, Etsuo A. et al. Cell, Volume 157, Issue 3, 726 - 739. DOI: 10.1016/j.cell.2014.03.042