Aug 01, 2025
microCT Sample Bed Repair
- 1Fred Hutchinson Cancer Center


Protocol Citation: Elena Carlson 2025. microCT Sample Bed Repair. protocols.io https://dx.doi.org/10.17504/protocols.io.e6nvw4kn7lmk/v1
License: This is an open access protocol distributed under the terms of the Creative Commons Attribution License, which permits unrestricted use, distribution, and reproduction in any medium, provided the original author and source are credited
Protocol status: In development
We are still developing and optimizing this protocol
Created: August 01, 2025
Last Modified: August 01, 2025
Protocol Integer ID: 223914
Keywords: microCT, preclinical, ex vivo, imaging, high resolution imaging, high resolution, preclinical imaging, translational imaging, microct sample bed repair perkinelmer, broken tissue bed, tissue bed, adhesive curing, super glue, proper alignment during adhesive curing, adhesive, expensive replacement, broken piece, original broken component, paper, small acrylic sample, piece of paper, replacement part, available material, preclinical microct system
Abstract
PerkinElmer/Revvity preclinical microCT systems, including the Quantum, Quantum GX2, and GX3 models, feature a thin, small acrylic sample/tissue bed that is prone to breakage. While replacement parts are available, they come at a significant cost. This protocol outlines a simple, cost-effective method for repairing the broken tissue bed using readily available materials: super glue, a piece of paper, tape, and the original broken components. The paper serves as a temporary stabilizer, ensuring proper alignment during adhesive curing and minimizing the risk of further damage. This approach offers a practical solution for maintaining functionality without expensive replacements. If the broken pieces are simply glued back together, the circular piece tends to roll or shift away before the adhesive can cure.
Materials
- Rigaku SHR BED Item number A00004326 TJ00091569 (aka Sample/Tissue bed for Quantum GX/GX2/GX3 microCT preclinical scanner)
- Super glue
- Tape
- Small piece of paper
Paper Coupling Method for Sample Mount Assembly
Prepare the Paper Insert
Roll a piece of paper tightly so that its diameter is slightly smaller than the central opening of the sample mount holder (silver in metal piece in attached photo). This ensures a snug fit without tearing the paper when later inserting the plastic component. If needed, secure the rolled paper with tape to prevent it from expanding inside the tube.
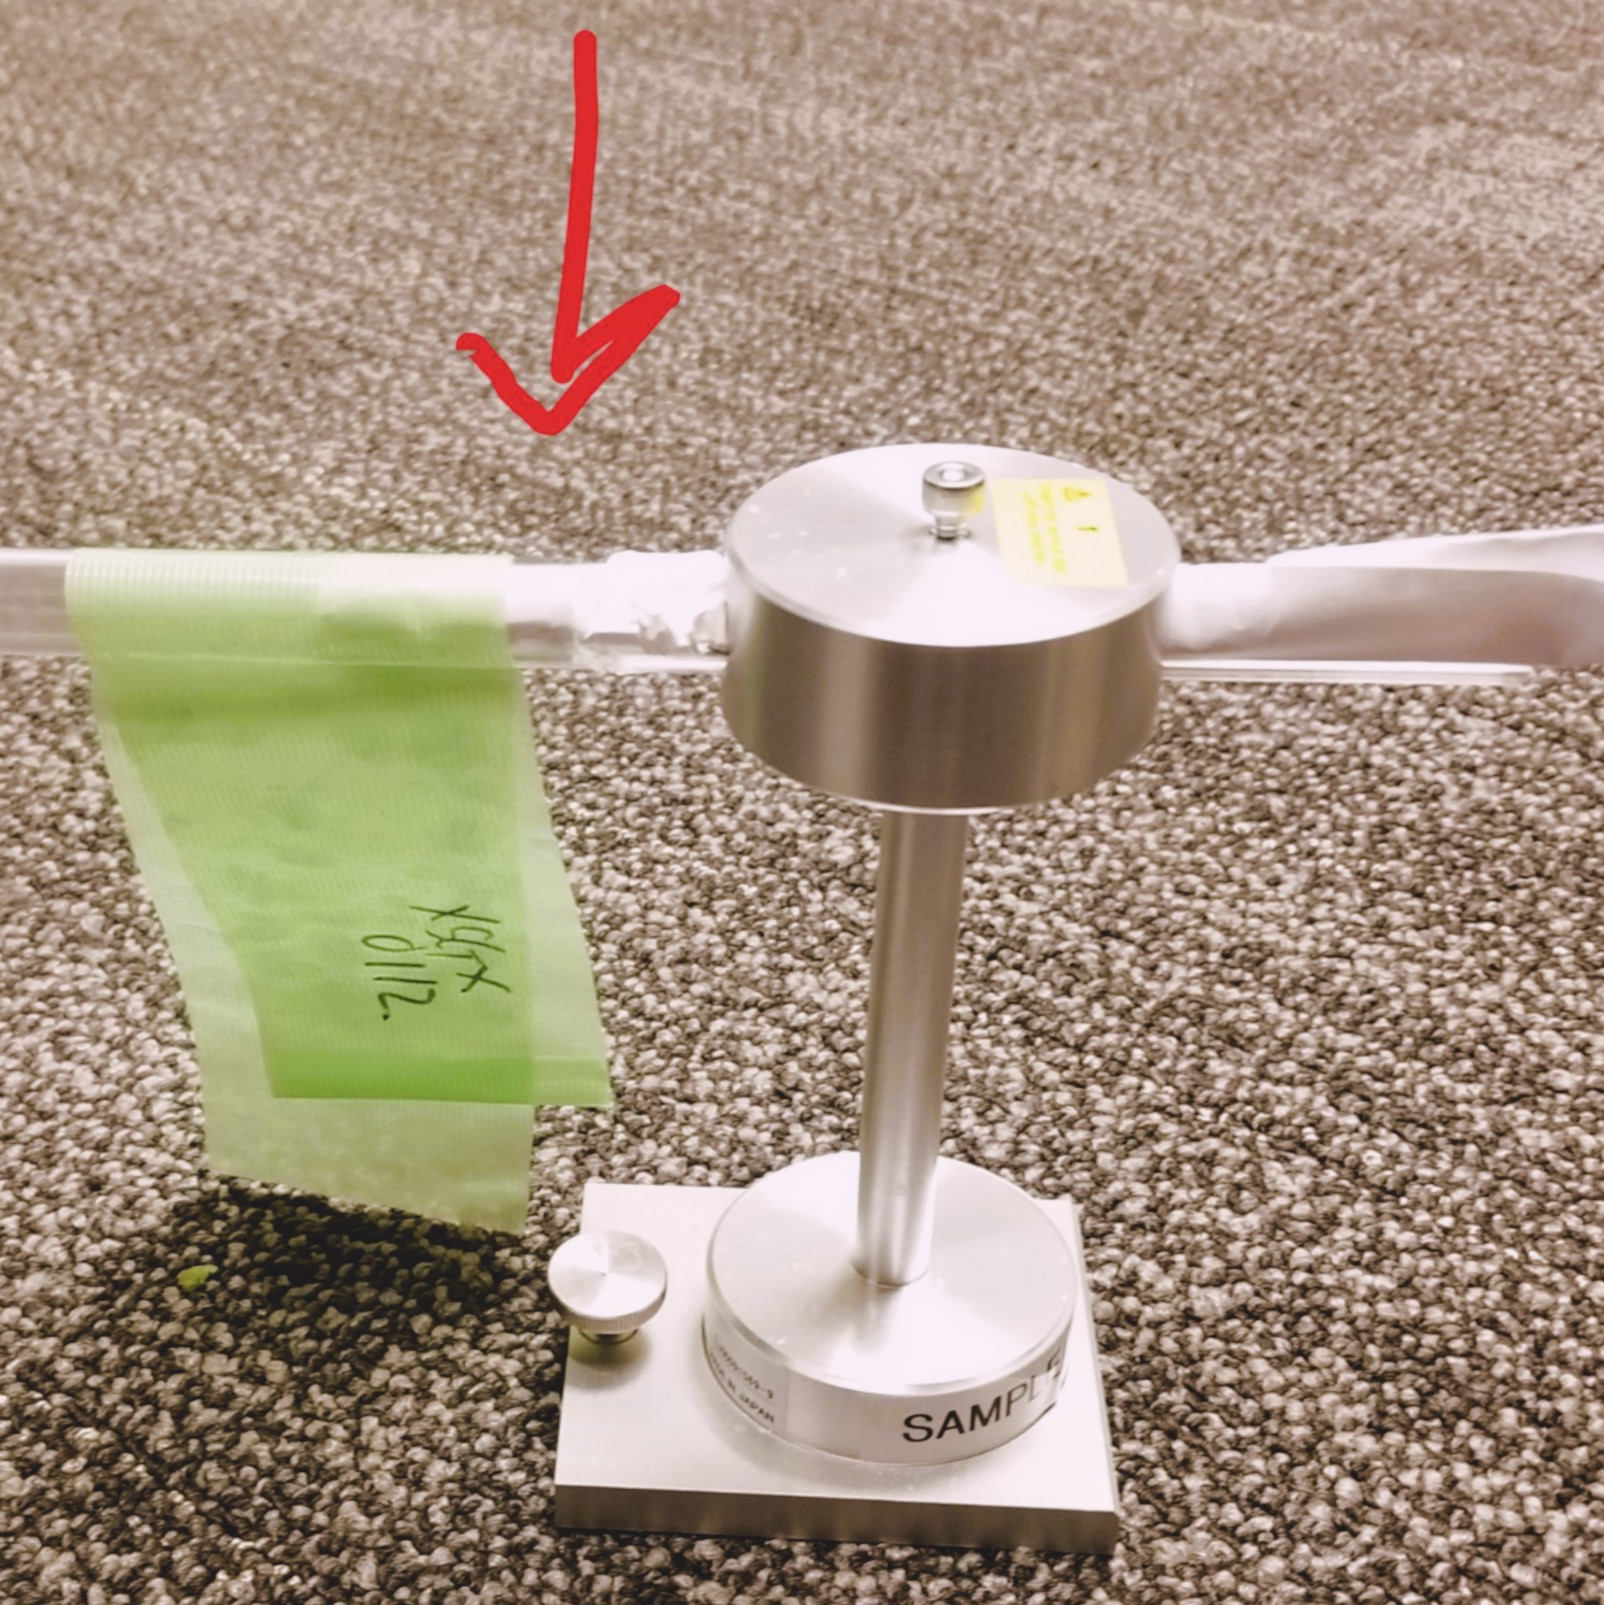
Paper tube in Tissue bed mount, with broken acrylic pieces fastened around the rolled up paper
Acrylic is broken at the spot marked by the red arrow above.
Insert the Broken Plastic Pieces through the hole mount, around the paper tube
Carefully position the rolled paper inside the circular tube. Proper alignment is crucial—if the tube is simply glued to the mount without stabilization, it may shift or roll before the adhesive cures.
Stabilize During Adhesive Curing
The paper acts as a temporary coupling mechanism, holding the circular tube in place within the mount holder. This stabilizes the components during the curing process, ensuring accurate alignment and a secure bond.
Final Assembly
Once the adhesive has fully cured, the broken pieces should stay glued together when you remove the whole assembly from the metal mount. The paper insert should be removed and the fixed acrylic placed back in the metal mount.