Jul 08, 2025
Microalgal Colony Blot - A Simple and Rapid Method for Direct Detection of Recombinant Proteins in Microalgae
Peer-reviewed method
- Yasin Torres-Tiji1,
- Francis J Fields1,
- Stephen Mayfield1
- 1University of California San Diego
- PLOS ONE Lab ProtocolsTech. support email: [email protected]


External link: https://doi.org/10.1371/journal.pone.0345458
Protocol Citation: Yasin Torres-Tiji, Francis J Fields, Stephen Mayfield 2025. Microalgal Colony Blot - A Simple and Rapid Method for Direct Detection of Recombinant Proteins in Microalgae. protocols.io https://dx.doi.org/10.17504/protocols.io.kxygx9k2kg8j/v1
Manuscript citation:
Torres-Tiji Y, Fields FJ, Mayfield SP (2026) Microalgal colony blot: A simple and rapid method for direct detection of recombinant protein production in microalgae colonies. PLOS One 21(3). doi: 10.1371/journal.pone.0345458
License: This is an open access protocol distributed under the terms of the Creative Commons Attribution License, which permits unrestricted use, distribution, and reproduction in any medium, provided the original author and source are credited
Protocol status: Working
We use this protocol and it's working.
Created: September 01, 2022
Last Modified: July 08, 2025
Protocol Integer ID: 69456
Keywords: ImmunoBlot, Dot-Blot, Nitrocellulose, Screening, Western Blot, Recombinant protein detection, Chlamydomonas reinhardtii, microalgae, High throughput, recombinant proteins in microalgae recombinant gene expression, microalgae recombinant gene expression, microalgal colony blot, green algae transgene, detection of recombinant protein expression, algal colonies per petri dish, recombinant protein expression, recombinant protein, recombinant strain production pipeline, recombinant gene expression, bottleneck in the recombinant strain production pipeline, significant levels of recombinant protein, suitable recombinant strain, many algal colony, algal colony, gene expression, nitrocellulose membrane, different algal transformant, rapid method for direct detection
Funders Acknowledgements:
US Department of Energy - Bioenergy Technologies Office
Grant ID: DE-EE0009671 (APEX)
Disclaimer
The authors disclose the following potential competing interests: Stephen Mayfield received funding from the U.S. Department of Energy and holds board membership as well as equity in Algenesis Inc.
Abstract
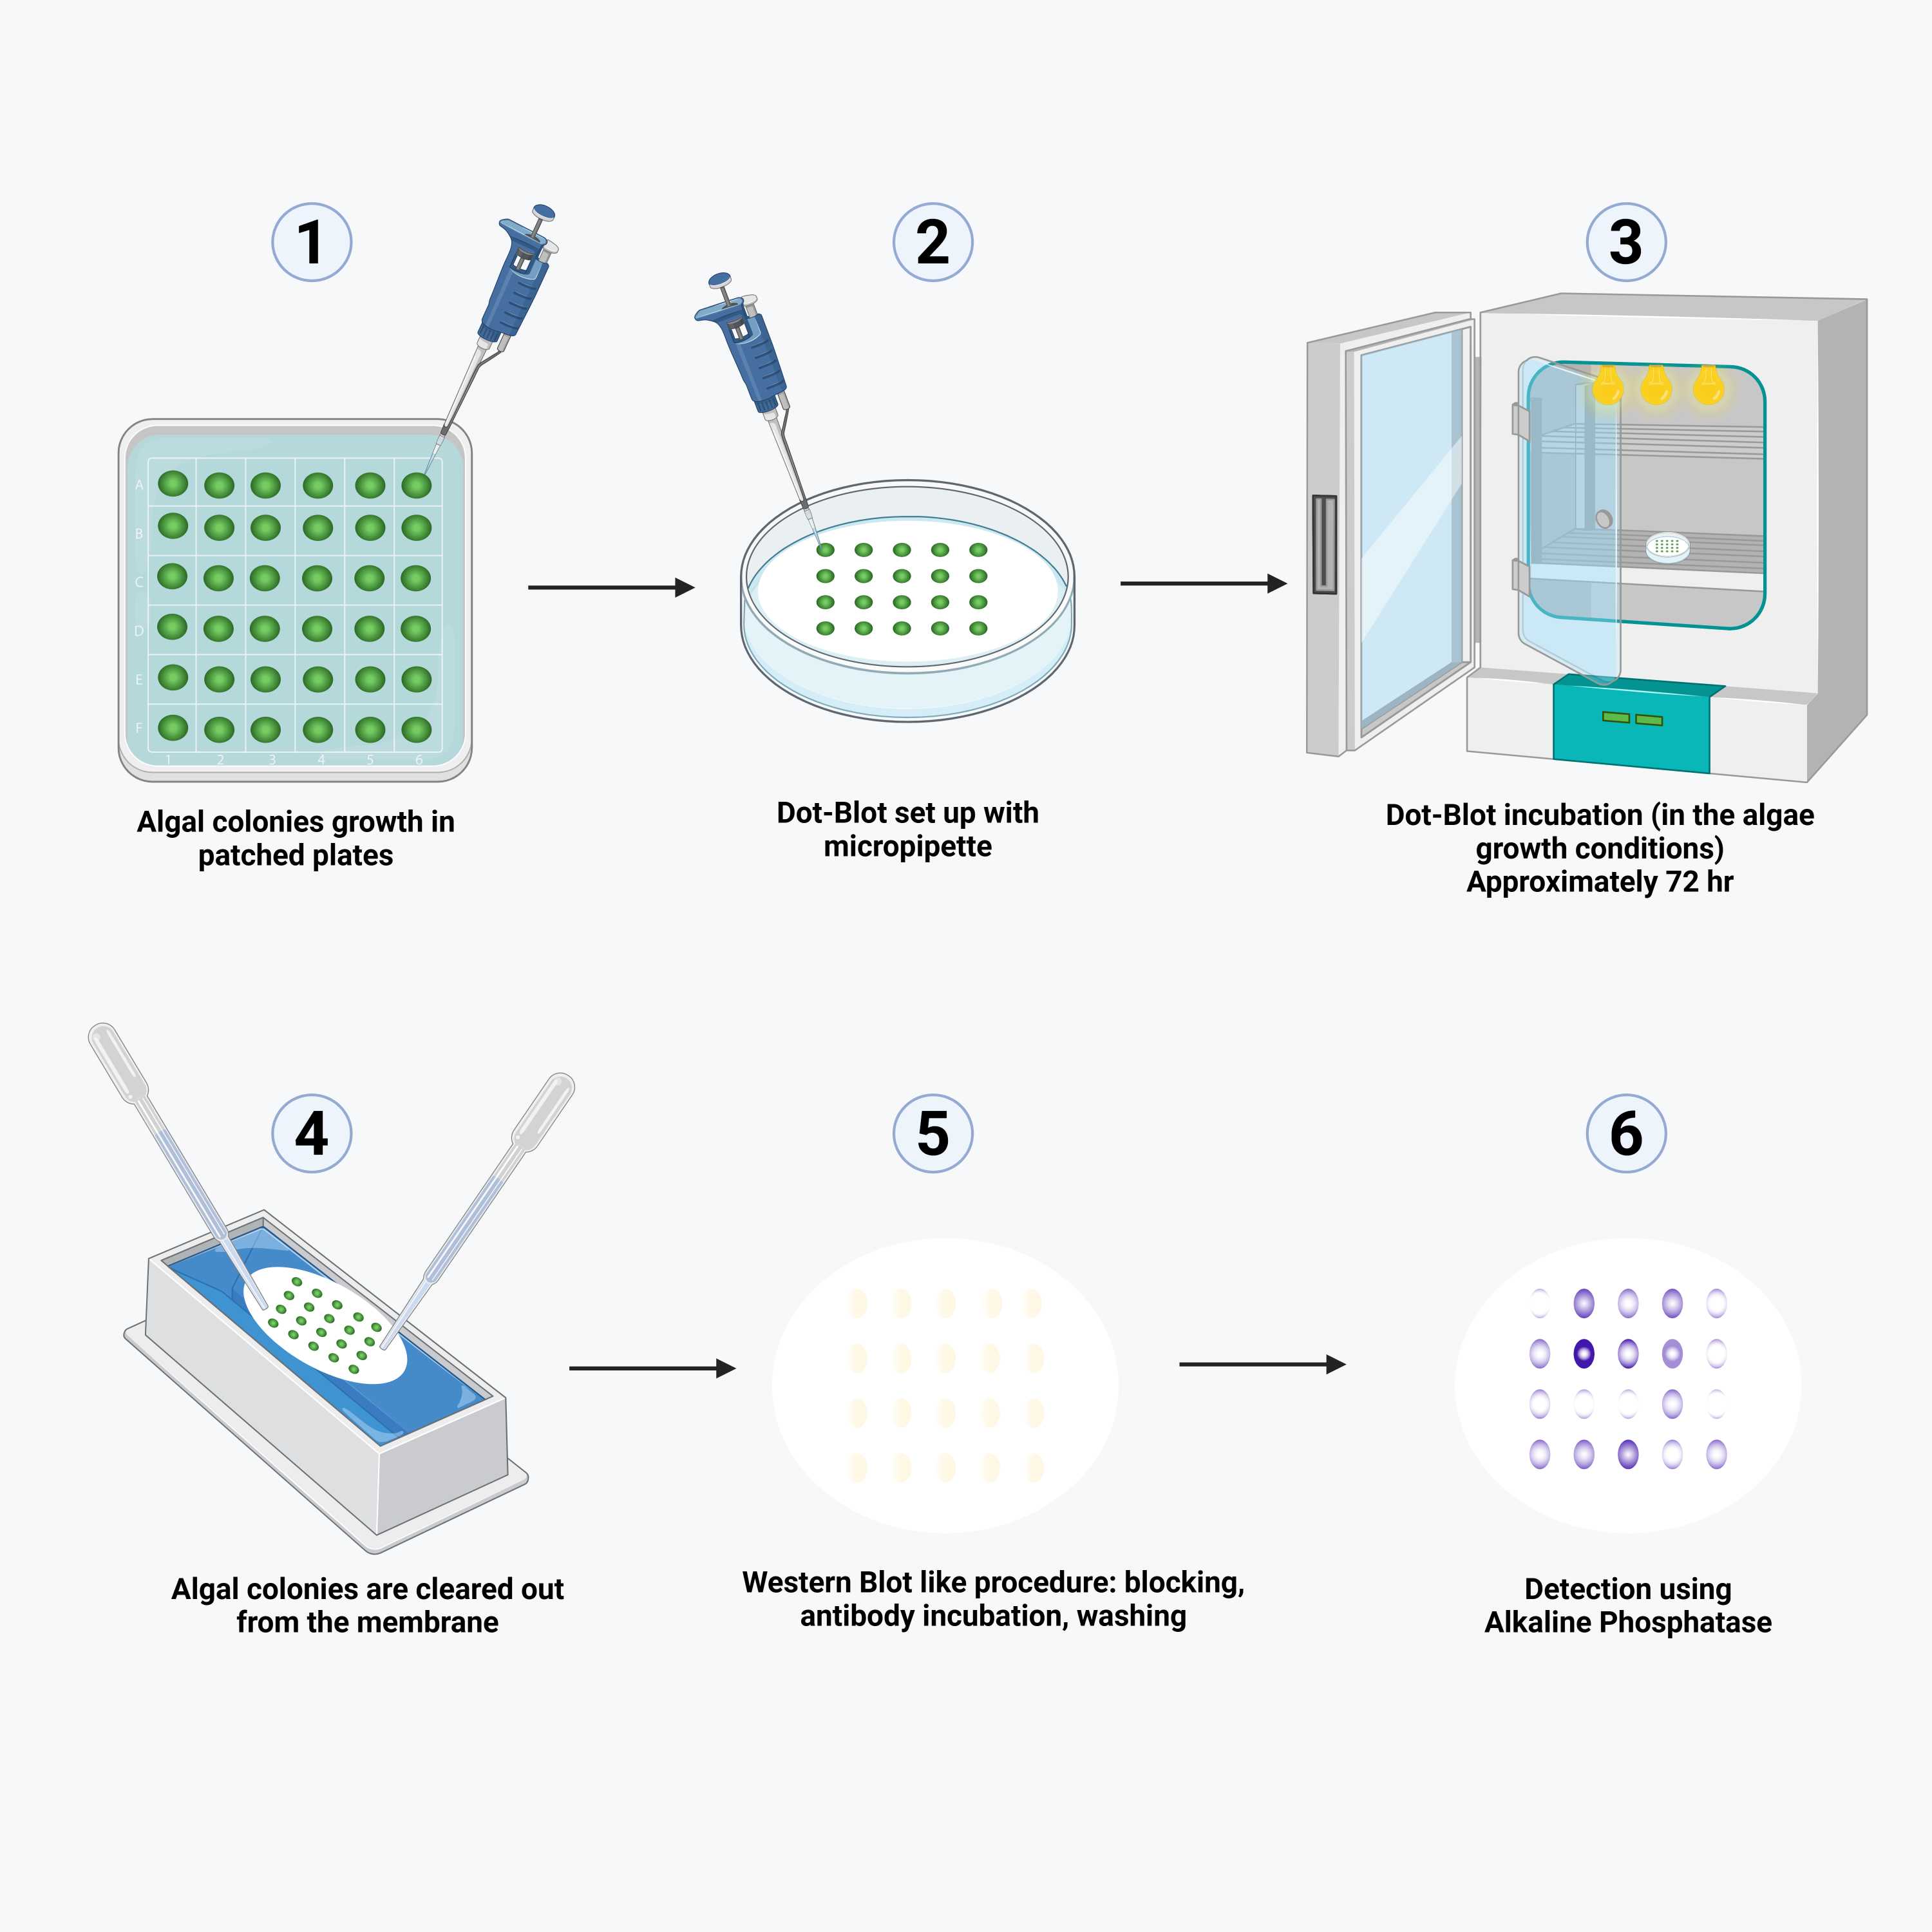
Recombinant gene expression highly depends on the loci in which the transgene integrates and in green algae transgenes integrate into the nuclear genome mostly through non homologous end joining. Therefore, recombinant gene expression varies greatly among different algal transformants and many algal colonies must be screened before a suitable recombinant strain can be found, which can be quite laborious and become a bottleneck in the recombinant strain production pipeline. In this manuscript a method for mid-throughput screening of recombinant protein expression is presented, the microalgal colony blot. This screening allows for the detection of recombinant protein expression of up to 100 algal colonies per petri dish, with each petri dish preparation taking only 20 minutes. A nitrocellulose membrane is fitted on top of a petri dish containing agar media and algal colonies are carefully placed on top using a micropipette. Plates are incubated for 1–7 days, depending on expected expression levels, providing a broad sensitivity range. While the colonies grow, they secrete the recombinant protein (either through active secretion or through cell lysis) which is immediately bound by the nitrocellulose membrane. After the incubation period, the membrane is processed and stained like a standard western blot. In this manner, up to 1000 colonies can be comfortably screened per preparation day and person. Given that only ~5% of C. reinhardtii transformants typically express significant levels of recombinant protein, screening 1,000 colonies rapidly ensures identification of high-expressing candidates.
Materials
- Nitrocellulose membrane
- Tris Saline Buffer with 1% Tween20 (TBST)
- Non-Fat Milk Protein powder
- Conjugated primary antibody, or primary and secondary antibodies. In this case, Anti-GFP Alkaline Phosphatase conjugated antibody was used.
- Plastic Pasteur pipette
- Petri dish
- Agar plates with selective antibiotic
- Ruler
- Pencil
- Scissors
- Wild-type algae that can be transformed
- Recombinant algae to be tested
- Recombinant algae control strain
- Plastic Pasteur pipette
- 70% ethanol
- Pipette p200 with disposable tips
- Biological Safety Cabinet
- NBT/BCIP Substrate solution
Before start
Previously, cells of the species Chlamydomonas reinhardtii need to have been transformed and plated on antibiotic selection agar plates, as described in this protocol: dx.doi.org/10.17504/protocols.io.bx5cpq2w.
This procedure is likely to work in cells of other species, like the newly discovered Chlamydomonas pacifica. As long as there is a protocol to transform and express recombinant DNA in an algal species, then this protocol should be applicable.
Once the cells have been transformed, you will wait for colonies to appear which can take between 5 to 7 days. Then, the colonies are patched in a fresh agar plate containing the antibiotic selection previously used. It is this patched plate that will be used as source of algal biomass for the Algal Immunoblot.
Dot-Blot preparation
Grab a ruler, a pencil, scissors and an empty petri dish and wipe them with 70% ethanol. Place them inside a clean biological safety cabinet, where the Algal Immunoblot preparation will take place.
5m
Cut a nitrocellulose membrane in the shape of a petri dish. Use an empty petri dish as guideline and draw a circle, or any other shape that fits the petri dish, around it is using a pencil. Then cut the shape 1 or 2 mm inside the circle to ensure that the membrane fits inside the petri dish. In this example a rectangular petri dish is employed for easier design.
5m
Draw a grid on the membrane with a pencil, with care not to break the membrane. It is possible to fit a 12 by 10 grid on a traditional 90 mm diameter petri dish if a rectangle of 6 cm by 5 cm is drawn on the membrane with squares that have a 0.5 cm side length.
10m
Place the membrane in an agar plate with the same antibiotic selection used for selection of transgenic colonies post transformation. Place the membrane slowly, with one side of it touching first. As the moisture from the agar moves onto the membrane through capillarity, place the membrane onto the agar. Make sure that no bubbles appear between the membrane and the agar.
1m
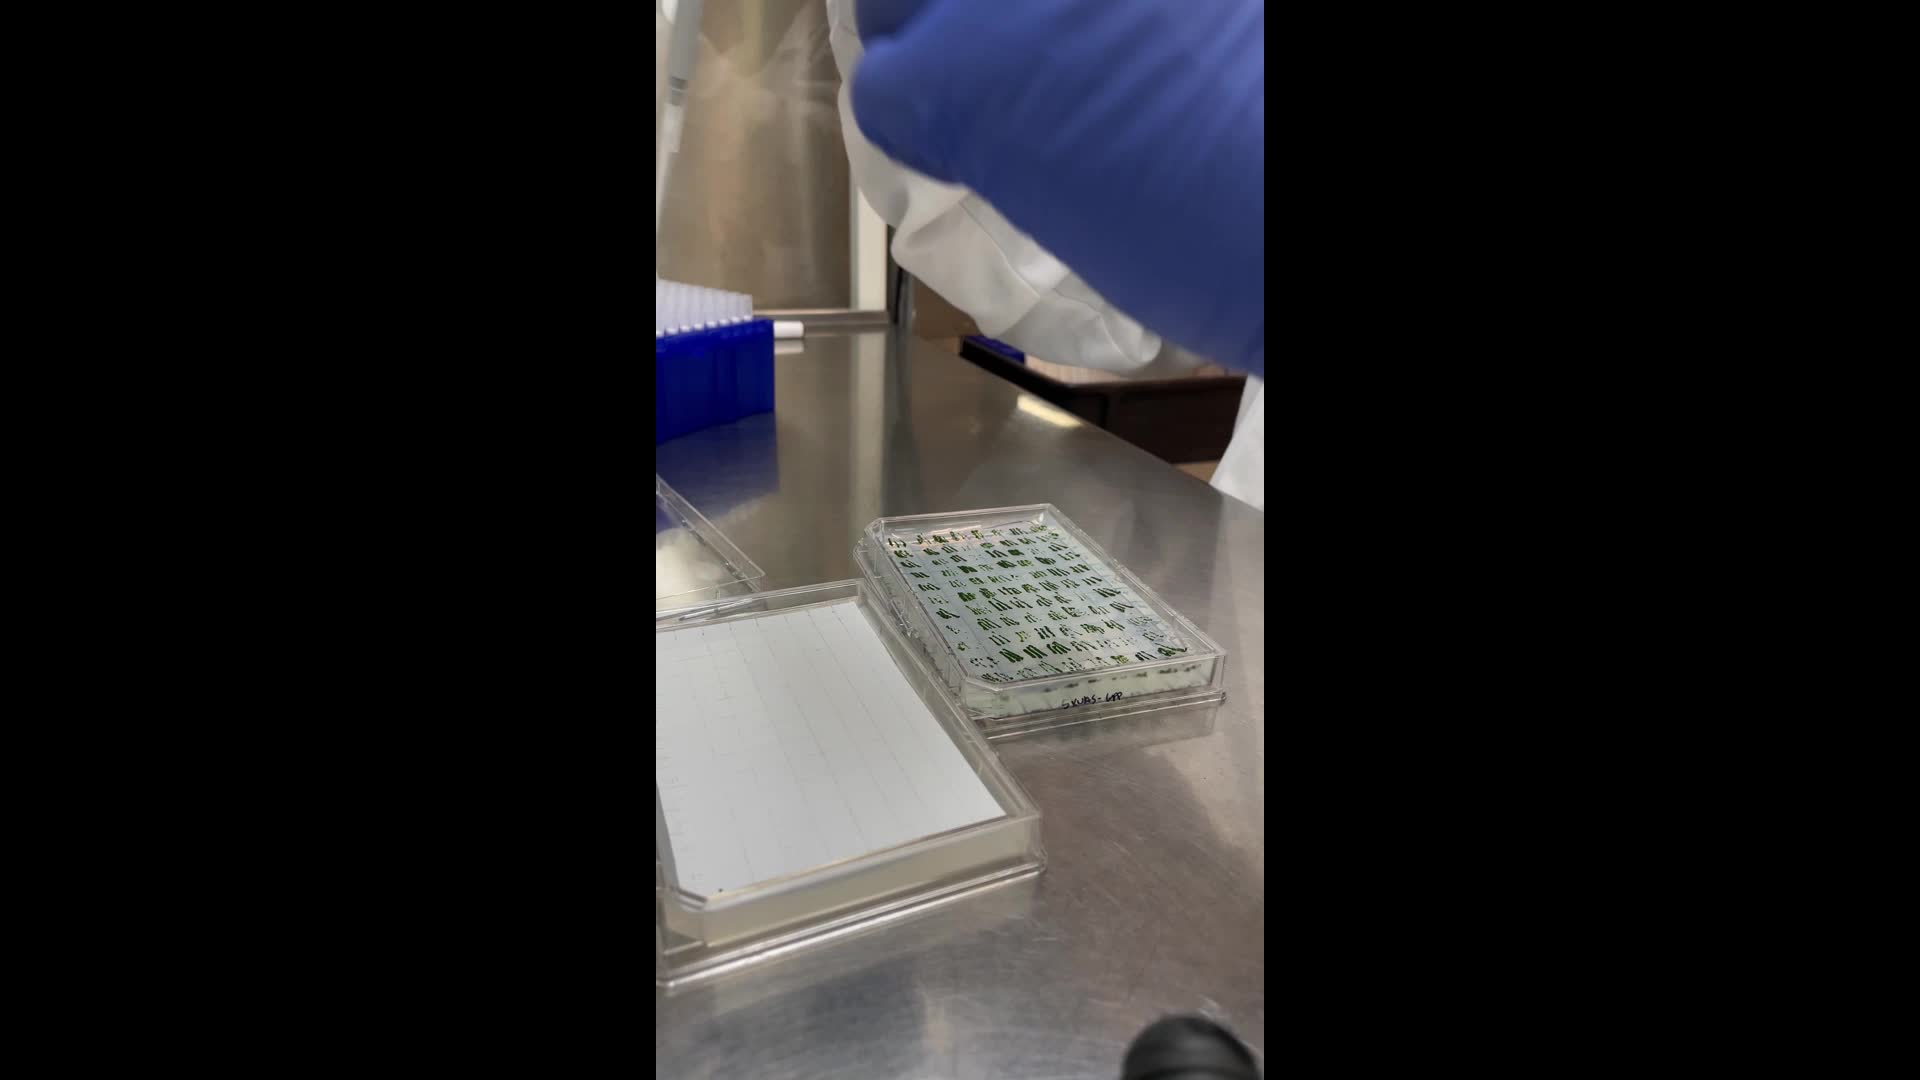
Have the grown patched plates with the algal clones to be tested ready. Make sure to also include a negative control in triplicate. A strain that harbors the same antibiotic selection as the one tested is preferred, as long as it does not express the recombinant protein being tested.
The grown patched plate next to the prepared microalgal colony blot can be seen in this picture:
Patched plate with colonies to be assayed on the left, microalgal colony blot right after preparation on the right.
1m
Using a P200 pipette, carefully fit algal biomass equivalent to 1 µl inside the pipette. Set the pipette to 200 µl, but do not try to use the pipette in the conventional manner (algae biomass is too viscous to be pipetted up), but rather press the tip against the algae biomass carefully so that algal biomass gets inside.
Place the tip of the pipette gently touching the surface of the nitrocellulose membrane, with care not to puncture it, and gently push the plunger as you lift the pipette from the surface. A cylinder or blob of algal biomass should be the result.
Watch the video for a demonstration.
20m
Incubation
Once the dot-blot has been prepared, incubate the plate in a growth room (temperature 25 - 30 Celsius with continuous lighting, just like for regular growth of C. reinhardtii cells in lab conditions) upside down like a regular petri dish.
The length of the incubation will determine the dynamic range of the assay. To detect strong protein expression 48 hr will suffice. This can be prolonged up to 144 hr or even more to increase the sensitivity of the assay.
3d
Dot-Blot Development
2h 50m
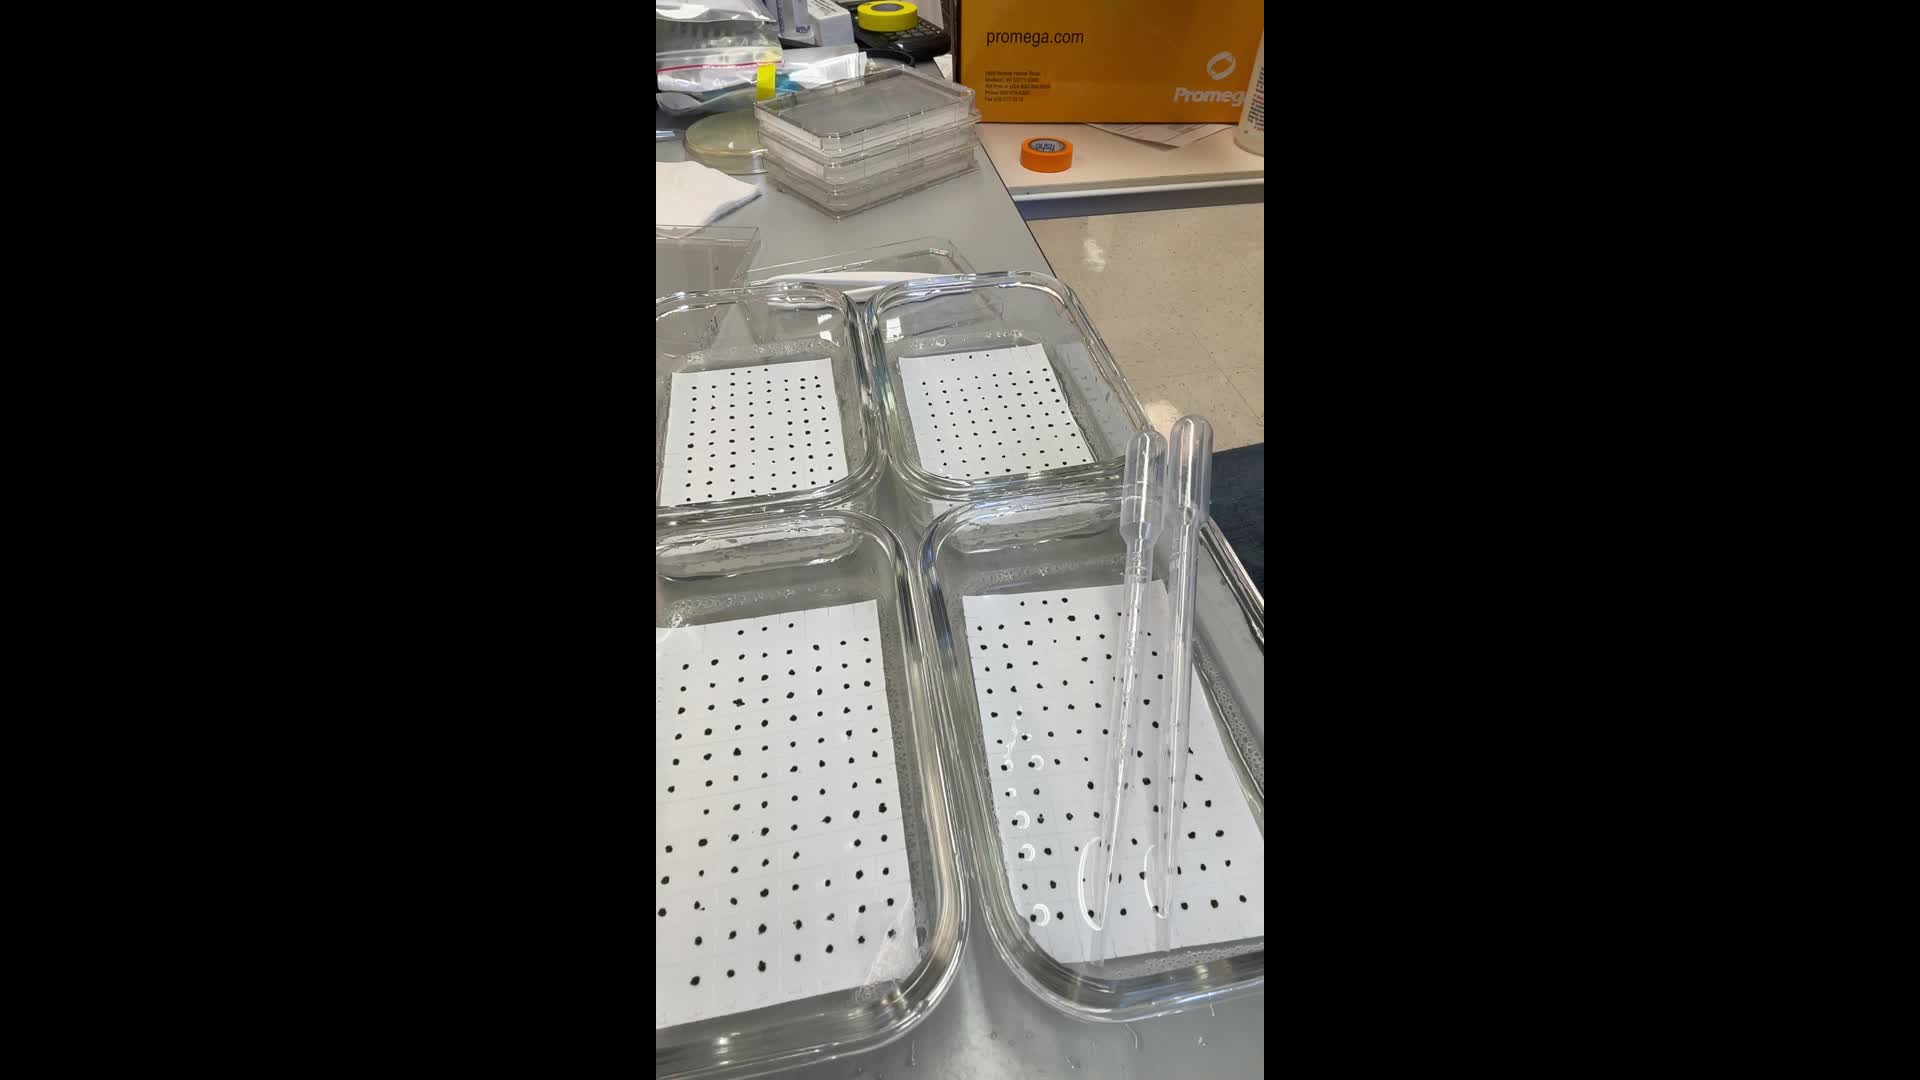
Wash off the cell lumps on top of the nitrocellulose membrane. To do this, employ TBST and a soft plastic pasteur pipette. Wash off as much cell debris as possible by placing the pipette tip right next to the colony and vigorously pipetting TBST. Gently scratch off any algal remains from the membrane using the tip of the pasteur pipette. Do not overdo it or the scratches will be visible at the end of the assay.
Watch the video for a demonstration.
5m
After this point, we treat the membrane as if it was a regular Western Blot after the transfer step. The protocol will be further described as if using an anti-GFP Alkaline Phosphate conjugated antibody.
Incubate the membrane with a Western Blot blocking solution for 1 hr on a rocking shaker at room temperature. Examples proven to work are Haycock Solution and TBST with 5% of non-fat milk powder.
1h
Discard the blocking solution and incubate the membrane with the primary antibody following the manufacturer's instructions. In this case we used anti-GFP AP at a dilution of 1:3000, and incubated it for 1 hour on a rocking shaker at room temperature.
1h
Wash three times for 10 minutes with TBST on a rocking shaker at room temperature.
30m
Develop the Immunoblot using a NBT/BCIP substrate solution. Add just enough to cover the membrane. Incubate with the solution on a rocking shaker at room temperature. The results can appear in under 30 seconds and can take up to 1 hour for the Dot-Blot to be fully stained. Monitor it continually for the first 5 minutes, then every 2 minutes for the next 10 minutes, and then every 10 minutes for the rest of the hour. Take pictures when the results are clearly visible but avoid waiting too long or the staining will become saturated.
Immunoblot being developed after adding 2 mL of NBT/BCIP substrate solution. Pictures were taken after: A - 0 minutes, B - 1 minute, C - 3 minutes, and D - 15 minutes.
15m
Acknowledgements
The authors would like to thank Professor Scott Biering at University of California San Diego for providing access to their inverted fluorescent microscope for cell imaging. The authors would also like to thank the US Department of Energy - Bioenergy Technologies Office for the continued funding support over the years.