Apr 13, 2026
Version 2
LAMP Protocol for Entomopathogenic Serratia spp. in Insect Frass - 2026 Update with Tissue Homogeniser V.2
- 1University of Melbourne;
- 2Zoos Victoria


Protocol Citation: Nicholas P Doidge 2026. LAMP Protocol for Entomopathogenic Serratia spp. in Insect Frass - 2026 Update with Tissue Homogeniser. protocols.io https://dx.doi.org/10.17504/protocols.io.bp2l69j7zlqe/v2Version created by Nicholas P Doidge
License: This is an open access protocol distributed under the terms of the Creative Commons Attribution License, which permits unrestricted use, distribution, and reproduction in any medium, provided the original author and source are credited
Protocol status: Working
We use this protocol and it's working
Created: April 10, 2026
Last Modified: April 13, 2026
Protocol Integer ID: 314852
Keywords: Frass, DNA extraction, LAMP, Serratia, Insect, Diagnostic, lamp protocol for entomopathogenic serratia spp, entomopathogenic serratia spp, serratia spp, associated serratia spp, dna extraction from folivorous insect, detection of insect, accuracy the lamp assay, positive species from the serratia, lamp assay, serratia, insect frass, frass of live insect, dna extraction, lamp protocol, insect, omnivorous insect, folivorous insect, live insect, bacterial separation, species
Abstract
A protocol for the detection of insect-associated Serratia spp. in the frass of live insects, using a LAMP assay targeting the ureD gene of urease-positive species from the Serratia marcescens complex. In order to improve the DNA extraction from folivorous insects a bacterial separation and concentration protocol has been developed prior to the DNA extraction, but this part of the protocol is not required for carnivorous and omnivorous insects. To improve accuracy the LAMP assay is conducted in triplicate, and a pH-linked calorimetric assay changes from pink to yellow for positive results. This protocol is potentially suitable for field applications with minimal equipment required.
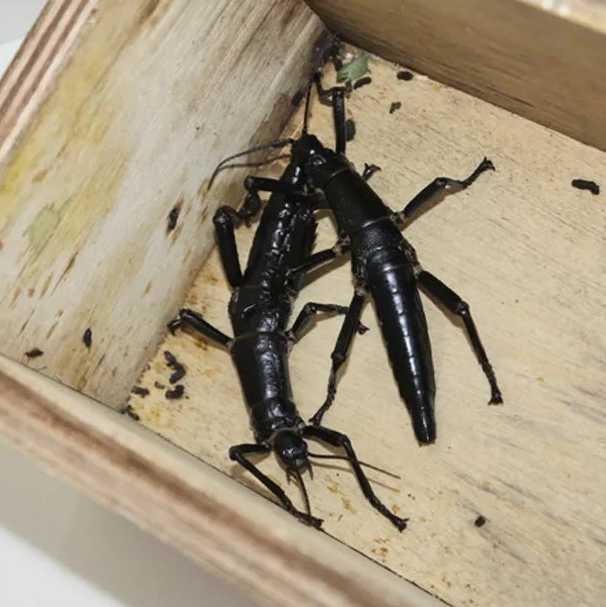
Image Attribution
Rohan Cleave, Zoos Victoria
Materials
Equipment Required:
-Pipettors and pipette tips in a range of sizes (1000 µL 100 µL 10 µL )
-Qiagen Tissue Lyser II, alternatively a high-speed horizontal vortex
-Low speed swing bucket centrifuge (500 x g ) (ideally but can be done without)
-High speed microcentrifuge (16000 x g )
-Equipment for measuring DNA concentration and quality (e.g. Thermo Fisher Nanodrop or Implen Nanophotometer)
-Heating element fitted to the tube size used for LAMP (PCR block, heating block, hot water bath)
-Access to a fridge (4 °C ) and freezer (-20 °C )
Materials Required (per extraction):
-5 x 1.5 mL microcentrifuge tubes
-5 mL sterile phospate buffered saline
-Sterile surface for handling frass (e.g. parafilm or petri dish)
-1 x sterile forceps (or reusable forceps sterilised between each pooled sample)
-1 x sterile pestle (Axygen Cat. AX-PES-15-B-SI-1)
-1 x 10 mL graduated centrifuge tube (ideally screw-top)
-1 x 2.0 mL round-bottomed microcentrifuge tube
-DNeasy PowerSoil Pro kit (Qiagen Cat. 47014/6)
-Molegular Grade water (MG H20)
-WarmStart® Colorimetric LAMP 2X Master Mix with UDG (NEB Cat. M1804S/L)
-LAMP Primers (IDT):
Serr_ureD_F3: ATCGCCTGACGCTCGA
Serr_ureD_B3: TAGAGCAGCGTCGCCGT
Serr_ureD_FIP: CTGCATCTGCGCCGCGTA-GCCTGCGGGCATGTCA
Serr_ureD_BIP: TCTGGAGATGATGCCCGATCCG-CGTAATGCGGGTATCGGTAA
Serr_ureD_LF: TGGCGTGGATCTTGGTCG
Serr_ureD_LB: CTGCGGTTCGCGCTTCA
-3 x 0.2 mL PCR tubes
Equipment and Materials Required
Equipment Required:
-Pipettors and pipette tips in a range of sizes (1000 µL, 100 µL, 10 µL)
-Tissue homogenizer (Pacific Laboratory Products PLP-SWE-G6 Homogenizer, alternatively Qiagen Tissue Lyser II or a high-speed horizontal vortex if not using tissue homogeniser)
-Low speed swing bucket centrifuge (500 x g) (ideally but can be done without)
-High speed microcentrifuge (16000 x g)
-Equipment for measuring DNA concentration and quality (e.g. Thermo Fisher Nanodrop or Implen Nanophotometer)
-Heating element fitted to the tube size used for LAMP (PCR block, heating block, hot water bath)
-Access to a fridge (4°C) and freezer (-20ºC) or ice to achieve these temperatures
Materials Required (per extraction):
-5 x 2.0 mL grinding tubes (alternatively 1.5 mL microcentrifuge tubes)
-5 mL sterile phospate buffered saline
-1 x 4mm and 2 x 3mm steel grinding beads (alternatively 1 x sterile pestle for manual homogenization)
-Sterile surface for handling frass (e.g. parafilm or petri dish)
-1 x sterile forceps (or reusable forceps sterilised between each pooled sample)
-1 x 10 mL graduated centrifuge tube (ideally screw-top)
-1 x 2.0 mL round-bottomed microcentrifuge tube
-DNeasy PowerSoil Pro kit (Qiagen Cat. 47014/6)
-Molecular Grade water (MG H20)
-WarmStart® Colorimetric LAMP 2X Master Mix with UDG (NEB Cat. M1804S/L)
-LAMP Primers (IDT):
Serr_ureD_F3: ATCGCCTGACGCTCGA
Serr_ureD_B3: TAGAGCAGCGTCGCCGT
Serr_ureD_FIP: CTGCATCTGCGCCGCGTA-GCCTGCGGGCATGTCA
Serr_ureD_BIP: TCTGGAGATGATGCCCGATCCG-CGTAATGCGGGTATCGGTAA
Serr_ureD_LF: TGGCGTGGATCTTGGTCG
Serr_ureD_LB: CTGCGGTTCGCGCTTCA
-3 x 0.2 mL PCR tubes
Bacterial Separation and Concentration
Collect 300 mg fresh frass sample per DNA extraction and store at 20ºC until processing.
Note
This protocol has been developed for folivorous insects such as phasmids and larval lepidopterans. Carnivorous and omnivorous insects are not likely to require bacterial separation and concentration, so the protocol can commence with 300 mg of crude frass added directly to the PowerBeads tube (Step 13) in the DNA Extraction section.
Note
The following protocol is for one pooled frass sample and one DNA extraction. Scale up as required. You may choose to do one or more DNA extractions for each pooled frass sample.
If you conduct multiple extractions on one pooled sample, you may use the same surface, forceps and pestle without sterilising between.
Add 1.0 mL sterile phosphate buffered saline (PBS) to each of five 2.0 mL grinding tubes (or 1.5 mL microcentrifuge tubes for manual homogenization).
Add 1 x 4mm and 2 x 3mm steel grinding beads to the grinding tubes containing PBS if using tissue homogeniser. If using manual homogenization proceed to next step.
Tip out frass sample onto a sterile surface (e.g. parafilm or petri dish) and using sterile forceps add approximately 60 mg frass (for D.australis approximately 2 adult, 8 subadult or 17 juvenile frass pieces) to each of five grinding tubes (300 mg total).
Note
Different life stages of insect produce frass pieces of significantly different sizes. For maximum accuracy count the frass pieces in 1 gram of your pooled sample, then calculate the average mass / frass piece and calculate the number of frass pieces in 60 mg. We previously calculated that frass from adult D. australis is approximately 30 mg/piece, from subadults 8 mg/piece, and juveniles 3.6 mg/piece. Therefore, for D. australis you can use the above estimates for 60 mg frass added to each microcentrifuge tube.
Note
If using reusable forceps disinfect them between each of the pooled frass samples you are testing. We generally scrubbed with Virkon if there was gross contamination, then rinsed with tap water, dried, and sterilised with 70-80% ethanol and flame.
Homogenise samples using Pac Lab Homogenizer on Plant Stem (60 Hz for 60 sec x 3 with 15 sec pause between cycles) or Plant Leaf (60 Hz for 45 sec x 3 with 15 sec pause between cycles) Protocols. If using manual homogenization: Using one sterile pestle for each pooled frass sample crush the sample in each tube until well homogenised in the PBS. A 100 µL pipette tip can be used to separate crushed frass from the bottom of the tube and assist with homogenization.
Transfer the contents of all five grinding or microcentrifuge tubes into one 10 mL graduated centrifuge tube. If using larger than 10 mL centrifuge tubes it will be difficult not to contaminate the pipettor unless you use longer (e.g. 1250 µL) pipette tips.
Mix the 10 mL tube well by shaking. Using a large swing bucket centrifuge spin down the graduated centrifuge tube at 500 x g for 5 mins.
Note
This slow centrifugation should separate most of the plant and insect material in the frass into the pellet while leaving most of the bacterial cells suspended in the supernatant.
Note
If a swing bucket centrifuge is not available stand the mixed 10 mL tube upright at 4ºC for 60 min to allow the pellet to settle, then proceed with the following steps but without mixing again between transfers of supernatant.
Using a 1000 µL pipette tip transfer up to 1.8 mL (2 x 900 µL) of supernatant to a clean 2.0 mL round-bottom microcentrifuge tube. To maximise bacterial yield, aspirate close to the pellet without disturbing it.
Pellet the supernatant in the 2.0 mL tube using a standard microcentrifuge at up to 16000 x g at room temperature for 5 mins. Carefully discard most of the supernatant from the 2.0 mL tube, taking care not to disturb the bacterial pellet.
Repeat Steps 9-11, adding to the same 2.0 mL tube. If significant supernatant is still present in the 10 mL tube, can repeat Steps 9-11 a third time to maximise bacterial cell yield.
DNA Extraction
Briefly spin the PowerBead Pro tube to ensure the beads have settled at the bottom of the tube.
Note
This Protocol is adapted from the DNeasy PowerSoil Pro Kit Handbook
Perform all steps of the DNA extraction at room temperature.
Solution CD2 must be stored at 4ºC, all other reagants in the PowerSoil Pro kit should be stored at room temperature.
If Solution CD3 has precipitated, heat it at 60ºC until the precipitate dissolves.
When preparing for the DNA extraction for each extraction you will need 1 x 2.0 mL PowerBead tube, 2 x 2.0 mL microcentrifuge tubes, 1 x MB Spin Column, 2 x 2.0 mL collection tubes and 1 x 1.5 mL elution tube.
Using a 1000 µL pipette tip re-homogenise the bacterial cell pellet in 800 µL of Solution CD1, then transfer all the contents of the 2.0 µL tube to a PowerBead tube. Shake briefly to mix.
Conduct cell disruption and lysis by shaking the PowerBead tube in the Pac Lab Tissue Homogenizer or Qiagen Tissue Lyser II at 25 Hz for 10 mins.
Note
If no Tissue Homogenizer or Tissue Lyser is available a horizontal vortex at max speed for at least 10 min may be used.
Centrifuge the PowerBead tube at 15000 x g for 1 min. Transfer the supernatant to a clean 2.0 mL microcentrifuge tube. Expect 500 µL to 700 µL supernatant, which may contain some frass particles.
Add 200 µL Solution CD2 and mix well by gentle pipetting.
Centrifuge the 2.0 mL tube at 15000 x g for 1 min. Avoiding the pellet, transfer up to 700 µL supernatant to a clean 2.0 mL microcentrifuge tube.
Add 600 µL of Solution CD3 and mix well by gentle pipetting.
Load 660 µL of lysate into an MB Spin Column. Centrifuge at 15000 x g for 1 min.
Discard the flow-through and repeat the step above to ensure all of the lysate has passed through the spin column.
Carefully place the spin column into a clean 2.0 mL collection tube. Take care not to splash any of the flow-through onto the spin column.
Add 500 µL of Solution EA to the spin column. Centrifuge at 15000 x g for 1 min.
Discard the flow-through and place the spin column back into the same 2.0 mL collection tube.
Add 500 µL of Solution C5 to the spin column. Centrifuge at 15000 x g for 1 min.
Discard the flow-through and place the spin column into a clean 2.0 mL collection tube. Centrifuge at 16000 x g for 2 min.
Carefully place the spin column into a clean 1.5 mL elution tube, without allowing any flow-through to be transferred to the new tube on the spin column. Carefully add 100 µL of MG H20 to the centre of the white filter membrane in the spin column. Centrifuge at 15000 x g for 1 min.
Discard the spin column. The DNA is now contained in the flow-though and ready to be used. If not using immediately, store at -20ºC. Measure the concentration and quality of extracted DNA using spectrophotometry (e.g. Thermo Fisher Nanodrop or Implen Nanophotometer).
LAMP Assay
Prepare a positive control of Serratia ureilytica AM923 DNA at a concentration of app. 50 ng/µL. Can be stored at 4°C for up to 7 days.
Make up stock solutions of the LAMP primers using MG H20. Add the same amount of MG H20 to the dried primers as the primer amount in moles to make 1000 µM stock solutions. Dilute the F3, B3, LF and LB primers 1:10 to make 100 µM working stocks.
Prepare a 25X LAMP Primer Mix using the LAMP worksheet. The Primer Mix can be stored at -20ºC for use in multiple assays.  LAMP_Spreadsheet_Master.xlsx13.8KB
Prepare the working Master Mix using the LAMP worksheet, with MG H2O, 1 X LAMP Master Mix and 1 X LAMP Primer Mix. Use 2 or 3 LAMP assays per extraction (duplicate or triplicate) to ensure confidence in the results. LAMP_Spreadsheet_Master.xlsx13.8KB
Vortex the working Master Mix thoroughly and spin briefly. Transfer 23 µL of Master Mix to each of the PCR tubes. Add 2 µL of MG H2O to the negative control tubes and close the caps on the negative controls.
Add 1 µL DNA sample to each of the tubes, including the positive controls loaded last to minimise false positives. Close all caps snugly and briefly spin down the PCR tubes to ensure the DNA sample is in contact with the Master Mix.
Note
We add the 1 µL DNA samples to the open caps of the PCR tubes, then close the caps and spin down the tubes. This helps to visualise that the sample has definitely been added to the tubes, but do whatever you are most comfortable with.
Incubate the LAMP assays for 30 min at 65ºC.
Note
In a laboratory this is most easily done on a PCR block, but could be done on a heat block sized correctly to the microcentrifuge tubes being used, or in a hot water bath.
At the end of the 30 min incubation, the results of the LAMP assays can be interpreted and photographed.
Expected result
Yellow = Positive
Pink = Negative
Orange = Inconclusive
The LAMP products can be stored at 4ºC for several months, but over time the amplification products will break down, affecting the pH and changing the colour. If left at room temperature the products will break down and cause colour change much faster.
Note
Any opening of the tubes containing LAMP products (i.e. to run on an agarose gel) should be done with caution, as the very high yield of amplification products by LAMP can easily contaminate a workspace with LAMP products.