Aug 27, 2025
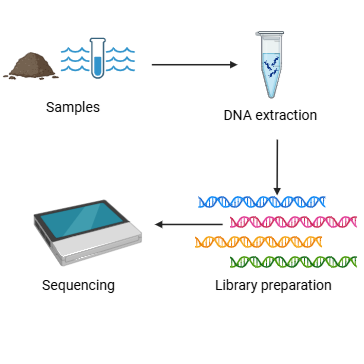
In situ species-level sequencing of seawater and sediment
- 1Instituto de Biotecnología, UNAM


Protocol Citation: Laura C. Martinez, Nallely Magaña-Montiel, Ricardo Grande, Liliana Pardo-López 2025. In situ species-level sequencing of seawater and sediment . protocols.io https://dx.doi.org/10.17504/protocols.io.261ge5endg47/v1
License: This is an open access protocol distributed under the terms of the Creative Commons Attribution License, which permits unrestricted use, distribution, and reproduction in any medium, provided the original author and source are credited
Protocol status: Working
We use this protocol and it's working
Created: June 18, 2024
Last Modified: August 27, 2025
Protocol Integer ID: 102054
Keywords: Marine water, Marine sediment, DNA extraction, 16S gene, Nanopore , dna from marine sediment, level sequencing of seawater, marine sediment, identification of the microorganism, sequencing data, 16s gene dna library, preparation of 16s gene dna library, microorganism, oceanographic research vessel, minion mk1c sequencer, oxford nanopore, water sample, nanopore, seawater, oxford nanopore technology, sediment, dna, subsequent sequencing, level sequencing, methodology for the extraction, tris buffer, situ species, extraction, sequence, gulf of mexico
Funders Acknowledgements:
CONAHCYT Master Scholarship
Grant ID: 1321139
LANCO-CONAHCyT
Grant ID: APOYOS LNC-2023-80
DGAPA-PAPIIT
Grant ID: IG200223
Abstract
This protocol outlines a methodology for the extraction of DNA from marine sediment and water samples collected in the Gulf of Mexico. It further details the preparation of 16S gene DNA libraries and their subsequent sequencing using the Oxford Nanopore Technologies (MinION Mk1C sequencer) aboard an oceanographic research vessel. It has been observed that the addition of water to the reactions may result in the fragmentation of the sequence into two parts; therefore, Tris buffer is used instead of water. The sequencing data can be used for the identification of the microorganisms present in the samples.
Image Attribution
Marine Biotechnology Laboratory - IBT-UNAM
Materials
PCR Barcoding Expansion 1–96Oxford Nanopore TechnologiesCatalog #EXP-PBC096
LongAmp Taq 2X Master Mix - 100 rxnsNew England BiolabsCatalog #M0287S
ZymoBIOMICS Lysis SolutionZymo ResearchCatalog #D4300-1-150
Q5 High-Fidelity 2X Master Mix - 100 rxnsNew England BiolabsCatalog #M0492S
ZymoBIOMICS DNA Binding BufferZymo ResearchCatalog #D4300-2-100
ZymoBIOMICS HRC Prep SolutionZymo ResearchCatalog #D4300-7-30
ZymoBIOMICS DNA Wash Buffer 2Zymo ResearchCatalog #D4300-4-60
UltraPure Low Melting Point AgaroseThermo Fisher ScientificCatalog #16520050
ZymoBIOMICS DNA Wash Buffer 1Zymo ResearchCatalog #D4300-3-50
Zymo-Spin III-HRC FiltersZymo ResearchCatalog #C1058-50
Zymo-Spin III-F FilterZymo ResearchCatalog #C1057-50
Zymo-Spin IICR Columns Zymo ResearchCatalog #C1078-50
ZR BashingBeadTM Lysis Tubes (0.1 & 0.5 mm)Zymo Research
Protocol materials
ZymoBIOMICS DNA Binding BufferZymo ResearchCatalog #D4300-2-100
Zymo-Spin III-HRC FiltersZymo ResearchCatalog #C1058-50
ZymoBIOMICS HRC Prep SolutionZymo ResearchCatalog #D4300-7-30
Zymo-Spin III-F FilterZymo ResearchCatalog #C1057-50
Zymo-Spin IICR Columns Zymo ResearchCatalog #C1078-50
ZymoBIOMICS DNA Wash Buffer 2Zymo ResearchCatalog #D4300-4-60
UltraPure™ Low Melting Point AgaroseThermo Fisher ScientificCatalog #16520050
ZymoBIOMICS DNA Wash Buffer 1Zymo ResearchCatalog #D4300-3-50
PCR Barcoding Expansion 1–96Oxford Nanopore TechnologiesCatalog #EXP-PBC096
LongAmp Taq 2X Master Mix - 100 rxnsNew England BiolabsCatalog #M0287S
ZR BashingBeadTM Lysis Tubes (0.1 & 0.5 mm)Zymo Research
Q5 High-Fidelity 2X Master Mix - 100 rxnsNew England BiolabsCatalog #M0492S
ZymoBIOMICS Lysis SolutionZymo ResearchCatalog #D4300-1-150
Safety warnings
The flow cell must be kept at a temperature range of 2-8 °C to ensure proper functionality.
Before start
Since this protocol is carried out on board a research vessel, it is necessary to ensure that all necessary materials and equipment are on board before setting sail.
It has been observed that the addition of water to the PCR reactions may result in the fragmentation of the sequence; therefore, in this protocol Tris buffer is used instead of water.
DNA extraction
29m
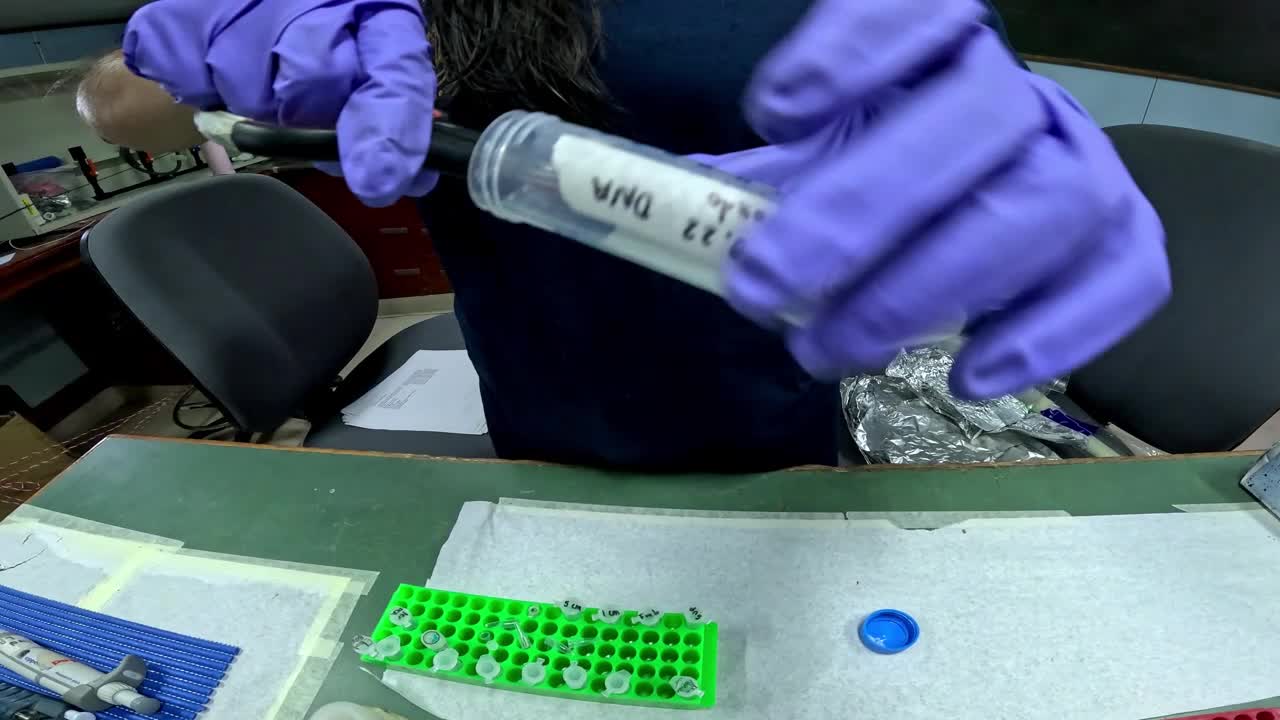
Add the sample to the lysis tube ZR BashingBead. Add 750 µL of ZymoBIOMICS Lysis SolutionZymo ResearchCatalog #D4300-1-150 to the tube and cap.
| A | B | |
| Sample type | Maximun input | |
| Soil | 250 mg | |
| Liquid samples | 250 μl |
For seawater samples, first use a membrane filter with the desired pore size to collect enough cells for the DNA extraction.
Note
To ensure optimal homogenization, the membrane filters were initially shredded and then placed in Falcon tubes, prior to addition of lysis solution.
The sediment sample from 5 cm exhibited excessive viscosity, the addition of water before add the lysis buffer, was necessary.
The DNA extraction was made following the ZymoBIOMIC DNA Miniprep Kit protocol.
For more information on the filtration process, please refer to the protocol "Water and sediment sampling in the sea to discover marine bacteria" (https://www.protocols.io/edit/water-and-sediment-sampling-in-the-sea-to-discover-dx4w7qxe)
Vortex for 00:15:00 .
Transfer the lysis solution in the Falcon tube to the ZR BashingBeadTM Lysis Tubes (0.1 & 0.5 mm)Zymo Research
Note
The sediment samples do not require to be transfer to another tube.
15m
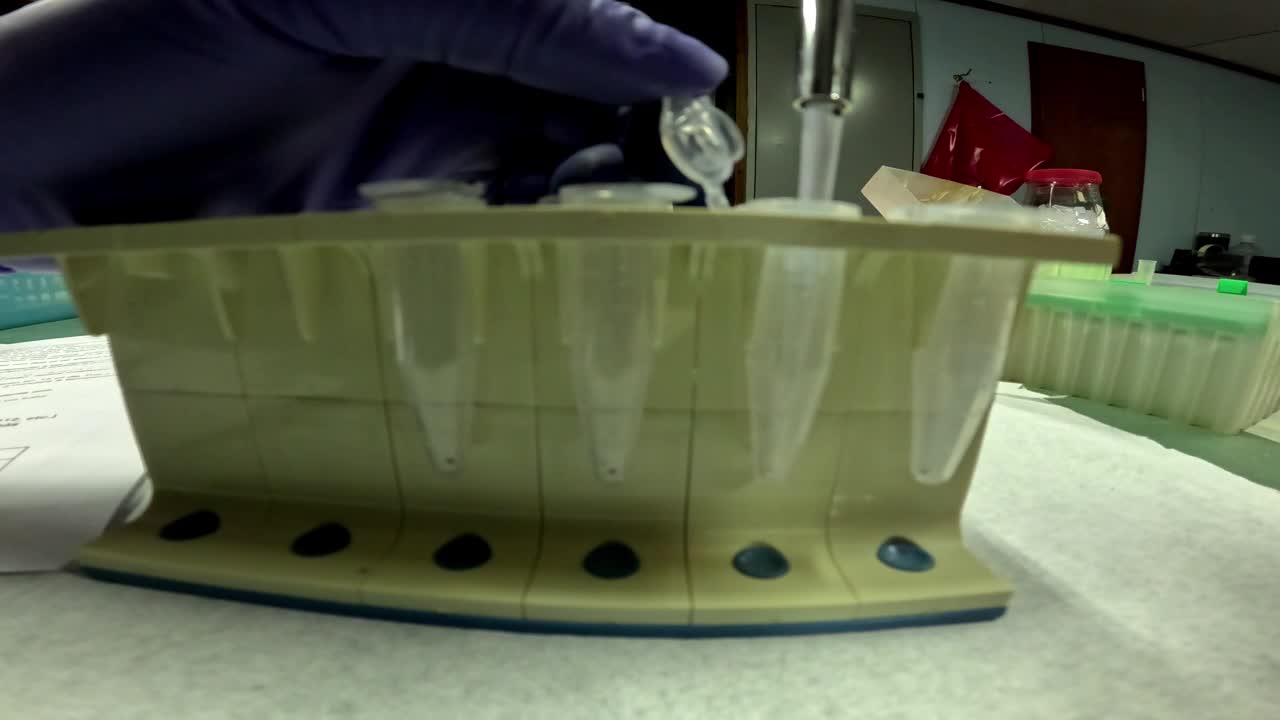
Centrifugue the lysis tube at 13600 rpm, Room temperature, 00:01:00
Note
13,600 rpm is the maximum speed of the microcentrifuge
Equipment
MiniSpin
NAME
Microcentrifuge
TYPE
Eppendorf
BRAND
5452000010
SKU
LINK
1m
Transfer 400 µL supernatant to theZymo-Spin III-F FilterZymo ResearchCatalog #C1057-50 and placed it in a collection tube. Centrifugue at 10000 rpm, Room temperature, 00:01:00 . Discard theZymo-Spin III-F FilterZymo ResearchCatalog #C1057-50
Note
For the sediment samples 350 µl were transfered.
1m
Add 1200 µL of ZymoBIOMICS DNA Binding BufferZymo ResearchCatalog #D4300-2-100 to the filtrate in the collection tube and mix well.
Transfer 800 µL of the mixture from step 4 to aZymo-Spin IICR Columns Zymo ResearchCatalog #C1078-50 in a collection tube. Centrifugue at13600 rpm, Room temperature, 00:01:00
1m
Discard the flow through from the collection tube and repeat step 5.
Add 400 µL ZymoBIOMICS DNA Wash Buffer 1Zymo ResearchCatalog #D4300-3-50 to the Zymo-Spin IICR Columns Zymo ResearchCatalog #C1078-50 in a new collection tube . Centrifugue a 13600 rpm, Room temperature, 00:01:00 . Discard the flow through from the collection tube
1m
Add 700 µL to the Zymo-Spin IICR Columns Zymo ResearchCatalog #C1078-50 in a collection tube. Centrifugue at 13600 rpm, Room temperature, 00:01:00 . Discard the flow through from the collection tube
1m
Add 200 µL of ZymoBIOMICS DNA Wash Buffer 2Zymo ResearchCatalog #D4300-4-60 to the Zymo-Spin IICR Columns Zymo ResearchCatalog #C1078-50 in a collection tube. Centrifugue at 13600 rpm, Room temperature, 00:01:00
1m
Transfer the Zymo-Spin IICR Columns Zymo ResearchCatalog #C1078-50 to a clean 1.5 ml
microcentrifuge tube.
Add 100 µL (50 μl minimum) of steril miliQ water directly to the column matrix and incubate for 1 minute
Note
The original protocol use ZymoBIOMICS DNase/RNase Free Water, but miliQ water works as well.
Centrifugue at13600 rpm, Room temperature, 00:01:00 to elute the DNA.
1m
Place a Zymo-Spin III-HRC FiltersZymo ResearchCatalog #C1058-50 in a new collection tube.
Note
This step is to prepare the filter through which the DNA will pass.
Add 600 µL of ZymoBIOMICS HRC Prep SolutionZymo ResearchCatalog #D4300-7-30 to the Zymo-Spin III-HRC FiltersZymo ResearchCatalog #C1058-50
Centrifuge at 10000 rpm, Room temperature, 00:03:00
3m
Transfer the elute DNA (from step 9) to a prepared Zymo-Spin III-HRC FiltersZymo ResearchCatalog #C1058-50 (from step 10) in a clean 1.5 ml
microcentrifuge tube.
Centrifugue at 13600 rpm, Room temperature, 00:03:00 . Do not discard the flow through because it is the DNA. This DNA is suitable for PCR.
3m
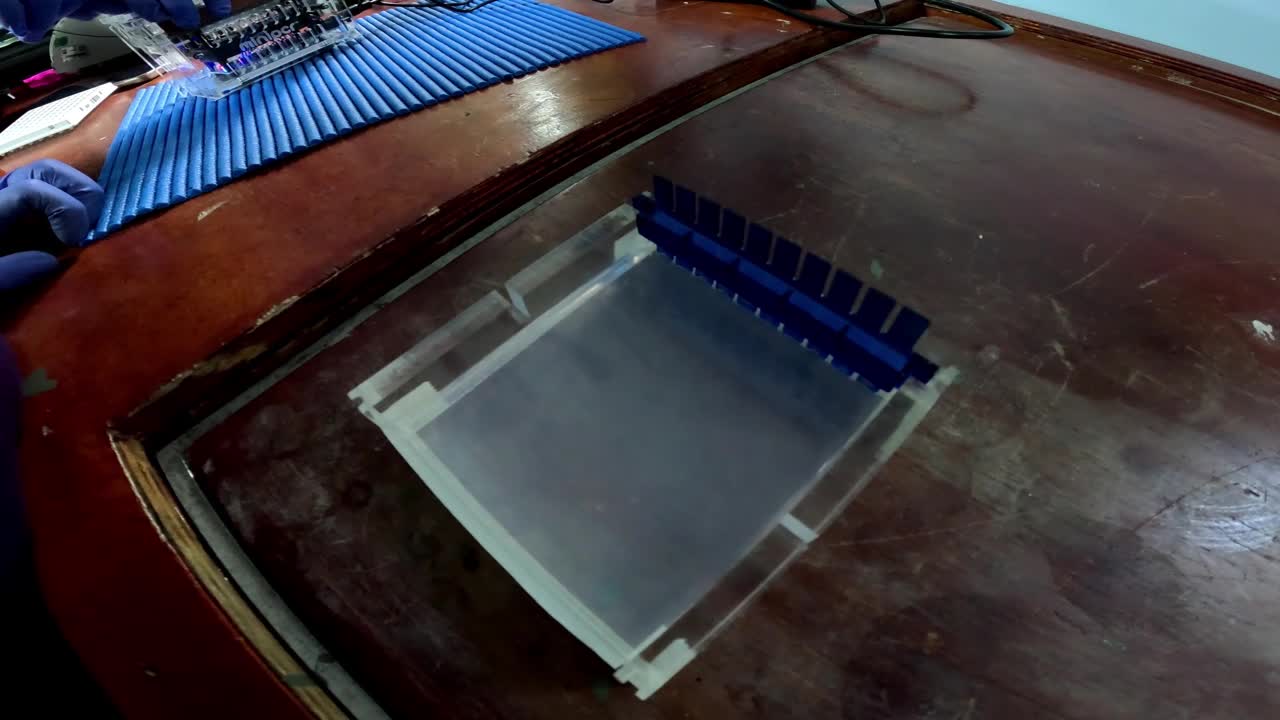
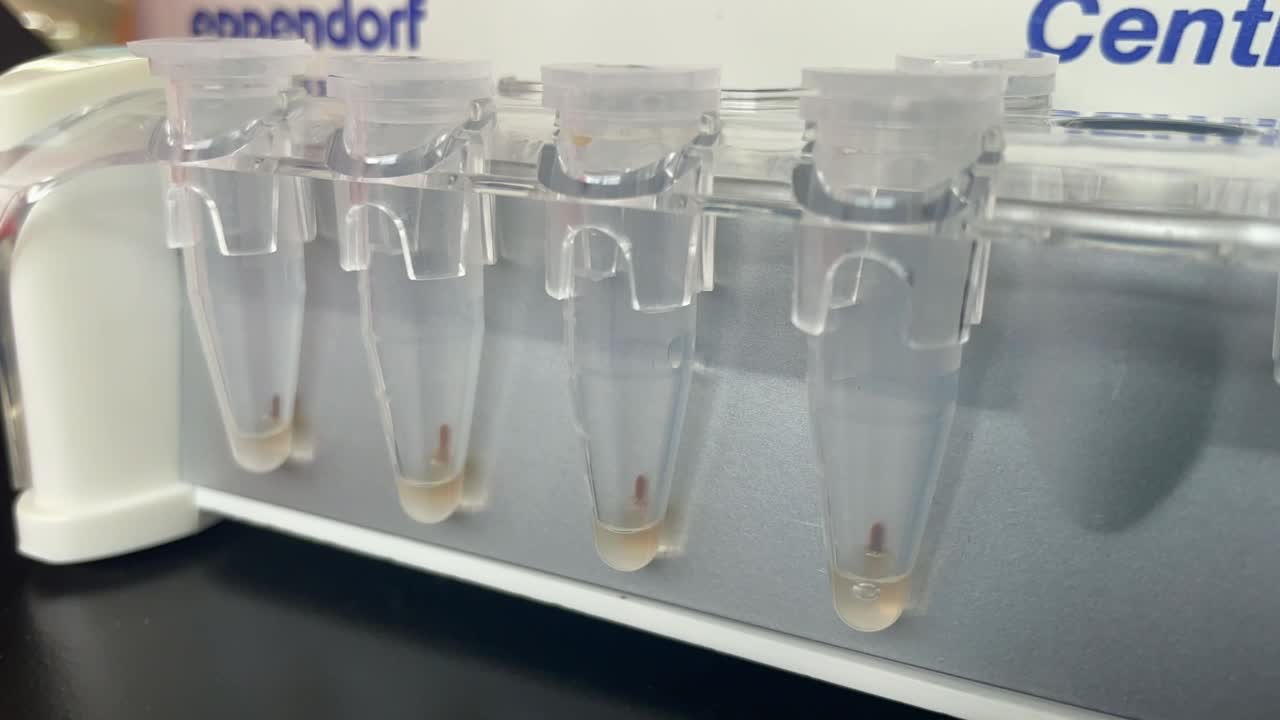
To verify DNA extraction run the product on an agarose gel usingUltraPure™ Low Melting Point AgaroseThermo Fisher ScientificCatalog #16520050 0.5 % (v/v) at 70 V for 20 min.
Note
The electrophoresis equipment was placed on a special table to ensure that the movement of the vessel did not affect the gel.
Visualize the gel in a transilluminator.
PCR for 16S rRNA gene amplification
1h 22m
Mix the following reagents in a 0.2 ml PCR tube
It has been observed that the addition of water to the reaction mixture can result in the cleavage of DNA in two fragments. Therefore, it is recommended to add Tris buffer.
In the following steps of this protocol, Tris buffer will be used insted of water and will be specified in the reagents.
| A | B | |
| Reagents | Volume | |
| Master Mix | 10 µl | |
| Primers | 2 µl | |
| DNA | 8 µl | |
| Tris Buffer | Bring to 20 µl |
The Q5 High-Fidelity 2X Master Mix - 100 rxnsNew England BiolabsCatalog #M0492S was used for the amplification.
The primers used for the amplification were:
| A | B | |
| Primer | Sequence | |
| 27F | TTT CTG TTG GTG CTG ATA TTG CAG AGT TTG ATC MTG GCT CAG | |
| 1492R | ACT TGC CTG TCG CTC TAT CTT CCG GTT ACC TTG TTA CGA CTT |
Note
- Between 10 and 20 ng of DNA are required for the reaction; however, the vessel lacks the necessary we do not have equipment for DNA quantification. For this reason, 8 µl of the extracted DNA were added.
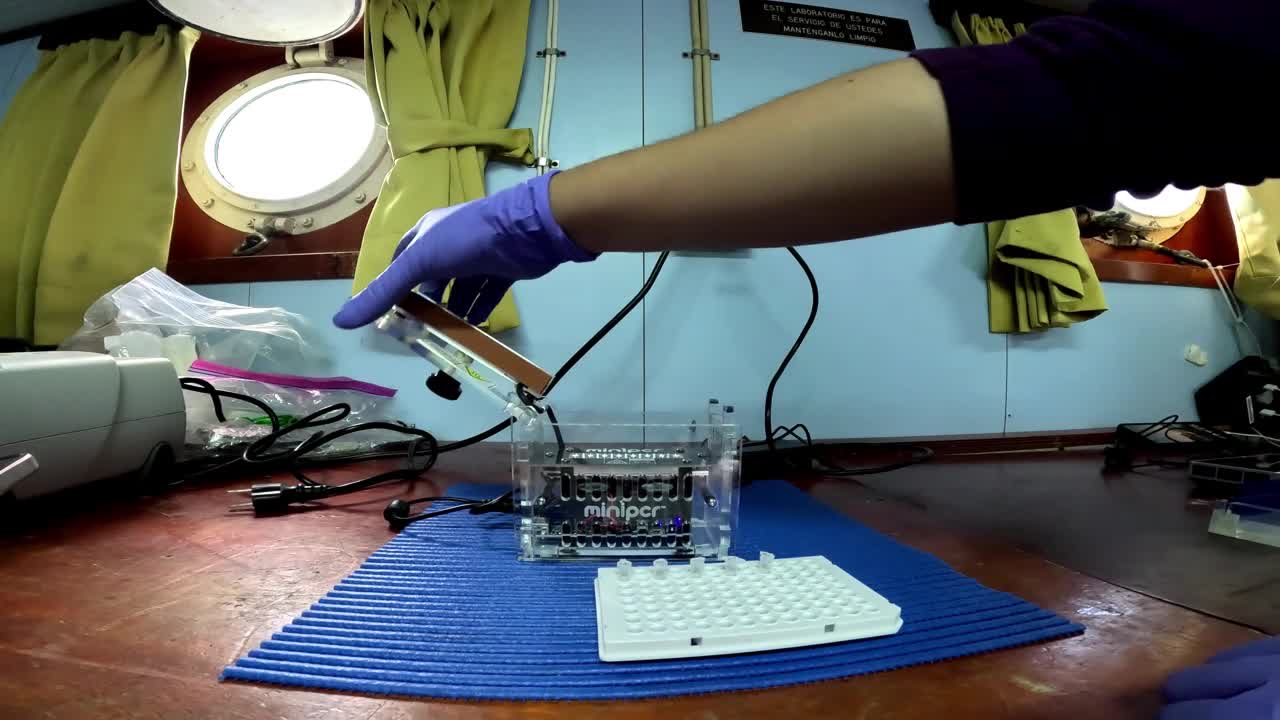
Use the miniPCR equipment for the amplification.
Using the miniPCR app, set the following cycle conditions.
Equipment
miniPCR® mini8 thermal cycler
NAME
Thermal cycler
TYPE
miniPCR®
BRAND
mini8
SKU
LINK
01:22:00
| A | B | C | |
| Temperature | Time | No. of cycles | |
| 98 ºC | 2 mins | 1 | |
| 98 ºC | 30 sec | 30 | |
| 55 ºC | 30 sec | ||
| 72 ºC | 1.5 mins | ||
| 72 ºC | 5 mins | 1 | |
| 10 ºC | Hold | See note below |
Note
Due to limitations inherent to the miniPCR instrument to set at 10°C, it was necessary to place the PCR tubes were placed on ice at 10°C following the final cycle at 72°C.
1h 22m
DNA purification after 16S amplification
30m
Place the AMPure Beads (AXP) at Room temperature for 00:30:00 before use it
30m
Resuspend the AMPure XP Beads (AXP) by vortexing.
Transfer the DNA sample to a clean 1.5 ml Eppendorf DNA LoBind tube.
Use a 0.6X ratio of the resuspended the AMPure XP Beads to the PCR product and mix by flicking the tube.
In this case, 12 µL of the beads were added.
Note
Example: if the final volume is 20 µl (20 x 0.6), 12 µl of AMPure XP Beads will be add.
Mix by vortexing and incubate for 00:05:00 at room temperature.
5m
Prepare 500 µL of fresh 80% ethanol in nuclease-free water.
Spin down the sample and pellet on a magnet until supernatant is clear and colourless. Keep the tube on the magnet for 00:05:00 and pipette off the supernatant.
Note
- Sometimes, it may be necessary to slightly rotate the tubes on the magnet to facilitate the faster production of pellets.
- To open the tubes, it is recommended that both hands be used, making sure the beads do not move (one hand holds the magnet with the tubes, while the other hand opens the tube).
5m
Keep the tube on the magnet and wash the beads with 200 µL of freshly prepared 80% ethanol without disturbing the pellet. Remove the ethanol using a pipette and discard.
Note
Add the ethanol along the walls, not directly onto the beads. The beads should not dry in this step; if the washing takes too long, close the tubes.
Repeat this step (step 18).
Spin down and place the tube back on the magnet. Pipette off any residual ethanol. Allow to dry for 00:02:00 .
2m
Remove the tube from the magnetic rack, resuspend the pellet in 15 µL of Tris buffer and mix.
Incubate for00:02:00 Room temperature .
2m
Spin down and place the tube back on the magnet for 00:02:00 or until the eluate is clear and colourless.
2m
Keep the tube on the magnet, pipette off the supernatant and transfer to a clean 1.5 ml Eppendorf tube.
To verify the amplification of the 16S gene, run the PCR product on an agarose gel using
UltraPure™ Low Melting Point AgaroseThermo Fisher ScientificCatalog #16520050 0.5 % (v/v) at 70 V for 00:20:00 .
20m
Library preparation: Barcoding PCR
For the library preparation the PCR Barcoding Expansion 1–96Oxford Nanopore TechnologiesCatalog #EXP-PBC096 was used.
This kit contains the neccesary barcodes to prepare the library.
Mix the following reagents in a 0.2 ml PCR tube
| A | B | |
| Reagent | Volume | |
| PCR Barcode | 1 µl | |
| DNA | 4 µl + 20 µl Tris Buffer | |
| Master mix | 25 µl | |
| Final Volume | 50 µl |
For each sample add one PCR Barcode (We used the barcodes A12, B12, C12 and D12).
Mix by pipetting and spin down.
Note
As the PCR Barcoding Expansion kit recommend, theLongAmp Taq 2X Master Mix - 100 rxnsNew England BiolabsCatalog #M0287S was used (Master Mix).
Amplify using the following cycle conditions
| A | B | C | |
| Temperature | Time | No. of cycles | |
| 98 °C | 2 mins | 1 | |
| 98 °C | 15 sec | 13 | |
| 62 °C | 15 sec | ||
| 72 °C | 1.5 mins | ||
| 72 °C | 5 mins | 1 | |
| 10 °C | Hold |
Purify the barcoded DNA following the steps listed in the section "DNA purification after 16S amplification"
Prepare 1 μg of pooled barcoded libraries and adjust the volume to 50 μL with TRIS buffer.
Note
Due to the inability to quantify the DNA could not be quantified on the vessel, so 12 µL of each barcoded library (4 libraries) were added, adjusting to a final volume of 50 µL with TRIS buffer (48 μL of DNA and 2 μL of TRIS buffer).
End-prep
30s
Thaw all reagents on ice.
Invert the reagent tubes to ensure they are well mixed but do not vortex the Ultra II End Prep Enzyme Mix.
If the Ultra II End Prep Buffer have precipitate, allow the mixture to come to room temperature and pipette the buffer up and down until break up the precipitate, followed by vortexing the tube for 00:00:30 .
30s
Spin down the tubes before opening
Mix the following reagents in a 0.2 ml PCR tube
| A | B | |
| Reagent | Volume | |
| DNA | 50 μL | |
| Ultra II End-prep Reaction Buffer | 7 μL | |
| Ultra II End-prep Enzyme Mix | 3 μL | |
| Final Volume | 60 μL |
Mix by pipetting
Incubate at the following conditions:
| A | B | |
| Temperature | Time | |
| 20°C | 5 mins | |
| 65°C | 5 mins |
The miniPCR cannot be set at 20°C so we use a water bath at the indicated temperature. The temperature was measured with a thermometer.
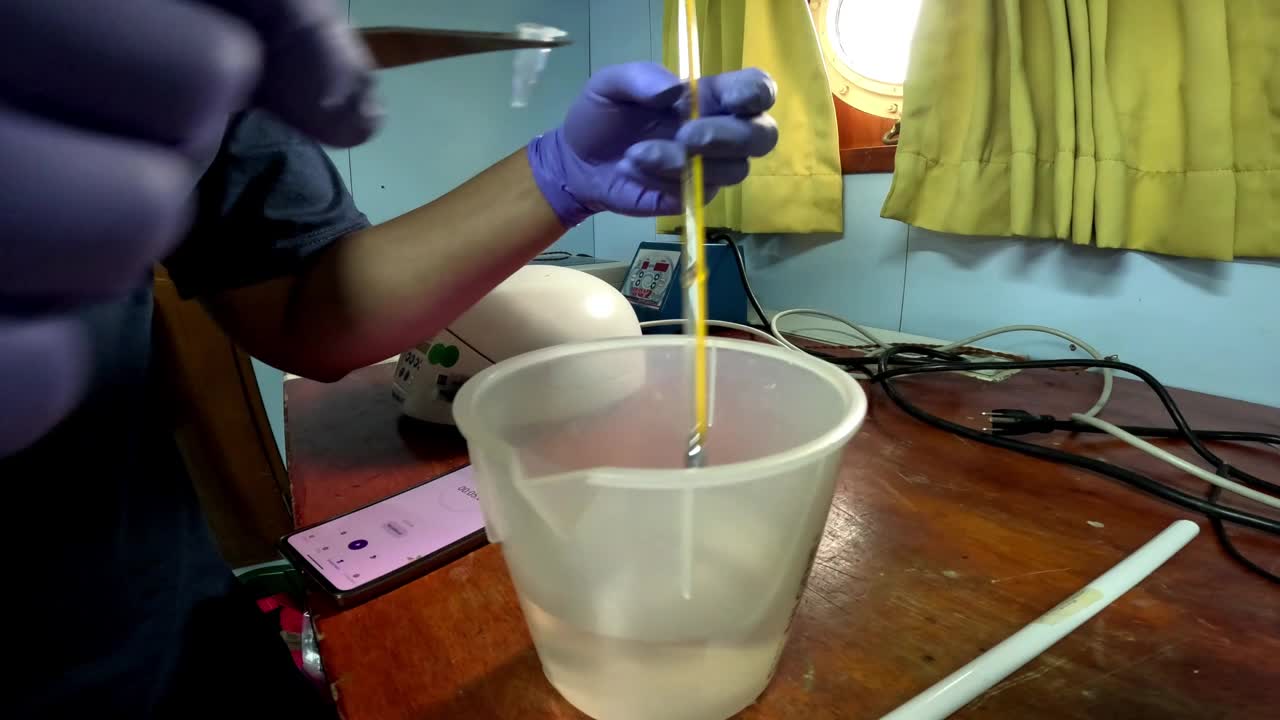
Using the "Heat Block" function of the miniPCR, the tubes were incubated at 65°C.
Purify the DNA following the same steps listed in the section "DNA purification after 16S amplification".
Note
The neccesary volume of beads in this step is 36 μl (60 x 0.6 = 36).
After the last wash (step 19) resuspend the DNA in 62 μl of TRIS buffer and follow the steps 20-22 (pipette off 60 μl of the supernatant).
Adapter ligation and clean-up
20m 30s
Spin down the follow reagents: Adapter Mix H (AMX H) and Quick T4 Ligase. Place it on ice.
Thaw Ligation Buffer (LNB) at room temperature, spin down and mix by pipetting. Place on ice immediately after thawing and mixing.
Thaw the Elution Buffer (EB) at room temperature, mix by vortexing, spin down and place on ice.
Mix the following reagents in a clean 1.5 ml Eppendorf DNA LoBind tube. Add all the reagents in the order of the following table.
| A | B | |
| Reagent | Volume | |
| DNA | 60 μL | |
| Ligation Buffer (LNB) | 25 μL | |
| NEBNext Quick T4 DNA Ligase | 10 μl | |
| Adapter Mix H (AMX H) | 5 μl | |
| Final volume | 100 μl |
After adding all the reagents, do not pipette to mix them, but gently tap with your finger.
Resuspend the AMPure XP beads by gentle agitation.
Transfer the DNA sample to a clean 1.5 ml Eppendorf tube.
Use a 0.4 ratio of the resuspended the AMPure XP Beads to the final preparation reaction and mix by gently moving the tube.
In this case the final volume is 100 µl, so 40 µl of beads were added.
Vortex and incubate for 00:05:00 at room temperature.
5m
Spin down to pellet the beads and place the tube on a magnet until the supernatant is clear and colorless. Incubate for 00:05:00 .
5m
Keep the tube on the magnet and remove the supernatant.
Keep the tube on the magnet and wash the beads with 200 µl of Short Fragment Buffer (SFB). Mix gently and wait for00:00:30 .
Note
The Short Fragment Buffer is used to purified fragments of all sizes, for DNA fragments of 3 kb or longer, use the Long Fragment Buffer (LFB).
30s
Pipette of the SFB and discard it.
Repeat this step (step 34).
Spin down and place the tube back on the magnet. Remove any remaining SFB. Let it dry for 2 minutes.
Remove the tube from the magnetic rack, resuspend the pellet in 15 µl of Elution Buffer (EB) and mix.
Incubate for 00:10:00 atRoom temperature .
10m
Spin down and place the tube back on the magnet for 2 minutes until the supernatant is clear and colourless.
Keep the tube on the magnet and transfer 13 µl of the supernatant to a clean 1.5 ml Eppendorf tube.
Priming and loading the SpotON flow cell
5m
Thaw the Sequencing Buffer II (SBII), Loading Beads II (LBII), Flush Tether (FLT) and one tube of Flush Buffer (FB) at Room temperature before mixing the reagents by vortexing and spin down at Room temperature .
To prepare the flow cell priming mix, add 30 μl of Flush Tether (FLT) directly to the tube of Flush Buffer (FB), and mix by vortexing at Room temperature .
Open the MinION device lid andx slide the flow cell under the clip.
Equipment
MinION
NAME
Sequencer
TYPE
Oxford Nanopore Technologies
BRAND
MinION 1B / MinION 1C
SKU
Note
Press the flow cell firmly to ensure proper contact. The yellow area of the cell should never be dry.
Slide the flow cell priming port cover clockwise to open the priming port.
After opening the priming port, check for a small air bubble under the cover.
Set a P1000 pipette to 200 μl and insert the tip into the priming port.
Turn the wheel until the dial shows 220-230 μl, to draw back 20-30 ul, or until you can see a small volume of buffer entering the pipette tip.
Note
Do not draw back more than 20-30 μl.
Visually check that there is continuous buffer from the priming port across the sensor array.
Slowly load 800 μl of the priming mix into the flow cell via the Priming port, avoiding the introduction of air bubbles. Wait for 00:05:00 . During this time, prepare the library for loading.
5m
Mix the contents of the Loading Beads II (LBII) by pipetting.
Note
The LBII settle very quickly, so mixed immediately before use.
In a new tube, prepare the library for loading as follows:
| A | B | |
| Reagent | Volume | |
| Sequencing Buffer II (SBII) | 37.5 μl | |
| Loading Beads II (LBII) | 25.5 μl | |
| DNA library | See note below | |
| Final volume | 75 μl |
Note
The recommended loading range is between 5-10 fmol adjusted to a final volume of 12 μl with the elution buffer. However, the DNA could not be quantified; therefore 12 μl of the DNA library were added undiluted.
It is important to load the library onto the flow cell immediately after adding the Sequencing Buffer II (SBII) and Loading Beads II (LBII).
Complete the flow cell priming by lifting the SpotON sample port cover to make the SpotON sample port accessible and load 200 μl of the priming mix into the flow cell priming port (not the SpotON sample port), avoiding the introduction of air bubbles.
Note
The SpotON sample port and the priming port are differents. Be sure of add the priming mix into the priming port.
Add 75 μl of the prepared library to the flow cell via the SpotON sample port in a dropwise fashion.
Be sure each drop flows into the port before adding the next.
Note
Mix the prepared library by pippeting up and down just prior to loading
Gently replace the SpotON sample port cover, making sure the bung enters the SpotON port, close the priming port and replace the MinION device lid.
Start sequencing
To start the sequencing, the following kits were selected:
- Ligation Sequencing Kit (SQK-LSK110)
- PCR Barcoding Expansion 1-96 (EXP-PBC096)
Flow Cell Cleaning
If the flow cell is going to be reuse, it is neccesary to whash it using the Flow Cell Wash Kit.
Mix the following reagents in a clean Eppendorf tube
| A | B | |
| Reagent | Volume | |
| Solution A | 20 µl | |
| Solution B | 380 µl | |
| Final volume | 400 µl |
The process is similar to the washing of the cell mentioned in the "Priming and loading the SpotON flow cell".
Open the port.
Set a P1000 pipette to 200 μl, insert the tip into the priming port and remove between 15-20 µl.
Add the 400 µl of the mixed solution
Load 400 µl of the Storage buffer after the washing if the flow cell is going to be storage.
If another sample is to be run, only the washing buffer is added, and then the entire cell preparation protocol is repeated and the next sample is loaded.