Aug 18, 2025
Field-based invertebrate molecular diagnostics using a BentoLab
- Jordan P Cuff1,
- Ben Hawthorne1,
- Simon Maddock1,
- Evelyn Jensen1
- 1Newcastle University
- Foraging Ecology Research Group


Protocol Citation: Jordan P Cuff, Ben Hawthorne, Simon Maddock, Evelyn Jensen 2025. Field-based invertebrate molecular diagnostics using a BentoLab. protocols.io https://dx.doi.org/10.17504/protocols.io.261ge54zdg47/v1
License: This is an open access protocol distributed under the terms of the Creative Commons Attribution License, which permits unrestricted use, distribution, and reproduction in any medium, provided the original author and source are credited
Protocol status: Working
We use this protocol and it's working
Created: April 30, 2024
Last Modified: August 18, 2025
Protocol Integer ID: 99006
Keywords: Molecular diagnostics, Portable lab, In-field, Molecular ecology, Gel electrophoresis, Trophic interactions, Diagnostic PCR, Metabarcoding, HOTSHOT DNA extraction, invertebrate molecular diagnostic, based invertebrate, invertebrate, collection of invertebrate, molecular diagnostic, more descriptive diagnostic primer, use of diagnostic pcr, use of more descriptive diagnostic primer, diagnostic detection, diagnostic pcr, diagnostic detection of interaction, assays run, bentolab, bentolab this protocol, ecological interaction, short fragments of dna, deciduous forest, dna
Abstract
This protocol uses a BentoLab to extract DNA and amplify short fragments of DNA for diagnostic detection of interactions. This was designed for teaching and is meant to be completed within a single day. The activity was designed around the collection of invertebrates from coniferous and deciduous forest and the use of diagnostic PCR to determine their ecological interactions. This was based on the expertise of those running the activity, but the exact samples collected (and assays run) can be adjusted for other contexts. The methods used are generally very flexible. Downstream integration with nanopore sequencing could extend this activity to metabarcoding, and use of more descriptive diagnostic primers may be more informative.
Image Attribution
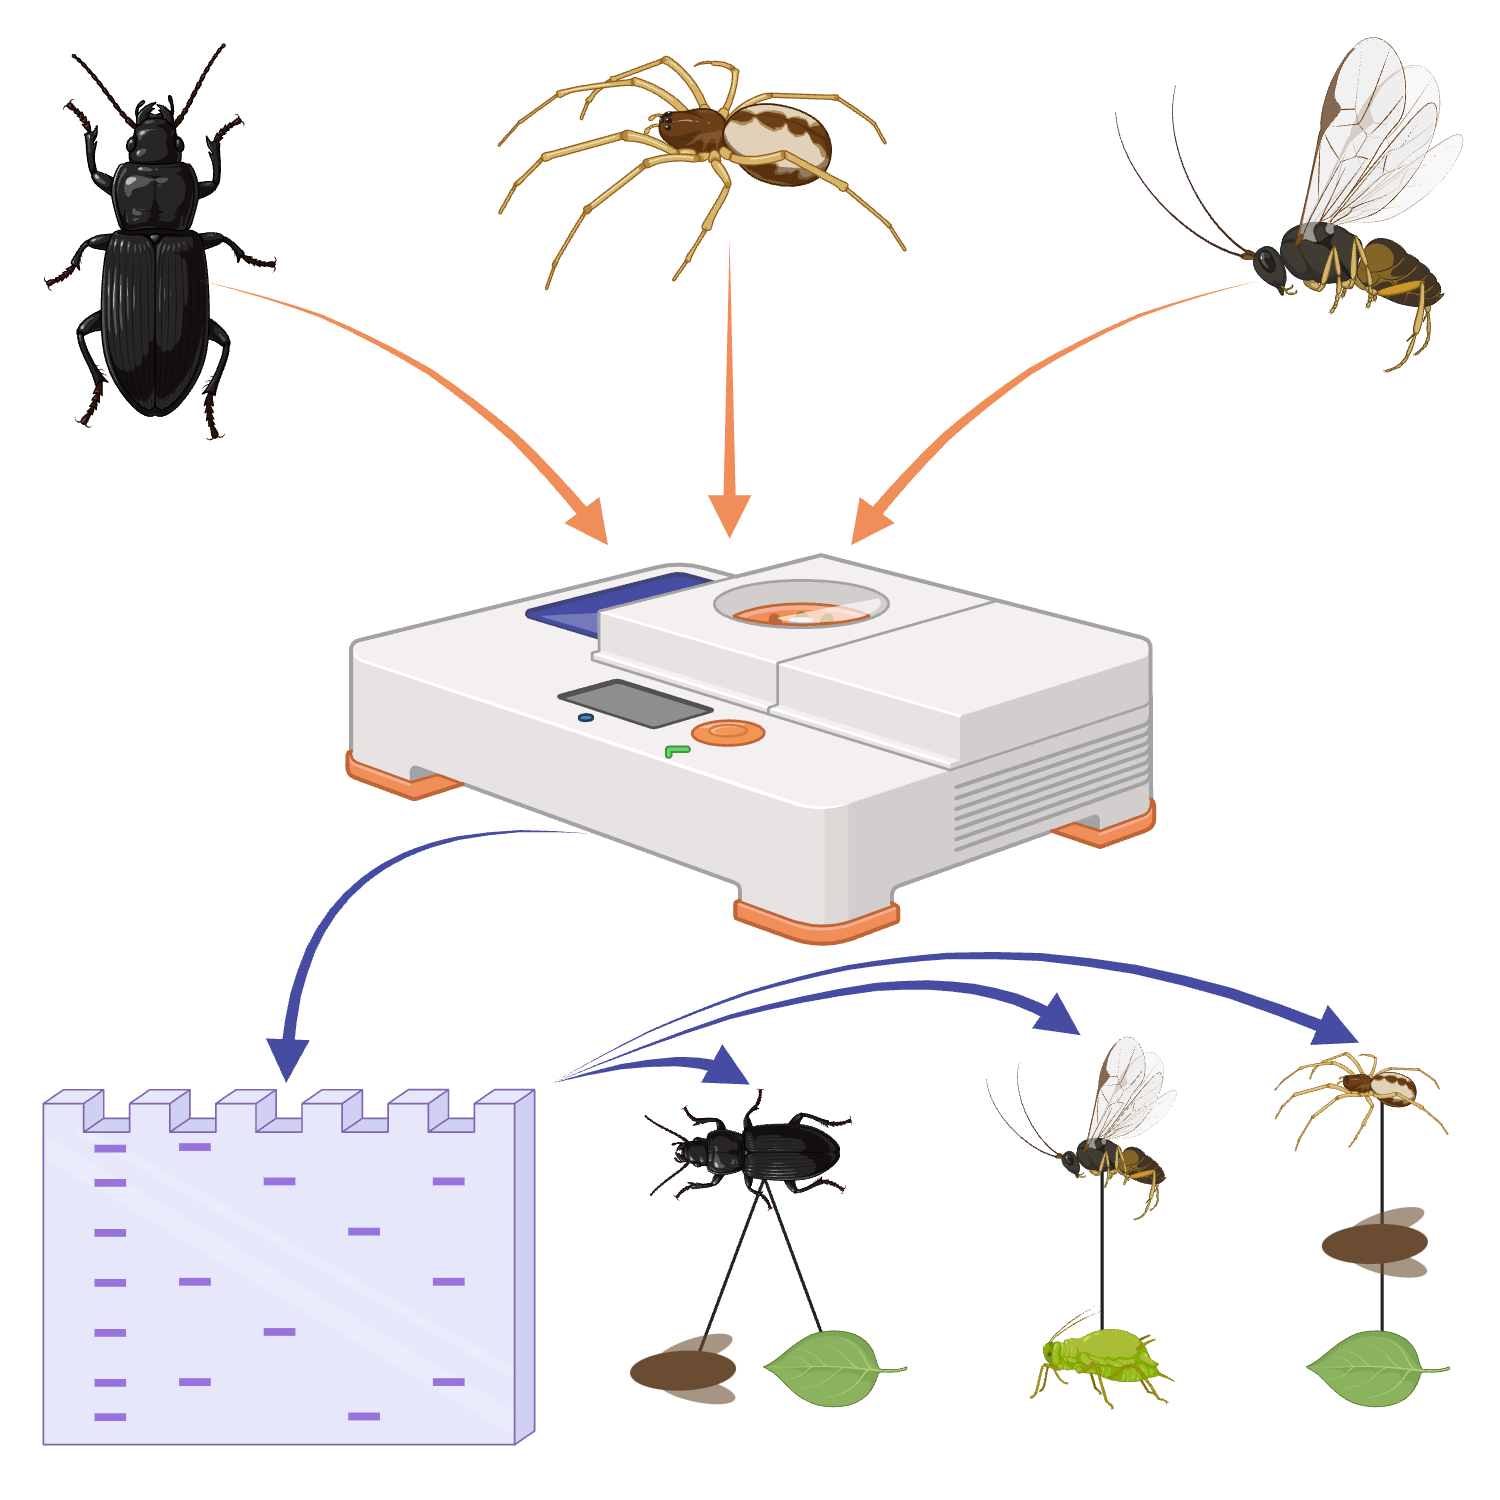
Created in BioRender. Cuff, J. (2025) https://BioRender.com/v3njedw
Materials
Equipment:
- Bentolab with gel hood (or microcentrifuge, thermocycler, tube racks, gel power pack, gel tank and gel transilluminator)
- Weighing scales (for agarose)
- Travel kettle or microwave (for gel prep)
- Conical flasks (for gels and gel buffer)
- Pooters
- Pitfall traps
- Trays for sorting invertebrates
- Sweep net
- Forceps
- Scalpels
- Pipettes (0.5-2, 2-20, 20-200, 200-1000)
Reagents and chemical consumables:
- Borax (or TBE; can transport as 10X and dilute on site) as gel buffer
- Molecular grade water
- 100 % ethanol
- Chemgene (or bleach, but be wary of cross-reactivity)
- 1 M Tris-HCl
- Agarose
- 0.1 M NaOH
- 0.5 M EDTA
- Blue light gel stain (e.g., SYBRSafe)
- DNA dye
- Taq DNA polymerase (hot start master mix for ease)
- 0.01 mM PCR primers
- Ethyl acetate
Plasticware and other consumables:
- Cotton balls
- Clay balls (for pitfall traps)
- > 100 mL collection pots for invertebrates
- Bags for carrying/storing kit
- 1.5 mL microcentrifuge tubes
- 0.2 mL PCR tubes, strips or plates
- Petri-dishes for dissections
Safety warnings
Familiarise yourself with the safety data sheets for the reagents involved and carry out appropriate risk assessments for the activity.
Ethics statement
Collecting insects and most other invertebrates is not currently covered by most welfare legislation, nor many other protective agreements. Nevertheless, evidence for insect sentience is growing and welfare considerations should not therefore be ignored (see the Insect Welfare Research Society for more information). Please take care to limit the suffering, killing and/or disturbance of invertebrates through the course of this activity and, if it is being carried out in an educational capacity, take time to discuss this with students/attendees.
Before start
Context and considerations:
The following protocol was established for a Newcastle University ecological field course activity at the Field Studies Council centre at Millport, Isle of Cumbrae. The protocol is based on the use of a BentoLab in a field station, requiring a relatively sterile area with access to electricity. Alongside the BentoLab, a small travel kettle, weighing scales, pipettes (P1000, P200, P20 and P2) and all plasticware/consumables required will be needed throughout.
The activity was designed around the collection of invertebrates from coniferous and deciduous forest and the use of diagnostic PCR to determine their ecological interactions. This was based on the expertise of those running the activity, but the exact samples collected (and assays run) can be adjusted for other contexts. The methods used are generally very flexible.
The HOTSHOT extractions are not as robust as many more stringent extraction protocols and the results may include many false negatives as a result of variable efficacy and high inhibitor concentrations. As well, the transilluminator on the BentoLab can be harder to view and interpret gels through when compared to standard UV transilluminators, and some refinement of protocols may be necessary to optimise results. All of these limitations are, however, opportunities to discuss the trials and tribulations of molecular ecology (especially in field contexts) if running this as an educational exercise.
Invertebrate collection
16h 40m
Consider what the experimental aims are and decide sampling methods accordingly. The methods we present below would, for example, be relevant to projects investigating the rate of predator-prey interactions of spiders, the omnivorous interactions of beetles or parasitism rates in herbivorous insects.
Summary of different workflows. Created in BioRender. Cuff, J. (2025) https://BioRender.com/v3njedw
Collect invertebrates by pitfall trapping, hand searching and/or sweep netting. The rim of pitfall traps should be flush with the ground and ideally covered with mesh and a raised lid to prevent rain or small mammals (or other bycatch) entering the trap. Pitfall traps should be left in place for 12-24 h if dry, or longer (e.g., 48 or 72 h) if preservative-filled. Collect invertebrates into pots and, if still alive, kill them by placing an ethyl acetate-soaked cotton ball into the pot with them and leave for up to 10 mins.
Note
Pitfall traps can be filled with fluid to kill invertebrates upon entry, but they can also be left dry to limit killing to just target organisms. If doing the latter, consider putting clay balls (e.g., those used in plant pots) into the trap to provide obstacles and refuges and limit within-trap predation events.
For hand searching, decide an appropriate space and time to search for to ensure standardisation between replicated samples. Search from high to low, being careful not to disturb invertebrates lower in the vegetation before collecting them. Collect invertebrates by pooter/aspirator or by placing them straight into tubes. Kill individual invertebrates by freezing at -20 °C for at least 01:00:00 , or place them together in a pot and kill with ethyl acetate as above.
For sweep netting, choose a set length strip of vegetation and walk at a steady pace, sweeping across and through the vegetation as you go. Ensure the net is continually moving to prevent escape, ideally in a figure-of-eight pattern, twisting it as you go. Once finished, grab the net halfway down, restricting escape by the collected invertebrates, and then invert it into a collection pot or bag with an ethyl acetate-soaked cotton ball in it. Seal the bag promptly to limit escapes.
Note
For all methods, try to limit the invertebrates killed to just those target organisms that will be taken forward for the molecular analysis (and even then, only as many as required).
16h
Identify the invertebrates using taxonomic keys or reference guides as appropriate. To save time for the molecular analysis, consider identifying just to order level, either in the field or in the lab.
30m
Once the collection is complete, return to the lab and sort the samples so that just the number necessary for the molecular analysis are placed into individual 0.2 mL tubes (if larger than 1-2 mm, subsample just the tissue relevant to the experimental questions; for example, for gut content analysis, just isolate the gut/opisthosoma/abdomen/gaster according to the target species).
Examples of different sample types. Created in BioRender. Cuff, J. (2025) https://BioRender.com/v3njedw
10m
DNA extraction
1h 23m
Depending on the type of invertebrate and the exact assay being run, it may be worth isolating specific tissues (e.g., the gut contents of the invertebrates) using a scalpel and forceps, which can be sterilised before and after each use using a serial dip/soak in Chemgene (or bleach), water and ethanol. Either way, place the target tissue into a 0.2 mL PCR tube, ideally using only 1-2 mm of tissue.
5m
To each sample, add 50 µL alkaline lysis reagent (25 millimolar (mM) NaOH , 0.2 millimolar (mM) EDTA ).
2m
To make up 25 mL alkaline lysis reagent , add 6.25 mL 0.1 M NaOH and 10 µL 0.5 M EDTA to 24.365 mL molecular grade (nuclease-free) water .
Note
Keep solution at Room temperature and use within 1-2 months.
5m
Ensure the sample is submerged in the reagent by pushing it down with sterilised forceps. Try to crush the sample lightly with sterilised forceps to expose any internal tissue (and sterilise forceps between each sample.
Note
If you are working with tubes for which you have a compatible centrifuge, consider centrifuging the samples to ensure submersion.
2m
Incubate each sample at 95 °C for 01:00:00 .
Note
Particularly given the nature of tough chitinous insect tissue, it might be beneficial to extend incubation to 02:00:00 for larger specimens.
Note
You could begin preparing the reagents for the PCR while you wait.
1h
Store samples at 12 °C until ready to proceed.
Add 50 µL neutralisation reagent (40 millimolar (mM) Tris-HCl ) to each sample and flick a few times to mix.
Note
Try to tap the solution back to the base of the tube after flicking.
2m
To make up 25 mL neutralisation reagent , add 1 mL 1M Tris-HCl to 24 mL molecular grade (nuclease-free) water .
5m
Transfer an aliquot of the supernatant (the liquid part of the solution) to a new tube and make it up to 100 µL with water.
The amount taken forward should depend on the size of the tissue used:
- If DNA was extracted from a large sample (e.g., a ladybird or larger), take forward 1 µL and mix with 99 µL molecular grade (nuclease free) water .
- If DNA was extracted from a fairly small sample (e.g., an ant or fly), take forward 5 µL and mix with 95 µL molecular grade (nuclease free) water .
- If DNA was extracted from a very small sample (e.g., a tiny parasitoid wasp or mite), take forward 10 µL and mix with 90 µL molecular grade (nuclease free) water .
Note
Keep solution at Room temperature until further use.
2m
DNA amplification
2h 45m
Calculate the amount of PCR mix required for the number of samples, keeping in mind the maximum capacity of the thermocycler (for the BentoLab, 32 samples) and the need to include at least one negative and positive control.
Assuming a 20 µL total reaction volume , this will require the following components per reaction: 10 µL hot-start PCR master mix , 0.5 µL forward primer at 10 micromolar (µM) concentration , 0.5 µL reverse primer at 10 micromolar (µM) concentration and 8 µL molecular biology grade (nuclease free) water . The remaining 1 µL will be the DNA, added later.
So each reaction should contain:
| A | B | C | D | |
| Component | Volume per reaction (microlitres) | Final concentration | Starting concentration | |
| 2X hot-start PCR master mix | 10 | 1X | 2X | |
| Forward primer | 0.5 | 0.25 micromolar | 10 micromolar | |
| Reverse primer | 0.5 | 0.25 micromolar | 10 micromolar | |
| Molecular grade water | 8 | NA | NA | |
| DNA | 1 | NA | NA |
Multiply these values (excluding the DNA) by the number of samples, accounting for at least one negative control and then, to account for instrument and human error, multiply them again by 1.2 (or 1.1 if working with recently calibrated pipettes and experienced personnel). For the 32 themocycler slots in the BentoLab, that would look like this:
| A | B | C | D | |
| Component | Volume per reaction (microlitres) | Volume for all samples (microlitres) | Volume for all samples, plus error | |
| 2X hot-start PCR master mix | 10 | 320 | 384 | |
| Forward primer | 0.5 | 16 | 19.2 | |
| Reverse primer | 0.5 | 16 | 19.2 | |
| Molecular grade water | 8 | 256 | 307.2 |
Add these components into a single tube and mix them gently by flicking and inverting the tube.
10m
Add 19 µL of this mixture to the number of new 0.2 mL PCR tubes that correspond to the number of samples that will be run (including controls).
Note
Ensure tubes are sufficiently labelled to remember which samples are in each tube ahead of adding the DNA in the next step.
2m
Add 1 µL DNA to each corresponding tube and 1 µL of water to the negative control.
2m
Place the tubes in the thermocycler and run at the following conditions:
| A | B | C | D | |
| Step | Temperature (degrees Celsius) | Time (minutes: seconds) | Number of cycles | |
| Initial denaturation | 95 | 3:00 | 1 | |
| Denaturation | 95 | 0:30 | 35 | |
| Annealing | Variable (depends on primers) | 0:30 | ||
| Extension | 72 | 0:30 | ||
| Final extension | 72 | 5:00 | 1 | |
| Final hold | 12 | Infinite | 1 |
Note
You could begin preparing the gel in the last half an hour of the PCR cycling.
2h 30m
Once complete, remove the tubes from the thermocycler and move onto the next step, or refrigerate if pausing.
1m
Gel electrophoresis
1h 35m
Prepare a 2 Mass / % volume agarose gel according to the below sub-steps.
Note
These instructions are for a 25 mL gel suitable for the BentoLab. For a normal sized gel tank, consider multiplying all values by four for a 100 mL gel.
Set up the gel tray by placing sufficient gel combs for all of the samples in the slots.
1m
Weigh 0.5 g agarose and set it aside.
2m
Make up 25 mL 1X borax solution by diluting 2.5 mL 10X borax solution in 22.5 mL water .
Note
If you need to make up 10X borax solution, for 100 mL , dissolve 1.91 g sodium tetraborate decahydrate in 100 mL water by heating and stirring until clear.
5m
If a microwave is available, add 25 mL 1X borax solution (measure by weighing 25 g if no measuring cylinders available) to the agarose in a conical flask and microwave until it begins bubbling, at which point mix it, microwave again until it bubbles and repeat until the solution is clear of lumps.
If a microwave is not available, boil 22.5 mL water (as above, measure by weighing 22.5 g if no measuring cylinders available) in a travel kettle, add the agarose and 2.5 mL 10X borax solution , and mix thoroughly.
5m
Before the solution begins to set, add 2 µL gel dye (e.g., SYBRSafe) and mix.
1m
Pour the agarose into the gel tray with the gel combs in place and allow it to set (15-25 mins)
25m
Once set, set up the gel tank with the cables plugged into the power pack (or BentoLab if using) correctly. Remove the gel combs and check that the wells in the gel have formed correctly.
Submerge the gel in 1X borax buffer solution.
Note
Ensure that the wells are at the negative end (i.e., they will 'run to the red').
2m
To each PCR product add 4 µL DNA dye .
10m
Add 1 µL DNA ladder to the first well of each row.
2m
Add 4 µL dyed DNA of each sample to a different well in the gel.
10m
Cover the gel and run at 100 V for 00:25:00 . There are usually bubbles visible at either end and the dye will begin moving quite soon after.
Note
If using a full gel tank (rather than the BentoLab one), borax allows very high running voltages for quicker results, so consider running at 300 V for 10-15 min.
25m
Stop the power pack and remove the gel from the buffer. Dry with tissue.
2m
Place the gel over the transilluminator and cover it in a way that allows you to photograph it (i.e., in a gel doc or using the phone camera box with the BentoLab). Photograph the gel and inspect the bands to ascertain whether amplification was successful, and for which samples. Take particular notice of the controls to ensure that contamination or reaction failure aren't problematic.
5m
Protocol references
Citation
LINK
Citation
LINK
Citation
LINK
Citations
Birkhofer K, Bylund H, Dalin P, Ferlian O, Gagic V, Hambäck PA, Klapwijk M, Mestre L, Roubinet E, Schroeder M, Stenberg JA, Porcel M, Björkman C, Jonsson M. Methods to identify the prey of invertebrate predators in terrestrial field studies.
https://doi.org/10.1002/ece3.2791Cuff JP, Kitson JJN, Hemprich-Bennett D, Tercel MPTG, Browett SS, Evans DM. The predator problem and PCR primers in molecular dietary analysis: Swamped or silenced; depth or breadth?
https://doi.org/10.1111/1755-0998.13705Truett GE, Heeger P, Mynatt RL, Truett AA, Walker JA, Warman ML. Preparation of PCR-quality mouse genomic DNA with hot sodium hydroxide and tris (HotSHOT).
https://doi.org/Acknowledgements
Thanks to the students of Newcastle University's Field-based Ecology (NES2312) course in 2023/2024 and 2024/2025 for applying and testing this protocol.