Jul 29, 2024
Determination of Auxenochlorella protothecoides Cell Density With a Hemocytometer
- 1Department of Molecular & Cell Biology, University of California, Berkeley, CA 94720, USA
- Merchant Lab UC Berkeley


Protocol Citation: Dimitrios Camacho, Sabeeha S. Merchant 2024. Determination of Auxenochlorella protothecoides Cell Density With a Hemocytometer. protocols.io https://dx.doi.org/10.17504/protocols.io.rm7vzjk12lx1/v1
License: This is an open access protocol distributed under the terms of the Creative Commons Attribution License, which permits unrestricted use, distribution, and reproduction in any medium, provided the original author and source are credited
Protocol status: Working
We use this protocol and it's working
Created: June 12, 2024
Last Modified: July 29, 2024
Protocol Integer ID: 101702
Keywords: Hemocytometer, Cell, Counting, auxenochlorella, cell density, auxenochlorella protothecoide, accurate for cell density, neubauer hemocytometer, hemocytometer, cell, determination of auxenochlorella
Funders Acknowledgements:
National Institutes of Health: Nutritional Copper Signaling and Homeostasis Grant
Grant ID: GM 042143
National Institutes of Health: Molecular Basis of Cell Function T32 Training Grant
Grant ID: 5T32GM007232-44
US Department of Energy (DOE), Office of Biological and Environmental Research (BER): Systems Engineering of Auxenochlorella protothecoides: from Photosynthesis to Biofuels and Bioproducts Grant
Grant ID: DE-SC0023027
University of California, Berkeley, Chancellor’s Fellowship
Grant ID: N/A
Disclaimer
We would like to acknowledge Usha F. Lingappa and Jeffrey L. Moseley for comments and suggestions.
Abstract
This protocol describes a reliable method for counting the cell densities of Auxenochlorella protothecoides cultures using a Neubauer hemocytometer. This method is accurate for cell densities > 106 cells / mL.
Guidelines
The key to obtaining accurate and precise cell counts is to mix the samples well before every step. Cells will settle to the bottom of the tube or flask if left standing, even for a few minutes.
Materials
Consumables:
- 1.5 mL tubes
- RAININ P20, P200, P1000 tips
- Milli-Q H2O
- Kimtech Science KimwipesTM
- 10 mM phosphate buffer, pH 7.
- 10% bleach
- 70% ethanol
Equipment:
- Sterile hood
- Bunsen burner
- Igniter
- Hausser Scientific hemocytometer, cell depth 0.1 mm
- Hemocytometer cover slide
- Zeiss Compound microscope (Model AXIO Lab 10) with magnification of 100x, 200x, 400x (Objective x Ocular lens)
- RIANIN P20, P200, P1000 and respective RAININ tips
- Tactile mechanical tally counter
Before start
Make the phosphate buffer solution.
1. Make a stock of 1 Mass Percent NaH2PO4 and 1 Mass Percent Na2HPO4
2. Dissolve 5.38 g of NaH2PO4 • H2O (monobasic monohydrate, M.W. = 138 g / mol) in 39 mL of Milli-Q H2O.
3. Dissolve 8.66 g of Na2HPO4 (dibasic anhydrous M.W. = 142 g / mol) in 61 mL of Milli-Q H2O.
4. Mix solutions together to make 100 mL 1 Mass Percent sodium-phosphate buffer, 7 .
5. Add 10 mL of 1 Mass Percent sodium-phosphate buffer to 990 mL of MilliQ-H2O to make a 10 millimolar (mM) phosphate buffer, 7 .
Procedure
10s
Move the culture flask to a clean sterile hood.
Swirl the culture several times to ensure thorough mixing.
Using sterile technique, pipette 100 µL of culture into a 1.5 mL tube.
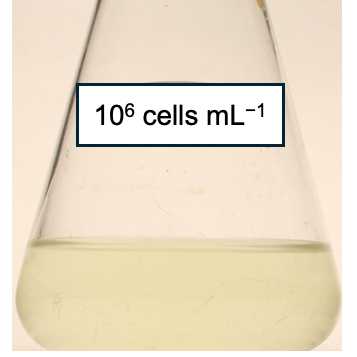
Dilute the sample until the suspension is almost clear (fig. 1). Record your dilution factors.
Fig. 1. Dilution of a sample containing 108 cells/ mL. 100x was chosen for counting
Dilute samples with 10 millimolar (mM) sodium-phosphate 7 or with the growth medium in which the cells were cultured. Dilutions generally do not exceed 200-fold.
Remove the hemocytometer from its protective case and wipe both the hemocytometer and cover slide with a KimwipeTM.
Place the hemocytometer on a KimwipeTM. Place the cover slide over the hemocytometer
Pipette 10 µL of water into both chambers of the hemocytometer. The cover slides have a coating on one side which alters the dispersion of the Milli-Q H2O and your sample on the hemocytometer.
00:00:05 If the H2O is not uniformly dispersed within 00:00:05 , (fig. 2 A) you may have the wrong side of the cover slide facing down. Wipe the cover slide and hemocytometer with KimwipeTM, then flip the cover slide over. Retest the dispersion of H2O.
Fig. 2. Picture of Neubauer hemocytometers 5 s after H2O is dispensed into each well. A) Incorrect cover slide orientation results in incomplete dispersion of H2O highlighted in red circles. B) Correct orientation of cover slide allows for homogeneous dispersion of H2O within 5 s.
10s
Use a KimwipeTM to wipe the hemocytometers dry.
Ensure that the sample is well mixed and pipette 10 µL of sample into each of the two chambers.
Remove the dust cover from the microscope. Rotate the nosepiece to set the objective lens to 20x. Rotate the turret condenser to the brightfield setting denoted as BF. Lower the microscope stage using the coarse focus knob. Switch the light source on.
Safety information
Warning: For your safety, decrease the light intensity before looking into the eyepiece.
Adjust the inter-pupillary distance by pushing or pulling the eye tubes together or apart.
Hold the stage clip open, set the hemocytometer on the microscope stage, and release the stage clip gently to secure the hemocytometer.
Carefully raise the stage using the fine focus knob until the gridlines of the hemocytometer come into focus.
Warning: The cover slide will collide with the objective lens if the stage is raised too high. This may result in damage to the cover slide, hemocytometer, and objective lens.
Use the diopter adjustment to compensate for the difference of vision between your two eyes.
Close one eye and adjust the stage using the fine focus knob to focus on the gridlines of the hemocytometer.
Open the opposite eye and close the other eye. Adjust the focus using the diopter adjustment without touching the fine adjustment knob.
Slowly increase the light intensity until you are comfortable with the contrast of cells and the background.
The contrast for transmitted light brightfield microscopy can be optimized according to the Köhler illumination technique, summarized below.
Raise the condenser using the substage height adjustment knob to max height.
Make sure that the condenser does not collide with the bottom of the hemocytometer. There is an adjustable stop screw that you may set so that the condenser never collides with the hemocytometer.
Close the luminous-field diaphragm until a ring is visible.
Center the luminous field diaphragm using the two centering screws.
Open the luminous field diaphragm until the edge of the diaphragm disappears from the field of vision.
Remove one eyepiece from the tube socket.
Look into socket with your naked eye.
Use the lever on the condenser to adjust the aperture so that the luminous field diaphragm is about 2/3 – 4/5 of the diameter of the exit pupil of the objective.
Replace the eyepiece. These are the optimal settings for most applications. Repeat steps 12 to 12.7 after switching between objective lenses.
After pipetting the sample into the chambers, wait 00:01:00 for the sample to disperse evenly in both chambers. Cells should settle in place and should stop moving. All cells should also come into the same plane of focus as the gridlines as they become evenly suspended in the Z-axis.
1m
Count between 100 – 200 cells inside the triple grid lines that outline the border of the 1 mm x 1 mm grid (5 × 5 squares) (fig. 3). Cells that are partially through the triple grid line should be counted only if more than half of the cell is inside of the innermost line; if more than half of the cell is outside the innermost line, it should not be counted (panel B, fig. 3).
Fig. 3. View of hemocytometer through a brightfield compound microscope. A) 100x magnification of hemocytometer without cells. Distances between gridlines and the recommended counting pattern are indicated. B) Zoomed in image of 0.2 mm × 0.2 mm grid. Green circles represent cells that should be counted whereas red circles represent cells that should not be counted. C) Side view of a hemocytometer indicating the distance between the cover slide and the hemocytometer.
If more than 10 cells are present within the first 0.2 mm × 0.2 mm grid alone, re-dilute the sample and record the new dilution factor.
Calculate the average number of cells counted across both chambers and multiply this number by your dilution factor and 104 cells. This number is the cell density (cells / mL). See calculation below.
volume = l × w × h = 1 mm × 1 mm × 0.1 mm = 0.1 mm3 = 0.1 µL
cell density = (cells counted / 0.1 µL) × 104 = cells / mL
After completing the count, carefully lower the microscope stage and remove the hemocytometer. Turn off the microscope’s light source and replace the dust cover.
Remove the cover glass and wipe the cover slide and hemocytometer clean with KimwipeTM. Pipette 10 µL of Milli-Q H2O into each chamber. Remove the cover slide and wipe it dry with a KimwipeTM. Clean the hemocytometers with 70% ethanol or 10% bleach, rinse with Milli-Q H2O, and dry with a KimwipeTM. Store the hemocytometer and cover slide in their protective case.
Autoclave or kill all samples and dilutions with 10 % (v/v) Bleach.