Oct 01, 2025
Bark and Ambrosia Beetle Macro Photography for an AI Training Dataset
- lsabelle Stratton1,
- Christopher Marais1,2,
- Andrew Johnson1,2,
- Jiri Hulcr1
- 1University of Florida;
- 2UF Forest Entomology Lab
- Protocols Bark Beetle Mycobiome


Protocol Citation: lsabelle Stratton, Christopher Marais, Andrew Johnson, Jiri Hulcr 2025. Bark and Ambrosia Beetle Macro Photography for an AI Training Dataset. protocols.io https://dx.doi.org/10.17504/protocols.io.x54v9p4oqg3e/v1
License: This is an open access protocol distributed under the terms of the Creative Commons Attribution License, which permits unrestricted use, distribution, and reproduction in any medium, provided the original author and source are credited
Protocol status: Working
We use this protocol and it's working
Created: January 17, 2024
Last Modified: October 01, 2025
Protocol Integer ID: 93694
Keywords: ambrosia beetle macro photography, photographing bark, ambrosia beetle, image processing, ai classifier, classifier, photo quality, such as mixed species sample, mixed species sample, optimal conditions for image processing, bark, camera, ai training dataset, species, photo
Abstract
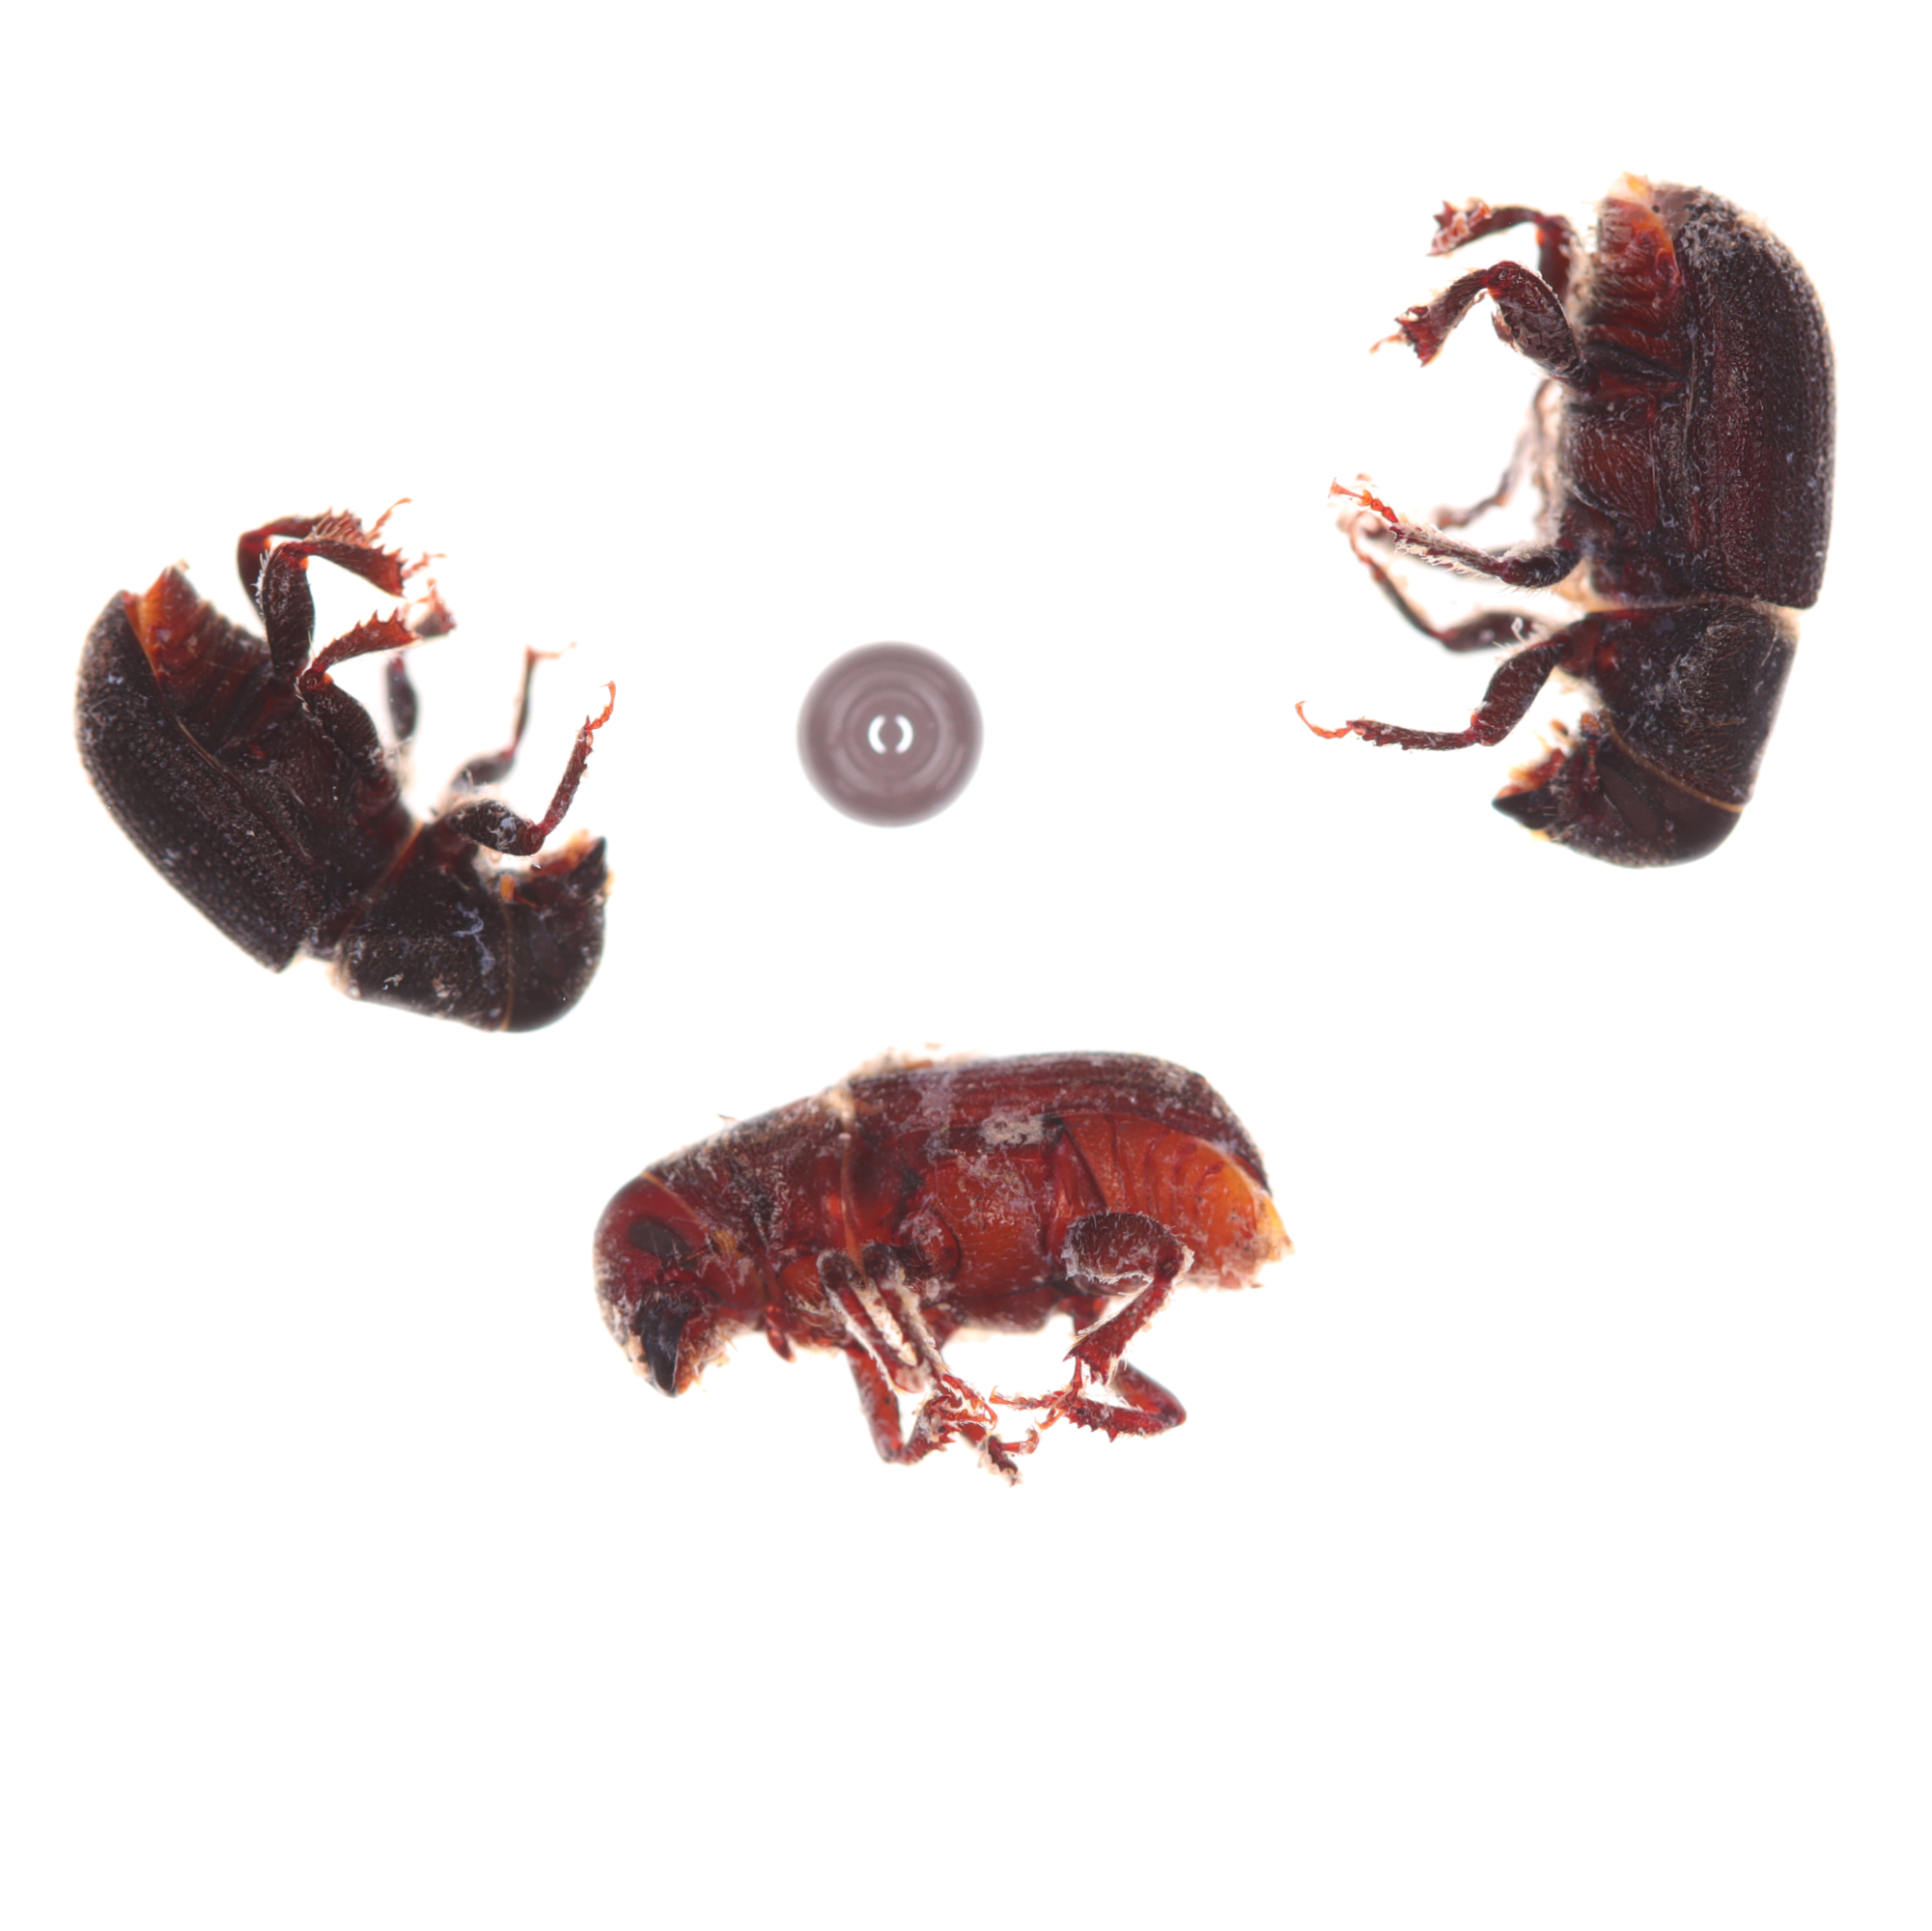
This protocol outlines a streamlined procedure for preparing and photographing bark and ambrosia beetles, ensuring optimal conditions for image processing by an AI classifier.
It is important to note that this procedure will be effective with the minimum requirements of a camera and bark/ambrosia beetles. While using all listed materials can enhance photo quality, they are not strictly essential for training a classifier, making the process accessible with the fundamental components.
This protocol does not accommodate every possible method and it is adaptable for various methods such as mixed species samples.
Materials
Please note that any brand specified here is not an endorsement of the UF Forest Entomology Lab.
Camera Set Up:
- Camera: Canon EOS M50
- Lens: Canon Macro Lens EF-S 60mm
- Ring Flash: Yongnuo Macro Ring Lite YN14EX
- Camera Stand: Engineered by Andrew Johnson
- Remote Shooting Program: EOS Utility 3
- Ceramic Tile
Other Materials:
- Two glass observational dishes; one being ~6cm in diameter
- 2mm ceramic ball bearing (Used for scale. Note the ceramic property will reduce reflectivity of the ball bearing)
- Vials of bark/ambrosia beetles to be photographed
- Extra clean vials
- Two pairs of forceps. It helps to have a thinner and thicker pair
- Pipette
- Thin flat spoon
Set Up: Camera
15m
Secure the camera to the camera stand.
If not already done, adjust the camera on the stand so that the end of the lens is approximately 11 cm from the top of the ceramic tile.
Note
For UF Forest Entomology Lab: To adjust the camera’s distance from the base of the stand, first securely hold the camera in one hand while loosening the knob attached to the clamp. Then use the red Allen wrench to loosen the bolt in the center of the clamp. The clamp height can then be adjusted. Reverse steps to secure the camera onto the stand.
Set up the ring flash.
Secure ring flash display to camera eyepiece with dial. The camera should be oriented downwards with the display facing up.
Secure ring flash to the end of the camera lens by first screwing on the 52mm adapter ring, then holding both buttons on either end of the ring. fit over the adapter.
Set flash shutter speed to 1/32s.
Log in to the computer, then turn on the camera.
Note
For UF Entomology Lab: EOS Utility 3 will automatically run after the camera is turned on.
Click “Remote Shooting”.
Camera settings should be set to manual focus, ISO: 160, shutter speed: 1/50, f-stop: 5.6
Note
These settings can be changed if necessary.
Set up manual focus peaking.
Note
For UF Entomology Lab: On the camera click Menu > Shooting settings > MF peaking settings.
Peaking - On, Level-high, Color-Red
The photos will need to be stored in one place.
Note
For UF Forest Entomology Lab: Z:\Forest_Entomology\lab records\Christopher_Marais\Beetle_classification_deep_data.
Click
> Destination Folder > Browse > Z: > Forest_Entomology > lab records > Christopher_Marais > Beetle_classification_deep_data > Ok
File Name should be set to shooting date, shooting time, photographer initials, sequential number.
Note
For UF Forest Entomology Lab:
Click
> File Name > Customize…> Customization 1,2,3 based on what is not already taken > Then set to shooting date, shooting time, photographer initials, sequential number > Ok
Set Up: Specimen
15m
Fill two glass observation dishes, A and B, with 190 proof ethanol (not denatured). Dish A should be approximately 6 cm in diameter, this dish will be used to photograph.
Place 2mm ball bearing into dish A.
Empty desired vial into dish B and ensure that each beetle is entirely submerged in ethanol.
Go to the place on your computer where the photos will be stored and either click on the associated species with the vial being photographed or create a folder titled insert “<Genus>_<species> “.
Note
For UF Forest Entomology Lab: go to Z: > Forest_Entomology > lab records > Christopher_Marais > Beetle_classification_deep_data
Create a folder within the species folder titled “Vial_<vial number>”.
Photography Procedure
1h
Create a folder under the associated vial titled “Subset_<x>” where x begins at 1.
Note
Each vial must be split into at least 2 subsets.
Individually with forceps, transfer a number of beetles from dish B to dish A such that each beetle is not overlapping to the best of ability and so that no beetle is touching the ball bearing.
Note
Individually transferring each beetle will minimize the debris in dish A.
Clear any debris or non-target specimen from dish A and place them back in the original vial.
Place dish A centered on ceramic tile and orient spot light onto beetles. Ensure that no edge of the glass dish is visible in the image preview, each beetle is completely submerged in ethanol, and each beetle is separated from itself and the ball bearing.
Note
A small amount of beetle overlap is sometimes effectively unavoidable; however the ball bearing must be separate. Each photo can be more conveniently segmented when the beetles and ball bearing are sufficiently separated.
Note
Note that if the beetles are not fully submerged it is possible air will seep in and compromise the sample.
.
Adjust focus ring until the red focus peaking is at maximum.
First pull spotlight away from dish A then take the photo.
Shuffle beetles so that they are in different positions and angles but still separated.
Repeat steps 18-21 ten times total.
Note
It will likely not be necessary to re-focus the image for each shuffle.
Cut and paste these ten photos into Subset_<x> .
Return beetles from dish A to original vial with any efficient tool shown in the materials section.
Repeat steps 22-24 until you have emptied the vial.
Top off ethanol in the vial and store it.
If vial is completely processed, all beetles will be back in the vial with it's vial number tag. Place vial into "Completed" box and return box to the lab freezer.
Note
In the case where vial is not completely processed and will be completed at another time:
Pick out a clean vial and insert beetles from dish B, these should be the unprocessed beetles. Indicate the vial number and processing status on the clean vial and place it, along with the original vial full of processed beetles, into the "Incomplete" box.
Repeat steps 21-26 as many times as necessary.
Clean Up
5m
Once vials are returned empty used ethanol from dish A and B into the correct lab hazardous waste receptacle.
Rinse and wipe down each dish.
Turn off camera, flash, and spotlight.
Finally, cover the set with a lab equipment cover.