Jan 14, 2026
A Surgical Protocol for Precise High-Throughput and Precise Viral Injections in Rhesus Monkey Brain
- Anne Claire Tangen1,2,3,
- Peyton Harmon1,3,
- Anya Plotnikova1,4,5,
- Arya Mohanty1,6,
- Alexander C. Cummins1,
- Kenneth A. Pelkey7,
- Katherine Cameron8,
- Camille Rood8,
- Kathryn Ann Guerriero9,
- Chris J. McBain7,
- Mark A. G. Eldridge1,10,
- Bruno Averbeck1,
- Reza Azadi1,11,12
- 1Laboratory of Neuropsychology, National Institute of Mental Health, NIH, Bethesda, MD 20892, USA;
- 2Neuroscience Institute, Carnegie Mellon University, Pittsburgh, PA 15213, USA;
- 3These authors contributed equally to the manuscript;
- 4Nash Family Department of Neuroscience and Friedman Brain Institute, Icahn School of Medicine at Mount Sinai, One Gustave L. Levy Place, New York, NY 10029, USA;
- 5Lipschultz Center for Cognitive Neuroscience, Icahn School of Medicine at Mount Sinai, New York, NY 10029, USA;
- 6School of Medicine, Wayne State University, Detroit, MI 48201, USA;
- 7Eunice Kennedy Shriver National Institute of Child Health and Human Development, NIH, Bethesda, MD 20892, USA;
- 8Section on Instrumentation, National Institute of Mental Health, NIH, Bethesda, MD 20892, USA;
- 9Veterinary Medicine and Resources Branch, National Institute of Mental Health, NIH, Bethesda, MD 20892, USA;
- 10Newcastle University, Newcastle upon Tyne, NE1 7RU, UK;
- 11Technical contact;
- 12Lead contact


Protocol Citation: Anne Claire Tangen, Peyton Harmon, Anya Plotnikova, Arya Mohanty, Alexander C. Cummins, Kenneth A. Pelkey, Katherine Cameron, Camille Rood, Kathryn Ann Guerriero, Chris J. McBain, Mark A. G. Eldridge, Bruno Averbeck, Reza Azadi 2026. A Surgical Protocol for Precise High-Throughput and Precise Viral Injections in Rhesus Monkey Brain. protocols.io https://dx.doi.org/10.17504/protocols.io.e6nvwnjq2vmk/v1
License: This is an open access protocol distributed under the terms of the Creative Commons Attribution License, which permits unrestricted use, distribution, and reproduction in any medium, provided the original author and source are credited
Protocol status: Working
We use this protocol and it's working
Created: January 05, 2026
Last Modified: January 22, 2026
Protocol Integer ID: 238262
Keywords: MRI scanning, Anesthesia, Craniotomy, Thoracotomy, Extraction, Exsanguination, rhesus monkey brain viral injection, precise stereotaxic microinjections in the macaque brain, macaque brain, precise viral injection, performing precise stereotaxic microinjection, cortical region, modification of neuron, surgical protocol, function of neural circuit, nonhuman primate, neural circuit, detailed surgical procedure, neuron, brain
Funders Acknowledgements:
National Institutes of Health Intramural Research Program
Grant ID: ZIA MH002928
Abstract
Viral injections in nonhuman primates allow modification of neurons to investigate the organization and function of neural circuits, their developmental processes, and disease-related mechanisms. Here we present a step-by-step protocol for performing precise stereotaxic microinjections in the macaque brain. This protocol covers the entire workflow, from pre-surgical imaging and target planning to perioperative care and detailed surgical procedures for multiple subcortical and cortical regions.
For complete details on the use and execution of this protocol, please refer to Furlanis et al.1.
Guidelines
Innovation:
We developed a new injection circuit that can be used across a range of surgical procedures requiring microinjections, including injections delivered through open cranial chambers. In addition, we provide a detailed protocol for general stereotaxic surgeries, addressing several aspects that are often underreported.
Institutional permissions:
All procedures were conducted in accordance with the guidelines approved by the National Institute of Mental Health Animal Care and Use Committee. Researchers intending to replicate these procedures must obtain prior approval from their own regulatory bodies.
Resource availability:
- Lead contact
Further information and requests for resources and reagents should be directed to and will be fulfilled by the lead contact, Reza Azadi, [email protected].
- Technical contact
Technical questions on executing this protocol should be directed to and will be answered by the technical contact, Reza Azadi, [email protected].
- Materials availability
This study did not generate new unique reagents.
- Data and code availability
Source data for Figure 18 is available on request. Similar data has been published previously and is available.
Supplemental information index (contact your handling editor):
- Supplementary File 1: Injection Circuit Holder
- Supplementary File 2: Stereotaxic Targeting Calculator
Materials
Key resources table:
| A | B | C | |
| REAGENT or RESOURCE | SOURCE | IDENTIFIER | |
| Mango | Mango Viewer | NA | |
| Microsoft Excel | Microsoft | NA | |
| Large-animal stereotaxic frame | Jerry-Rig USA | JR-SSHC | |
| Accura ClearVue | 3DSystems,Inc. | 24672-905 | |
| MED Digital ABS | Stratasys | NA | |
| Passivated 18-8 Stainless Steel Phillips Pan Head Screws, #2-56 Thread Size, 5/16” Long | McMaster-Carr | 91772A078 | |
| Passivated 18-8 Stainless Steel Phillips Flat Head Screw, 82 Degree Countersink, #4-40 Thread, 5/16” Long | McMaster-Carr | 91771A107 | |
| 18-8 Stainless Steel Socket Head Screw, #4-40 Thread Size, 3/8” Long | McMaster-Carr | 92196A108 | |
| Corrosion-Resistant 18-8 Stainless Steel Hex Nuts, #2-56 Thread Size | McMaster-Carr | 91841A003 | |
| Corrosion-Resistant 18-8 Stainless Steel Hex Nuts, #4-40 Thread Size | McMaster-Carr | 91841A005 | |
| 18-8 Stainless Steel Square Nut, #4-40 Thread Size | McMaster-Carr | 94785A511 | |
| CapTite Microfluidic Interconnect Elbow piece | LabSmith | T116-205 | |
| 30 gauge precut, 45 degree, lancet-sharpened needles | Hamilton | 22030-01 | |
| 23 gauge 304 Stainless Steel Tubing, Miniature, 0.025” OD, 0.004” Wall Thickness | McMaster-Carr | 8987K64 | |
| Uncoated High-Speed Steel Drill Bit, 0.65 mm Size, 32 mm Overall Length | McMaster-Carr | 2951A44 | |
| 50 cm PEEK tubing, 1/16” OD, 0.007” ID | IDEX Health & Science | 1536L | |
| Plastic Tubing Cutter | IDEX Health & Science | A-327 | |
| Microfluidic Cap Tite One-Piece Fitting ferrule | LabSmith | T116-100 | |
| CapTite Two-Piece Adapter | LabSmith | T116-A360 | |
| IDEX Fingertight One-Piece Fitting, Standard Knurl, Natural PEEK, 1/16” OD Tubing, 10-32 Coned | IDEX Health & Science | F-120X | |
| IDEX Threaded Adapter, PEEK, 0.020” ID, 10-32 Coned (F) to 1/4-28 Flat Bottom (F) | IDEX Health & Science | P-627-01 | |
| 100 µL Model 1710 CX Syringe, 1/4-28 Threads, Plunger Stop | Hamilton | 81062 | |
| Electrode Manipulators, Models 1460, 1460-61 | Kopf | 1460-61 | |
| Medline Sterile 100% Cotton Woven Gauze Sponges (4x4) | P-627-01 | NON21420 | |
| Standard Back Table Cover | Halyard | 42217 | |
| Disposable Flexible Light Handle Cover | Medline | DYNJLHS1H | |
| Skin Prep Solution 3M™ DuraPrep™ 6 mL | 3M | 3M-8635 | |
| Utility Marker with Ruler | Medline | DYNJSM06 | |
| Disposable Utility Drapes | Medline | DYNJP2405 | |
| Disposable Craniotomy Drape | Medline | DYNJP10001H | |
| 3M Ioban 2 Antimicrobial Incise Drape | loban | E51BA99 | |
| Disposable Suction Coagulator Handswitch | Ambler Surgical | SCH08 | |
| Electrosurgical Pencil Argent™ 10 Foot Cord Blade Tip | McKesson | 22-ESP1 | |
| Disposable Bulb Syringe | Cardinal Health | 143286 | |
| EZ Drape Sterile Hose & Cable Covers | AD Surgical | A400-1000 | |
| Kendall Disposable 16 oz Solution Bowl | Cardinal Health | 14219-136 | |
| Kendall Disposable 32 oz Solution Bowl | Cardinal Health | 46610-292 | |
| Electrosurgical Pencil Argent™ 10 Foot Cord Blade Tip | McKesson | 22-ESP1 | |
| Sterile Scalpel Blades #11 | Roboz Surgical Instrument Company | RS-9801-11 | |
| Sterile Scalpel Blades #10 | Roboz Surgical Instrument Company | RS-9801-10 | |
| Sterile Scalpel Blades #15 | Roboz Surgical Instrument Company | RS-9801-15 | |
| Scalpel Handle #3, 4” Length | Roboz Surgical Instrument Company | RS-9843 | |
| Scalpel Handle #7, 6.25” Length | Roboz Surgical Instrument Company | RS-9847 | |
| Tissue Forceps, 1x2 Teeth, 5.5” Length | Roboz Surgical Instrument Company | RS-8164 | |
| Freer Periosteal Elevator, Sharp/Blunt, 7.5” | Black & Black Surgical, Inc. | B63876 | |
| Freer Elevator, Double Ended, Sharp/Blunt, 7” | Roboz Surgical Instrument Company | RS-8820 | |
| Halsted Mosquito Forceps, Curved, 5” | Roboz Surgical Instrument Company | RS-7111 | |
| Hartmann Hemostatic Mosquito Forceps, Curved, 3.5” | Ambler Surgical | 30-851 | |
| Mayo Scissors, Straight, 5.5” | Roboz Surgical Instrument Company | RS-6870 | |
| Small Muscle Retractor, Spratt Curette, Size 5/0 | Roboz Surgical Instrument Company | RS-9040 | |
| Large Muscle Retractor, Spratt Curette, Size 2/0 | Roboz Surgical Instrument Company | RS-9052 | |
| High-Speed Surgical Drill Set, 120 VAC 50/60 Hz | BASi | MF-5360 | |
| Circular Saw Cutting Wheels | Pfingst & Company | H041047 (S); H041061 (M); H041073 (L) | |
| Drill Bits | Roboz Surgical Instrument Company | RS-6280C-2; RS-6280C-5; RS-6280C-8 | |
| Stainless Steel Surgical Spoons | Jerry-Rig USA | JR-SSSS | |
| Ruskin Rongeur, Double Action, Curved, 3 mm | Roboz Surgical Instrument Company | RS-8431 | |
| BoneSeal Absorbable Bone Hemostat | Hemostasis | 9550054 | |
| Bishop-Harmon Tissue Forceps, Titanium | Ambler Surgical | 9567T | |
| Micro Dissecting Scissors, Straight, 3.5” | Roboz Surgical Instrument Company | RS-5907 | |
| Castroviejo Needle Holder, Curved, 5.5” | Ambler Surgical | 50-171 | |
| Frazier Micro Dissecting Hook, Sharp, 3 mm Loop | Roboz Surgical Instrument Company | RS-6180 | |
| Suction Tube, 18 Gauge, Bent with Controller | Neozoline | NZ4251Bent | |
| Artificial Dura Tecoflex EG-93A, 0.005” Thickness | Lubrizol | EG-93A | |
| Codman Surgical Patties, 13 x 76 mm | Integra | 801407 | |
| Backhaus Towel Clamp, 3.5” | Roboz Surgical Instrument Company | RS-7780 | |
| Littauer Stitch Scissors, 5.5” | Roboz Surgical Instrument Company | RS-7076 | |
| Weitlaner Retractor, 3x4 Blunt Prongs | Roboz Surgical Instrument Company | RS-8616 | |
| Mayo-Hegar Needle Holder with Carbide Jaws, 6” | Roboz Surgical Instrument Company | RS-7922 | |
| Harvard Apparatus Pump Controller | Harvard Apparatus | 70-4404 | |
| Nanomite Injector, Single Syringe | Harvard Apparatus | 70-3602 | |
| Suture 2-0 PDS II Violet | Ethicon | Z997G | |
| ETHILON® Nylon Suture 3-0 | Ethicon | 1663G | |
| COATED VICRYL® (polyglactin 910) Suture 3-0 | Ethicon | J316H | |
| PROLENE Polypropylene Suture 4-0 | Ethicon | D7143 | |
| ETHILON® Nylon Suture 5-0 | Ethicon | 1855G | |
| COATED VICRYL® (polyglactin 910) Suture 5-0 | Ethicon | J493G | |
| PRANG | Bio-Serv | F2351 | |
| Glucose | MilliporeSigma | G7528 | |
| Sodium Bicarbonate | MilliporeSigma | S5761 | |
| Ascorbic Acid | MilliporeSigma | 11140 | |
| Sodium Chloride | MilliporeSigma | S7653 | |
| Monosodium Phosphate | MilliporeSigma | S3139 | |
| Potassium Chloride | MilliporeSigma | P9333 | |
| Calcium Chloride | MilliporeSigma | C5080 | |
| Magnesium Chloride | MilliporeSigma | M9272 | |
| Water | MilliporeSigma | 320072 |
- Resin, Accura ClearVue, 2-liter cartridge3D SystemsCatalog #24672-905
- Passivated 18-8 Stainless Steel Phillips Pan Head Screws, #2-56 Thread Size, 5/16” LongMcMaster-CarrCatalog #91772A078
- Passivated 18-8 Stainless Steel Phillips Flat Head Screw, 82 Degree Countersink, #4-40 Thread, 5/16”McMaster-CarrCatalog #91771A107
- 18-8 Stainless Steel Socket Head Screw, #4-40 Thread Size, 3/8” LongMcMaster-CarrCatalog #92196A108
- Corrosion-Resistant 18-8 Stainless Steel Hex Nuts, #2-56 Thread SizeMcMaster-CarrCatalog #91841A003
- Corrosion-Resistant 18-8 Stainless Steel Hex Nuts, #4-40 Thread SizeMcMaster-CarrCatalog #91841A005
- CapTite Interconnect ElbowLabSmithCatalog #T116-205
- 30 gauge precut, 45 degree, lancet-sharpened needlesHamiltonCatalog #22030-01
- 23 gauge 304 Stainless Steel Tubing, Miniature, 0.025 OD, 0.004 Wall ThicknessMcMaster-CarrCatalog #8987K64
- Uncoated High-Speed Steel Drill Bit, 0.65mm Size, 32mm Overall LengthMcMaster-CarrCatalog #2951A44
- 50 cm PEEK tubing, 1/16” OD, 0.007” IDIDEX Health & ScienceCatalog #1536L
- Plastic Tubing CutterIDEX Health & ScienceCatalog #A-327
- Microfluidic Cap Tite One-Piece Fitting ferruleLabSmithCatalog #T116-100
- CapTite Two-Piece AdapterLabSmithCatalog #T116-A360
- Idex Fingertight One-Piece Fitting, Standard Knurl, Natural PEEK, 1/16” OD Tubing, 10-32 ConedIDEX Health & ScienceCatalog #F-120X
- Idex Threaded Adapter, PEEK, 0.020” ID, 10-32 Coned (F) to 1/4-28 Flat Bottom (F)IDEX Health & ScienceCatalog #P-627-01
- 100 µL Model 1710 CX Syringe, 1/4-28 Threads, Plunger StopHamiltonCatalog #81062
- Electrode Manipulators, Models 1460, 1460-61KopfCatalog #1460-61
- Medline Sterile 100% Cotton Woven Gauze Sponges (4x4)MedlineCatalog #NON21420
- Standard Back Table CoverHalyard healthCatalog #42217
- Disposable Flexible Light Handle CoverMedlineCatalog #DYNJLHS1H
- Skin Prep Solution 3M™ DuraPrep™ 6 mL3M corporationCatalog #7100115636
- Disposable Utility DrapesMedlineCatalog #DYNJP2405
- COATED VICRYL® (polyglactin 910) Suture 3-0EthiconCatalog #J316H
- Disposable Craniotomy DrapeMedlineCatalog #DYNJP10001H
- Ioban 2 Antimicrobial Incise Drape3M corporationCatalog #6650EZE
- Disposable Suction Coagulator HandswitchAmbler SurgicalCatalog #SCH08
- Disposable Bulb SyringeCardinal HealthCatalog #143286
- EZ DRAPE Sterile Hose & Cable CoversAD SurgicalCatalog #A400-1000
- Kendall Disposable 32oz Solution Bowl, CovidienCardinal HealthCatalog #61200
- Kendall Disposable 32oz Solution Bowl, CovidienCardinal HealthCatalog #61200
- Electrosurgical Pencil Argent™ 10 Foot Cord Blade TipMcKesson CorporationCatalog #22-ESP1
- Sterile Scalpel Blades #11RobozCatalog #RS-9801-11
- Sterile Scalpel Blades #10RobozCatalog #RS-9801-10
- Sterile Scalpel Blades- #15RobozCatalog #RS-9801-15
- Scalpel Handle #3, 4” LengthRobozCatalog #RS-9843
- Scalpel Handle #7, 6.25” LengthRobozCatalog #RS-9847
- Tissue Forceps, 1x2 Teeth, 5.5” LengthRobozCatalog #RS-8164
- Freer Periosteal Elevator, Sharp/Blunt, 7.5”Black & Black Surgical, Inc.Catalog #B63876
- Freer Elevator, Double Ended, Sharp/Blunt, 7” RobozCatalog #RS-8820
- Halsted Mosquito Forceps, Curved, 5” Roboz Surgical Instrument Company RS-7111RobozCatalog #RS-7111
- Hartmann Hemostatic Mosquito Forceps, Curved, 3.5” Ambler SurgicalCatalog #30-851
- Mayo Scissors, Straight, 5.5” RobozCatalog #RS-6870
- Mayo Scissors; Straight; 43mm Blade Length ; 5.5 Overall LengthRobozCatalog #RS-6870
- Small Muscle Retractor- Spratt Curette; 6.5 Length; Oval, Size 5/0RobozCatalog #RS-9040
- Large Muscle Retractor- Spratt Curette; 6.5 Length; Oval, Size 2/0RobozCatalog #RS-9052
- High Speed Surgical Drill Set 120VAC, 50/60 HzBASi Research ProductsCatalog # MF-5360
- Circular Saw Cutting WheelsPfingst & CompanyCatalog #H041073 (L)
- Circular Saw Cutting WheelsPfingst & CompanyCatalog #H041073 (L)
- Circular Saw Cutting WheelsPfingst & CompanyCatalog #H041073 (L)
- Drill Bits- Carbide Round Burrs; Size #8RobozCatalog #RS-6280C-8
- Drill Bits- Carbide Round Burrs; Size #8RobozCatalog #RS-6280C-8
- Drill Bits- Carbide Round Burrs; Size #8RobozCatalog #RS-6280C-8
- Ruskin Rongeur, Double Action, Curved, 3 mmRobozCatalog #RS-8431
- BoneSeal Absorbable Bone HemostatHemostasisCatalog #9550054
- Bishop-Harmon Tissue Forceps, Titanium Ambler SurgicalCatalog #9567T
- Micro Dissecting Scissors, Straight, 3.5” RobozCatalog #RS-5907
- Castroviejo Needle Holder, Curved, 5.5”Ambler SurgicalCatalog #50-171
- Frazier Micro Dissecting Hook; Sharp; 5 Length; 3mm LoopRobozCatalog #RS-6180
- Micro Ear Suction Tube Bent (18 Gauge)Adept medical Catalog #NZ4251Bent
- Artificial Dura Tecoflex EG-93A Thickness 0.005”LubrizolCatalog #EG-93A
- Codman Surgical Patties 13´76mmIntegra BiosciencesCatalog #801407
- Backhaus Towel Clamp 3.5RobozCatalog #RS-7780
- Littauer Stitch Scissors 5.5; 33mm Blade LengthRobozCatalog #RS-7076
- Weitlaner Retractor 3X4 8 BluntRobozCatalog #RS-8616
- Mayo-Hegar Needle Holder With Carbide Jaws; 6 LengthRobozCatalog #RS-7922
- HAPC-4: Controller populated with four channel modulesHarvard ApparatusCatalog #70-4404
- Nanomite Injector, Single Syringe, BlackHarvard ApparatusCatalog #70-3602
- PDS® II (polydioxanone) Suture, 2-0EthiconCatalog #Z997G
- ETHILON® Nylon Suture 3-0EthiconCatalog #1663G
- COATED VICRYL® (polyglactin 910) Suture 3-0EthiconCatalog #J316H
- PROLENE® Polypropylene Suture, 4-0 EthiconCatalog #D7143
- ETHILON® Nylon Suture 5-0EthiconCatalog #1855G
- COATED VICRYL® (polyglactin 910) Suture 5-0EthiconCatalog #J493G
- Bio-Serv™ PRANG™, Oral Rehydrator PowderBio-ServCatalog #14-726-431
- D-( )-glucose Merck MilliporeSigma (Sigma-Aldrich)Catalog #G7528
- Sodium bicarbonateMerck MilliporeSigma (Sigma-Aldrich)Catalog #S5761
- ( )-Sodium L-ascorbateMerck MilliporeSigma (Sigma-Aldrich)Catalog #11140
- Sodium ChlorideMerck MilliporeSigma (Sigma-Aldrich)Catalog #S7653
- Sodium phosphate monobasicMerck MilliporeSigma (Sigma-Aldrich)Catalog #S3139
- Potassium ChlorideMerck MilliporeSigma (Sigma-Aldrich)Catalog #P9333
- Calcium chloride dihydrateMerck MilliporeSigma (Sigma-Aldrich)Catalog #C5080
- Magnesium chloride hexahydrateMerck MilliporeSigma (Sigma-Aldrich)Catalog #M9272
- WaterMerck MilliporeSigma (Sigma-Aldrich)Catalog #320072
Materials and equipment setup:
Sucrose-substituted artificial cerebrospinal fluid (ssACSF); saturated with carbogen (95% O2, 5% CO2), with osmolarity 310-320 Osm.
| A | B | C | |
| Reagent Sucrose | Final concentration (% w/v) | Amount | |
| NaCl | 0.47% | 80 mM | |
| NaH2PO4 | 0.015% | 1.25 mM | |
| KCl | 0.026% | 3.5 mM | |
| CaCl2 | 0.007% | 0.5 mM | |
| MgCl2 | 0.092% | 4.5 mM | |
| NaHCO3 | 0.20% | 24 mM | |
| Glucose | 0.18% | 10 mM | |
| Water (H2O) | N/A | 1 L |
Troubleshooting
Problem
Clogged injection circuit: On rare occasions, the injection circuits may become clogged, either due to small fragments in the viral solution or mineral oil, or because tissue is pushed into the needle during brain penetration when targeting multiple sites within the same structure.
Solution
Alternating flushes of sterile water and 70% ethanol can often clear a clogged circuit, especially when using a pump to maintain steady positive pressure and injection flow. If clogging occurs during surgery following a tissue penetration, it is likely caused by tissue obstructing the needle tip. In this case, use a pair of fine forceps to gently wipe the tip of the needles and remove debris. Afterwards, verify that the injection flow is restored.
Problem
Seroma fluid accumulation: Accumulation of seroma is relatively common after such extensive surgeries involving dissection of multiple tissue layers, detachment of the temporalis muscles, and large craniotomies. This is due to a large area of dead space, and is more commonly seen in larger animals (e.g. males). Excessive seroma buildup typically becomes apparent in the second postoperative week.
Solution
Pay close attention to the wound closure. Ensure that the bone flap is properly repositioned so its margins are well aligned with the surrounding skull, and securely tighten the suture lines connecting the flap to the bone. To minimize dead space, suture the posterior portions of the temporalis muscles together when anatomically possible (note that there are variations and some animals, particularly females, may have less medial overlap). Close the galea as tightly as possible to prevent fluid accumulation beneath it. Maintain strict sterility throughout the surgery, keep the tissues moist, and irrigate generously before closing each layer. In cases of excessive seroma formation, consider draining the fluid, since pressure from the expanding seroma can facilitate dehiscence of the incision line and impede healing, even if the sutures remain intact. Additionally, a diuretic, such as furosemide (1 mg/kg) once daily, can be initiated to decrease fluid accumulation in consultation with a veterinarian. It is recommended to culture the fluid drained from the surgical site to evaluate for any evidence of developing infection.
Problem
Meningeal adhesion: During the healing process, the dura and pia mater can fuse together. Infection can promote adhesion formation. Moreover, mechanical trauma from needle penetrations may lead to localized meningeal adhesions. This issue is particularly important for dorsal cortical targets, as removing such adhesions during brain extraction can risk cortical damage.
Solution
To reduce the likelihood of meningeal adhesion, minimize tissue trauma during needle entry and thoroughly irrigate the surgical site to remove any blood clots before dura closure. More importantly, avoid overlapping the dura incisions with penetration sites.
Before start
Stereotaxic surgery is a common technique in systems neuroscience for performing precise microinjection in the nonhuman primate brain2,3. Despite the wide use of stereotaxic procedures, detailed methods are rarely included in published studies. This protocol provides a step-by-step guide for performing high-precision stereotaxic viral injections in macaques.
The procedures described here were developed and optimized for the experiments reported in previous publications1,4–9. However, the same general framework can be adapted for other stereotaxic and surgical applications in nonhuman primates, such as tracer injections, excitotoxic lesion studies, and chronic cranial implantations. In addition to the injection procedure, this protocol describes how to extract the brain for ex vivo electrophysiological studies, which differs from commonly used post-euthanasia extraction used for anatomical or histological analyses. Finally, we introduce a custom-designed injection circuit that enables simultaneous multiple injections, improving reliability and substantially reducing surgical duration.
In developing this protocol, we incorporated and expanded upon established methods in the literature, such as the use of tooth markers10, and sagittal sinus alignment11. Finally, we further optimized our previous surgical protocol12 and injection-circuit design13.
Building the injection setup
Building the injection circuits.
To prepare the injector needle, sharpen the tip of a hypodermic tube to a 30° bevel. Alternatively, use a pre-sharpened hypodermic needle.
Cut a 30-gauge hypodermic needle to a length of 70 mm.
Cut a 23-gauge needle to a length of 50 mm.
Use a CapTite Two-Piece Adapter to connect the needle to CapTite Interconnect Elbow.
Place the 23-gauge guide tube around the 30-gauge injector needle to protect it from bending during penetration of the brain.
Use a Plastic Tubing Cutter to cut the PEEK tubing to a length of approximately 50 cm, ensuring a flat and burr-free cut.
Connect the PEEK tubing to the CapTite Interconnect Elbow using a CapTite One-Piece Fitting (Ferrule).
Secure the CapTite Interconnect Elbow into the 3D-printed connector holder using Phillips Rounded Head Screws (2-56 Thread Size, 5/16” Long) and Hex Nuts (2-56 Thread Size).
Attach the top piece of the 3D print using Socket Head Screws (4-40 Thread Size, 3/8” 95 Long), hex nuts (4-40 Thread Size), Phillips Rounded Head Screw (2-56 Thread Size, 5/16” Long), and hex nut (2-56 Thread Size).
Attach an Idex Fingertight One-Piece Fitting to the other end of the PEEK tubing.
Connect this fitting to an Idex Threaded Adapter, PEEK, 0.020” ID, 10-32 Coned (F) to 1/4-28 Flat Bottom (F). Slide the PEEK tubing out at least 5 mm before screwing it.
Note
Timing: 30 min Figure 1 illustrates the components of the injection setup.
Building the 3D-printed injection circuit holder.
Figure 1: Injection circuit components: Hamilton 100 µL syringe (1), Idex Threaded Adapter (2), Idex Fingertight One-Piece Fitting (3), 50 cm PEEK tubing 1/16” (4), Microfluidic CapTite One-Piece Fitting ferrule (5), CapTite Microfluidic Interconnect Elbow piece (6), CapTite Two-Piece Adapter (7, 8), Hamilton 30 gauge precut, 45 degrees, lancet sharpening needle (9), 23 gauge 304 Stainless Steel Tubing guide tube (10), 3D-printed injection circuit holder (11), metal bar which connects to micromanipulator (12), Phillips Flat Head Screw (4-40 Thread, 5/16" Long; 13a), Hex Nuts (4-40 Thread Size; 13b), Socket Head Screws (4-40 Thread Size, 3/8" Long; 13c), Square Nuts (4-40 Thread Size; 13d), Phillips Rounded Head Screws (2-56 Thread Size, 5/16" Long; 13e), Hex Nuts (2-56 Thread Size; 13f).
Use the provided STL file (Supplementary file 1) to 3D-print the circuit holder in Accura ClearVue from 3D Systems (only Ethylene oxide (EtO) gas compatible).
Attach the bar to the 3D-printed holder by tightening the Phillips Flat Head Screw (4-40 Thread, 5/16”) into the hex nut (4-40 Thread Size)(screw) to secure the connection between the 3D-printed holder and metal bar.
Note
CRITICAL: Verify that the connection between the 3D-printed holder and metal bar is secure and does not rotate or move during use.
Building the loading connectors.
Cut a piece of PEEK tubing to approximately 5mm.
Drill through the PEEK tubing using an approximately 0.6 mm drill bit to allow insertion of the 23-gauge needle.
Insert the needle into the PEEK tubing, then place the PEEK-covered end into an Idex Fingertight One-Piece Fitting, with the narrow side facing outward to allow secure insertion into the Idex adapters.
Screw this assembly into the coned side of the Idex Threaded Adapter (PEEK, 0.020” ID, 10-32 Coned (F) to 1/4-28 Flat Bottom (F)).
Attach a syringe to the flat-bottom side of the adapter.
Test the injector circuit
Verify all connections by gently pulling on the PEEK and hypodermic tubes to ensure they are secure.
Using the loading connector, fill a syringe with distilled water.
Inject the distilled water through the circuit to confirm there are no clogs, and check all connectors for leaks.
Note
CRITICAL: PEEK connectors should be tightened only finger-tight; overtightening can causecracks or deformation. Ensure that the needle tip remains straight and sharp throughout assembly.
Note
NOTE: See Troubleshooting 1
Pre-operative Scanning
Note
Timing: 3 h
Framing the animal in an MR-compatible stereotaxic device.
With one ear bar firmly secured in place as far back against the stereotaxic arm as possible, lift the monkey’s head and feel for the zygomatic arch.
Place the ear bar into the monkey’s ear canal. To ensure the ear bar is correctly placed into the ear canal, you should be able to feel the end of the zygomatic arch against and perpendicular to the ear bar.
While holding the head against the ear bar in the ear canal, place the other ear bar in the contralateral ear canal using the same method by feeling for the zygomatic arch. Place that ear bar into the respective cavity and secure it in the frame.
With the help of another person, align and center the ear bars by loosening both ear bar-locking screws. Adjust the ear bars until the monkey’s head is centered in the frame. Confirm that the numbers visible on the ear bars match.
Place the orbit holder and mouthpiece by loosening both screws. Place the mouth-piece at the roof of the monkey’s mouth without placing the piece under the tongue. Simultaneously, hook the orbit holders on the lower orbits of the monkey.
While pulling up on the mouthpiece as much as possible, secure both screws, starting with the anterior-posterior (AP) adjustment screw.
Record the ear bar and the orbit holder positions.
Finally, place a tooth marker on the tip of one of the monkey’s canines or another notable tooth in the upper jaw10.
Note
CRITICAL: Ensure that both ear bars are seated correctly in the ear canals. An improperly positioned ear bar will lead to inaccurate head alignment and unreliable stereotaxic measurements. If there is any doubt about placement, reframe the animal and recheck the 146 tooth-marker measurements.
Targeting
Note
Timing: 1 h
Targeting dorsal cortical areas can be performed visually by exposing the cortical surface during surgery. Using approximately 10 µL of viral solution is typically sufficient to transfect a circular region of cortex about 2 mm in diameter.
Targeting subcortical structures requires stereotaxic localization. Here we provide details of targeting subcortical structures, such as hippocampus, posterior striatum, anterior striatum and area 25. The details of targeting parameters (i.e., injection coordinates, volumes, and rates) are provided in Figure 2 and Supplementary file 2, which was generated using Mango software on a macaque template: NMT v214,15. Table 1 summarizes the injection parameters for each target. The following steps describe how to determine each injection site:
Figure 2: Stereotaxic target placement
Table 1: Injection parameters
Using sagittal slices from the pre-operative MRI, identify the Y-coordinate (rostrocaudal axis) corresponding to the tips of the ear bars.
For each target, determine the X, Y, and Z coordinates of the injection site, as well as the X, Y, and Z coordinates of the sagittal sinus on the same coronal slice.
During surgery, calculate the Y (rostro-caudal) coordinate relative to the ear bar position (“ear bar zero”), and determine the X (medio-lateral) and Z (dorso-ventral) coordinates using the sagittal sinus as a reference.
An Excel sheet is provided to facilitate the calculation of stereotaxic coordinates for target sites Supplementary file 3.
Sterilizing surgical instruments
Note
Timing: 15 h
Sterilize the following items:
- Surgical instruments.
- Injection circuits, loading connectors, and spare components.
- Microinjection syringes.
- Allen wrenches for adjusting the micromanipulator components if necessary.
- Microinjection pumps.
- Micro-manipulators.
- Ear bars.
Note
CRITICAL: If you sterilize the injection circuits with Ethylene Oxide (EtO), keep in mind that the gas may not reliably reach the inside of the tubing. Flush the entire circuit with a chemical sterilant, then rinse it thoroughly with sterile distilled water to clear out any residue.
Loading virus into syringes
Note
Timing: 1 h
The dead volume of the injection circuit is approximately 25 µL . This volume can be reduced, if necessary, by shortening the PEEK tubing and decreasing its internal diameter, as well as the needle length. However, a significant portion of the dead volume results from the syringe connector (approximately 10 µL ). If needed, the circuit can be pre-filled with sterile mineral oil to minimize dead volume, as follows:
Under sterile conditions, attach the loading connector to the syringe.
Place the hypodermic tubing into sterile mineral oil and draw back the plunger to load mineral oil into the syringe.
Push and pull the plunger several times to eliminate air bubbles completely.
Draw up approximately 20 µL of sterile mineral oil.
Without removing the loading connector, wipe the needle tip to remove residual oil before inserting it into the virus vial. Withdraw the required volume of viral solution.
Remove the loading connector and draw back the plunger to create a 10 µL air gap, ensuring no liquid remains in the needle or connector.
Note
CRITICAL: It is important to completely get rid of the air bubble gap when initially loading the mineral oil. Because of the dead volume of the loading connector, after you have loaded 5 µL into the syringe, remove the needle tip from the mineral oil to then proceed with loading virus.
Supportive medications
Note
Timing: 30 min
Administer pre- and post-operative medications, including corticosteroid, antibiotic, and analgesic agents, as described below.
Corticosteroids: administer dexamethasone 0.5 µL IM the evening prior to surgery. From the day of surgery, continue administration at 0.5 µL three times daily (TID) for 3 days, followed by 0.5 µL twice daily (BID) for 2 days, then 0.5 µL once daily (SID) for 1 day, and finally 0.25 µL once daily (SID) for 1 day. This tapering schedule helps minimize post-operative neuroinflammation and minimize edema.
Antibiotics: administer cefazolin 25 µL IM the evening prior to surgery. Beginning on the day of surgery, continue cefazolin 25 µL IM twice daily (BID) for 3 days, followed by cephalexin 25 µL PO twice daily (BID) for 11 days.
NSAIDs: administer meloxicam 0.2 µL IM once daily (SID) for 3 days starting on the day of surgery, followed by meloxicam 0.2 µL PO once daily for an additional 3 days.
Zeroing the Stereotaxic frame using the ear bar
Note
Timing: 30 min Figure 3 illustrates the zeroing procedure.
Under sterile conditions, place the sterilized ear bars in the stereotaxic frame and adjust them to the same distance used during MRI scanning. Ensure to maintain sterility of the ear bar tip, as the injection needle may accidentally touch them.
Figure 3: Zeroing the stereotaxic frame
Mount the sterilized micromanipulators onto the stereotaxic arms.
Attach the injection circuit to the micromanipulator.
Using the micromanipulator, move the needle tip until it is precisely aligned with the center or the tip of the ear bar, and record the corresponding coordinates.
Induction of anesthesia
Note
Timing: 30 min
For initial sedation, anesthetize the animal with ketamine 5 µL -15 µL and midazolam 0.05 µL -0.2 µL IM, then transport the animal to the surgical preparation area. Alternative sedation regimens may be used as appropriate in consultation with the institute veterinarian.
Place an intravenous catheter in a peripheral vein, such as the saphenous or cephalic vein, and proceed with endotracheal intubation. Collect perioperative blood samples for complete blood count (CBC) and serum biochemistry analysis.
Shave the head and neck and perform an initial rough scrub to remove all hair and debris. Tape or a lint roller can be used to remove any remaining hair or debris.
Transport the animal to the operating room once prepared.
Monitor physiological parameters throughout the procedure, including heart rate and electrocardiogram, end-tidal CO2, respiratory rate, blood pressure, body temperature, and minimum alveolar concentration (MAC). If needed, connect the animal to a ventilator to maintain stable respiration.
Maintain intravenous catheter patency by infusing lactated Ringer’s solution at 3-5 ml/kg/hour.
Administer mannitol 2 µL of a 20% solution IV over 00:20:00 , two to three times during surgery, depending on the degree of brain swelling observed.
Initial prepping and framing
Note
Timing: 45 min
Prepping the scalp:
In a sterile manner, place 10 to 20 4x4 sterilized gauzes in two separate sterile bowls.
Fill one bowl with 70% ethanol and the other with a surgical scrub solution (e.g., Povidone-Iodine scrub).
In a sterile manner, protect the animals eyes by placing a dry, sterile gauze over the eyes.
Using the dominant hand, scrub the surgical site in a concentric circular motion, starting from the center of the skull and moving outward, with a gauze soaked in the scrub solution. Avoid direct contact between your gloved hand and the animal skin. Use the alcohol soaked gauze (from the second bowl) to remove the scrub solution from the skin. Use sterile forceps to access the bowls. Use your non-dominant hand to ensure the gauze protecting the eyes remains in place.
Repeat the scrub-rinse cycle at least three times, or until all visible debris and remaining trimmed hairs are removed from the skin.
Use the same method to disinfect the stereotaxic frame arms. Do not use the same gauze pads that were used on the skin for cleaning the equipment to prevent cross-contamination.
Finally, apply a sterile antiseptic solution (e.g DuraPrep) to the prepared skin, following the manufacturer’s recommended contact time and usage instructions. Allow the solution to dry fully before draping.
Note
CRITICAL: Always protect the eyes throughout the prepping procedure, as the scrub solution can damage the cornea. Before draping, make sure no loose hair or debris remains on the skin. Proper skin preparation is also essential for adhesive drapes to adhere securely and remain in place throughout the surgery.
Scrub your hands and put on your sterile gown and gloves.
Draping:
In a sterile manner, place the disposable flexible light handle covers on the lights and move them to focus on the surgical site.
Using a sterile skin marker, mark the sagittal midline, then define the incision boundaries: rostrally at the level of the brow ridge and caudally extending at least 20 mm posterior to the occipital ridge. A longer incision facilitates lateral retraction of the skin, improving the exposure of the skull and temporalis muscles.
For the initial draping layer, use three disposable utility drapes with sterile tapes. Place two drapes parallel to the sagittal midline, approximately 20 mm away to allow for skin stretching after incision. Place the third drape just anterior to the rostral incision mark. If needed, secure drapes in place using towel clamps, grabbing the towel corners together with the monkey’s skin.
Place the craniotomy drape by aligning the leading edge of the adhesive area with the anterior incision mark. Press down firmly to ensure full adhesion and eliminate any air bubbles. Alternatively, an antimicrobial incision drape (e.g.3M™Ioban™) can be used to cover the surgical site, following the same protocol. Next, use general surgical drapes or table covers with a circular opening to cover the entire surgical field. If needed, secure this outer layer with towel clamps.
Note
CRITICAL: Avoid touching the animal’s skin, the stereotaxic frame, or any other non-sterile surface while draping. If your gloves or gown become contaminated at any point, you will need to rescrub, put on new sterile gloves and gown, and redrape the animal before proceeding.
Surgical Site Set-Up:
Connect the suction tip to the suction hose and attach the hose to the suction collection canister.
Plug in the disposable cautery pen to the power source and confirm that it is functioning properly.
Place two surgical bowls and a disposable bulb syringe filled with sterile saline on the Mayo stand.
Arrange all instruments necessary for the opening phase on the Mayo stand for easy access.
Surgical procedure
Note
Timing: 5-12 h
Opening skin: Using a #10 surgical blade, make a single sagittal incision along the midline, carefully following the line that was marked during preparation (Figure 4). Using the thumb and index finger of the other hand, maintain gentle pressure on the sides of the wound to keep it slightly open. To preserve the galea, inspect the incision after the first few millimeters and adjust the depth as needed. If bleeding occurs, apply pressure with sterile gauze for hemostasis. Maintain visualizing the incision depth throughout, and aim to complete the cut in a single continuous motion without lifting the blade from the skin (Figure 4).
Figure 4: Skin incision
Separating skin and galea: After completing the incision, use tissue forceps and periosteal elevators to gently separate the skin from the galea extending approximately 20 mm from the incision line. For a clean and consistent margin, move the elevator parallel to the incision line during dissection. Alternatively, the curved edge of the #10 blade can be used to separate the skin and fascia by gently dissecting along the area where the two layers are connected. Apply scalp clamps to secure the adhesive drapes to the skin and assist with hemostasis.
Opening galea: Press the sharp end of the periosteal elevator into the sagittal midline to cut through the galea and expose the underlying bone for a few millimeters. Then, use the elevator to separate the galea from the skull along the midline, working through the incision. Once elevated, cut the galea along the periosteal elevator using Mayo scissors (Figure 5). Rather than using a cutting motion, open the scissors slightly, just a few millimeters, and slide them forward to create a smooth incision. Alternatively, make an incision with the #15 blade, following the line of the skin incision.
Figure 5: Incision of the galea
Retracting galea: Separate the galea from the deep temporalis fascia using a periosteal elevator, or Mayo scissors by inserting the closed blades and gently spreading them apart. Apply traction on the galea to facilitate dissection. Following initial separation, dry gauze can be used to separate the galea by gently pushing it laterally (Figure 6).
Figure 6: Retraction of the galea
Retracting temporalis muscles: Using the sharp edge of a periosteal elevator, detach the dorsal portion of the temporalis tendons from the skull, keeping the elevator oriented sagittally to minimize muscle trauma. After the initial detachment, gradually elevate the tendon to fully separate it from the bone (Figure 7). Then, using muscle curettes gradually detach the body of the temporalis muscles from the skull. Alternatively, the periosteal elevator can be used with controlled horizontal movements.
Figure 7: Retraction of the temporalis muscles
Craniotomy:
The craniotomy margins should extend approximately 10 mm beyond the planned injection sites. Use a surgical ruler to measure the anterior-posterior boundaries relative to the ear bar level, and medio-lateral boundaries from the sagittal midline. For bilateral injections, the craniotomy can be made symmetric; otherwise, the craniotomy should cross the sagittal sinus by approximately 10 mm.
Using an ultrasonic piezoelectric bone cutter or a circular cutting wheel (Figure 8), begin drilling the craniotomy. It is recommended not to drill completely through the bone; leave a thin layer intact to avoid contacting the dura with the drill bit, as the bit can penetrate it. Exercise particular caution when drilling over the sagittal sinus; do not drill entirely through the bone in this area to prevent vascular injury to the sinus.
Figure 8: Craniotomy
Once margins are complete, use two periosteal elevators to gradually lift and detach the bone flap (Figure 9). It is recommended to begin elevating from the caudal side, carefully monitoring for dural adhesions commonly found over the sagittal sinus, but can occur anywhere. Use a periosteal elevator to gently press against the underside of the bone flap and separate any adhesions without damaging the dura. Continue lifting the flap while progressively detaching it. Avoid inverting or pushing down the opposite edge of the flap, as this may place pressure on the underlying cortex.
Figure 9: Removal of the bone flap
It is common to observe minor bleeding after removing the bone. Irrigate the dura surface, and if the bleeding is excessive or does not stop after a few minutes, apply a small piece of surgical neurosurgical patty to achieve hemostasis. Cut the patty to the size of the bleeding spot to avoid excessive weight on the brain during surgery. Remove the patty with irrigation before closure. In case of significant hemorrhage, use gel-foam to minimize the risk of intracranial bleeding after the surgery.
To replace the bone flap after the injections, suture lines can be used to secure it. Begin by removing any dural adhesions around the craniotomy margin using a periosteal elevator. Gently press the elevator towards the inner surface of the bone and remove the adhesions. Then, using a bore drill bit, create suture holes approximately 3 mm from the edge of the craniotomy. Angle the drill slightly to facilitate easier suture placement. While drilling, place a brain spatula underneath the bone and press firmly against the bone to shield the dura. The frontal bone is generally not suitable for suture placement. In these surgeries, it is preferable to place two holes on the lateral sides and two on the caudal edge of the craniotomy. Drill corresponding suture holes on the bone flap as well.
Use rongeurs to smooth any sharp edges along the bone flap and the craniotomy. In cases of bone bleeding, apply bone wax to achieve hemostasis. Be sure to remove the excess bone wax before opening the dura.
Measuring the sinus
Measure the sagittal sinus as soon as possible after bone flap removal, as delays can significantly affect targeting accuracy. Mount the micromanipulator with the injection circuits onto the stereotaxic bars. If disposable drapes are used, carefully cut through them with a sterile blade to cut through the drapes and expose the arms. Take special care to avoid bending the injection needle.
Position the micromanipulator at the most caudal target along the AP axis. If using a micromanipulator with fine AP adjustments, it is recommended to set the coarse AP position on the first (most caudal) target with the fine adjustment dial set to zero. Once the coarse position is fixed, the fine AP adjustment can be used to step through each target location. After setting the AP position, adjust the ML and DV until the tip of the needle gently touches the middle of the sagittal sinus (Figure 10). Take special caution not to compromise the sinus. Record the ML and DV on the manipulator, and repeat this procedure for each target along the AP axis.
Figure 10: Measurement of the sagittal sinus
Dura opening: Opening the dura mater helps maintain needle alignment, since the dura is a relatively tough tissue that can bend or deflect the needle’s trajectory. Maintain at least 5 mm margin between the dura incision and the edges of the craniotomy. Using a #11 blade on a #7 handle, make a small initial nick in the dura, keeping the back of the blade parallel to the cortical surface to avoid injury to the underlying brain tissue (Figure 11). Then, using fine tissue forceps, gently grasp and lift the dura at the nicked edge. Use the #11 blade or tip of iris scissors, carefully penetrate the dura, keeping the tips far from the cortex (Figure 12). Once you see cerebrospinal fluid, continue the incision using the scissors. Keep the blades slightly open (1 to 2 mm) and glide them along the dura rather than using a cutting or closing motion (Figure 12). At the rostral and caudal ends of the incision, take extra care to avoid injuring the sagittal sinus.
Figure 11: Initial incision of the dura mater
Figure 12: Opening of the dura mater
Viral injection:
Verify flow through the injection circuit by initiating virus efflux. Begin with a relatively high flow rate (e.g., 10 µL to 20 µL uL/min) to first fill up the dead volume of the circuit. Once the circuit is primed, reduce the rate to 1 µL to 5 µL uL/min and continue until viral efflux is visually confirmed at the needle tip. Then stop the flow or reduce it to a very low rate (e.g. 0.01 µL uL/min).
After adjusting AP and ML positions for the injection target, lower the needle and stop just above the cortical surface, and inspect the anticipated penetration site for any large blood vessels in the pia mater. If a vessel is present, minimally adjust the AP or ML or avoid the injection at that site. Once clear, gently penetrate the cortex and advance the needle to the target depth. Note that the pia mater may resist penetration, particularly when using needles with shallow bevel angles (e.g. 45°). Optionally, a minimal flow rate (e.g. 0.01 µL /min) can be maintained during the descent to help prevent needle blockage by tissue. After reaching the desired DV coordinate, set the injection pump to the intended rate. To minimize tissue damage during injection, it is important to irrigate the dura and exposed cortex with sterile saline at least every 00:02:00 -00:03:00 . Redirecting the surgical light can also help prevent overheating and drying the tissue (Figure 13).
Figure 13: Viral injection
Following the completion of the injection, wait for 00:10:00 before withdrawing the needle to minimize the risk of backflow of the injected solution due to positive pressure at the injection site. Retract the needle very slowly over the first 2-3 mm, to avoid creating negative pressure that could draw virus along the penetration trajectory. Confirm viral flow at the end of each injection once the needle is out of the brain. For multiple injections along a penetration track within a single target structure, it is recommended to proceed from the most ventral site to the more superficial one. In such cases, the waiting period between injections may be reduced to 00:01:00 , as backflow is not a major concern.
Closing: Before closure, remove the micromanipulators from the stereotaxic arms and flush the cortical surface with normal saline, ensuring that no blood clots and no bleeding remain.
Closing the dura: Using fine tissue forceps and Castroviejo needle holder, suture the dura with either absorbable or nonabsorbable monofilament sutures (size 5-0 or 6-0) on a tapered needle (Figure 14). A simple continuous suture pattern is preferred, as it minimizes the amount of suture material left on the dura. Sutures should be placed approximately 1 to 1.5 mm apart. In case of extreme brain swelling, avoid placing tension on the tissue by attempting to close the dura. In such situations, it is best to leave the dura open and instead cover the area with an artificial dural graft. Note that the dura is elastic, and in many cases, it is still possible to achieve primary closure despite initial appearance. When attempting dural closure, take small bites (less than 1 mm from the margin) to ensure that the full closure is possible.
Figure 14: Closure of the dura mater
Bone flap replacement: Use a multifilament absorbable suture (size 3-0 or 2-0) for each suture hole. Begin by threading the suture tails through the holes on the craniotomy margins. Use fine forceps to pull the sutures through, if necessary. Then, pass the sutures through the corresponding holes on the bone flap. Ensure the suture lines are not entangled before proceeding. Tie each suture using a square knot, formed by placing two single knots in opposite directions. Gradually tighten the sutures in multiple steps, alternating sides to prevent uneven tension that could misplace the bone flap. Avoid over-pulling the sutures so as not to break the suture lines. Once the bone flap is properly aligned and stable, secure each suture with one or two additional single knots (Figure 15).
Figure 15: Replacement of the bone flap
Closing fascia: Use multifilament absorbable suture lines (size 3-0) to close the galea in a simple continuous pattern. Sutures should be spaced approximately 3 to 4 mm apart (Figure 15). Ensure that both the rostral and caudal ends of the fascia are securely closed.
Closing skin: Use a monofilament absorbable suture line (size 3-0) in an intradermal pattern to close the skin. Alternatively, a monofilament non-absorbable suture line (size 3-0 or 2-0) can be used in a horizontal mattress pattern, placing approximately 2 mm from the skin margin and 4 mm apart. While the horizontal mattress pattern often overly evert the incision margins, its advantage is that the suture lines remain on either side of the incision rather than crossing it, reducing the likelihood that the animal can pick at the sutures. Continuous patterns leave less foreign material in the wound than interrupted patterns, thereby reducing postoperative irritation and improving healing. However, continuous sutures can be more prone to complications if they become loose, for example, due to animal interference or infection. Nonabsorbable sutures can be removed 10-14 days after the surgery.
Recovery:
Following extubation, place the animal in an Intensive Care Unit (ICU) with heat and supplemental oxygen, and monitor continuously until signs of consciousness are observed.
Once fully conscious, provide an oral fluid rehydration drink (e.g., Prang). On the following day, offer moistened chow and fruit, with free access to water and the oral rehydration drink.
Monitor the animal at least twice daily during the postoperative period for neurological or other clinical signs.
Because brain swelling may peak 48:00:00 -72:00:00 after surgery, maintain animals in the ICU for a minimum of 3 days postoperatively.
Post-operative medications and monitoring
Note
Timing: 2 weeks
See supportive medications section
Note
NOTE: see Troubleshooting 2
Terminal brain extraction for ex vivo slice electrophysiology
Note
Timing: 3 h
The brain may be removed 5-8 weeks after the injection surgery. Following transcardial perfusion with chilled sucrose-substituted artificial cerebrospinal fluid (ssACSF), the brain should be removed as rapidly as possible. To facilitate extraction and minimize the post-mortem interval, the skull and soft tissue should be prepared under anesthesia prior to perfusion. The total elapsed time from the start of perfusion to brain removal and gross blocking should be kept to approximately 25 minutes. Anesthesia should be continuously maintained throughout the perfusion procedure until completion of exsanguination.
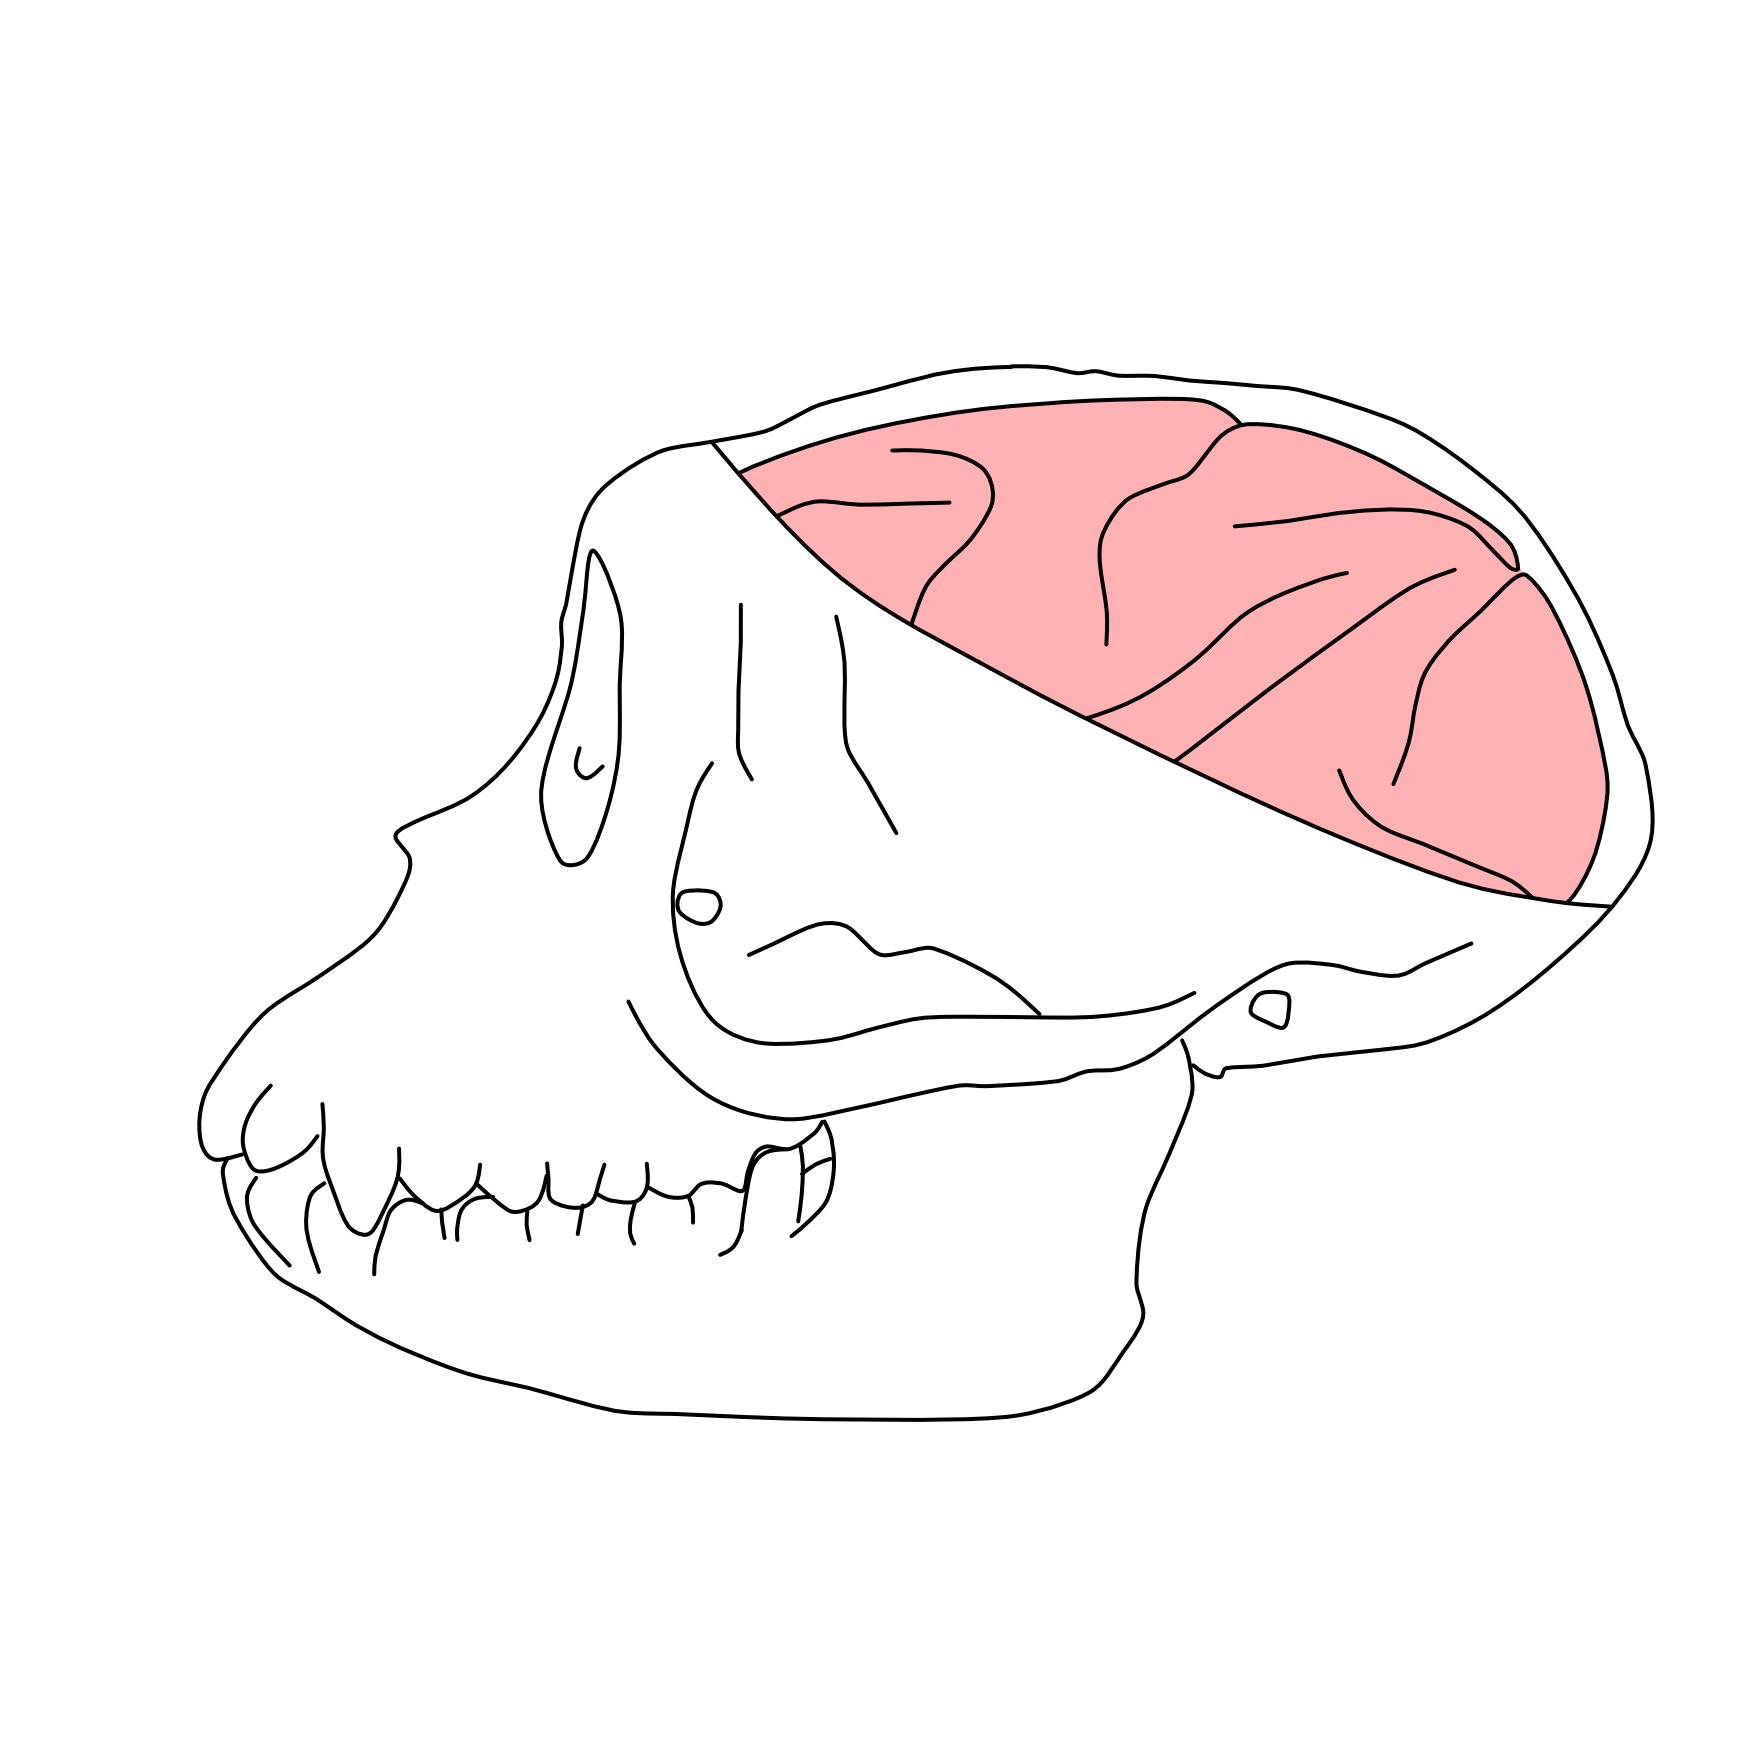
Surgical opening of the skull:
Follow the steps described earlier for preparation, draping, and surgical opening. Take special care when encountering adhesions formed after the initial injection surgery. Avoid applying excessive force, as the bone flap may not be fully integrated and unnecessary pressure can damage the underlying brain tissue.
Detach the temporalis muscles from their bony origins on the bone and expose the occipital ridge to the level of the zygomatic arch.
Detach the trapezius muscle from the occipital ridge to expose its ventral aspect.
Drill the skull following the pattern shown in Figure 16.
Figure 16: Skull drilling pattern
Thick lines denote the craniotomy drilling pattern for injection surgery; thin lines denote the drilling pattern used for terminal brain extraction.
Using two periosteal elevators, gradually lift the bone flaps without fully removing them. Proceed cautiously, as the original bone flap may be adherent to the dura and other meningeal layers.
Note
NOTE: see Troubleshooting 3
Perfusion:
Transfer the animal to a necropsy setup, in a supine position with the head and exposed skull resting on saline-soaked gauze.
Using a #22 blade, make a midline incision between the clavicles extending caudally to the lower pelvic region.
Perform thoracotomy, using blunt scissors, then open the diaphragm and pericardium to expose the heart.
Clamp the descending aorta in the lower thorax to ensure adequate perfusion of the brain.
Using Mayo scissors, cut the right auricle to open the right atrium, allowing blood to drain from the cardiovascular system and lowering blood pressure.
Excise the apex of the heart to open the left ventricle.
Insert a large-bore cannula with an olive tip through the apex tip into the left ventricle and advance into the ascending aorta.
Secure the cannula by clamping the apex to prevent leakage.
Using a peristaltic pump at a flow rate of 100 mL per minute connected to a reservoir with 1.5 L -2 L of ice-cold fully oxygenated and consciously bubbled ssACSF, perfuse the animal until the blood vessels are clear (approximately 00:10:00 -00:20:00 depending on the size of the animal). Perfusion is assisted by residual cardiac function; the heart should continue beating throughout the procedure.
Brain extraction:
Turn over the animal to a prone position and remove the drilled bone flaps using rongeurs. Ensure complete removal of the remaining occipital bone.
Use forceps and curved scissors, dissect the most posterior extent of the dura mater over the occipital lobes, then along the midsagittal plane to remove the falx cerebri as well as the tentorium cerebelli.
Transect the cervical spinal cord and bluntly dissect the cranial nerves using the flat end of the scalpel handle.
Remove the brain from the skull in a caudal to rostral direction, carefully dissecting any remaining attachments.
Blocking:
Immediately place the extracted brain into a brain mold and irrigate continuously with cold oxygenated ssACSF.
Use the mold to cut full coronal plane tissue slabs. Figure 17 illustrates the coronal incision planes for the structure presented in this paper. Block the brain in the coronal plane, starting with the most rostral cut (e.g. temporal pole).
Figure 17: Brain blocking guide
Remove the coronal slabs from the mold and hemisect to separate the hemispheres.
Future block individual structures from each coronal slab as needed (see Figure 17).
Immediately transfer tissue blocks into sealed containers with cold oxygenated ssACSF for storage or transport to host labs for acute ex vivo brain slice preparation for electrophysiological recording.
Slicing:
Gross brain blocks containing the structure of interest are further trimmed ( 1-1.5 cm3 or less), adhered to a specimen stage (cyanoacrylic acid/crazy glue) and sectioned (250-400 microns), and submerged in ice cold oxygenated ssACSF on a vibratome (eg. Leica Microsystems VT-1200S).
Individual slices are then transferred to a submerged incubation chamber containing oxygenated warmed (32 °C -34 °C ) ssACSF for 00:30:00 and maintained at Room temperature for the duration of the day. Slices can be maintained for several days provided the incubating solution is exchanged as needed to maintain osmolarity and prevent bacterial outgrowth.
Following at least 01:00:00 of post-slicing recovery, individual slices can be transferred to a recording setup for electrophysiological interrogation.
Expected outcomes
It is possible to assess injection performance using manganese solutions13 in a post-operative MRI scan. Figure 18 illustrates a coronal slice from post-operative scans performed immediately after the surgical procedure, showing microinjection targeting presented in Table 1. In these scans, successful liquid deliveries typically appear as localized regions of contrast enhancement at the intended target sites, showing hyperintensity on T1-weighted images. Successful execution of this protocol enables reliable cell-type-specific viral targeting in the rhesus macaque brain, with subsequent anatomical and functional validation. Following intracranial delivery of enhancer-driven adeno-associated viruses (AAVs) and an expression period of 6-8 weeks, virally labeled neurons can be identified by robust reporter expression and appropriate co-localization with molecular markers assessed by immunohistochemistry. In addition, infected neurons exhibit electrophysiological properties consistent with their expected cell types when examined in acute brain slices. Figure 19 presents representative validation outcomes from a prior application of this protocol16.
Figure 18: Post-operative MRI scan
Regions of hyperintense signal indicate the presence of manganese added to the viral solution, confirming successful liquid delivery and validating targeting accuracy.
Figure 19: Representative validation outcomes from prior application of this protocol in nonhuman primates.
(A) Example of enhancer-driven viral expression in the rhesus macaque brain, showing selective labeling of targeted neuronal populations and co-localization with appropriate molecular markers. (B) Quantification of cell-type specificity, expressed as the percentage of virally infected cells that co-express the intended marker across animals. (C) Representative morphological re-constructions and intrinsic electrophysiological properties of virally labeled neurons, illustrating firing patterns consistent with the targeted cell types. (D) Functional validation of virally labeled neurons using electrophysiological recordings, including light-evoked synaptic responses where applicable. The figure is reproduced from a prior application of this protocol16 and is included here to illustrate anticipated outcomes.
Limitations
The main limitation of stereotaxic injection procedures arises from the reliability and accuracy of the imaging data. A voxel size of approximately 0.5 mm is commonly used in nonhuman primate brain MRI scans. Performing multiple scans within a single session and averaging them can help improve spatial accuracy. The primary limitation of the injection circuit introduced in this paper is its poor performance with substances that degrade or lose stability during loading or slow delivery through the tubing and connectors. However, in our experience, it has been reliable for virus injections.
Protocol references
1. Furlanis, E., Dai, M., Leyva Garcia, B., Tran, T., Vergara, J., Pereira, A., Gorissen, B. L., Wills, S., Vlachos, A., Hairston, A., Dwivedi, D., Du, S., McMahon, J., Huang, S., Morabito, A., Vazquez, A., Kim, S., Lee, A. T., Chang, E. F., Razzaq, T., Qazi, A., Vargish, G., Yuan, X., Caccavano, A., Hunt, S., Chittajallu, R., McLean, N., Hewitt, L., Paranzino, E., Rice, H., Cummins, A. C., Plotnikova, A., Mohanty, A., Tangen, A. C., Shin, J. H., Azadi, R., Eldridge, M. A. G., Alvarez, V. A., Averbeck, B. B., Alyahyay, M., Vallejo, T. R., Soheib, M., Vattino, L. G., MacGregor, C. P., Chatain, C. P., Banks, E., Olah, V. J., Naskar, S., Hill, S., Liebergall, S., Badiani, R., Hyde, L., Hanley, E., Xu, Q., Allaway, K. C., Goldberg, E. M., Rowan, M. J. M., Nowakowski, T. J., Lee, S., Favuzzi, E., Kaeser, P. S., Sjulson, L., Batista-Brito, R., Takesian, A. E., Ibrahim, L. A., Iqbal, A., Pelkey, K. A., McBain, C. J., Dimidschstein, J., Fishell, G., and Wang, Y. (2025). An enhancer-AAV toolbox to target and manipulate distinct interneuron subtypes. Neuron 113, 1525–1547.e15.
2. Horsley, S. V., and Clarke, R. H. The Structure and Functions of the Cerebellum Examined by a New Method (1908).
3. Saunders, R. C., Aigner, T. G., and Frank, J. A. (1990). Magnetic resonance imaging of the rhesus monkey brain: use for stereotactic neurosurgery. Exp Brain Res 81, 443–446.
4. Pelkey, K., Kim, J. H., Vlachos, A., Mahadevan, V., Caccavano, A., Banke, T., Crawley, O., Navarro, A., Yuan, X., Abebe, D., Hunt, S., Vargish, G., Chittajallu, R., Eldridge, M., Azadi, R., Alexander, C., Tangen, A. C., Harmon, P., Plotnikova, A., Mohanty, A., Furlanis, E., Wang, Y., Dai, M., Garcia, B., Liu, D., Zhu, Z., Yuan, H., Summer, S., Epplin, M., Liotta, D., Pickel, J., Averbeck, B., Perez-Ota˜ no, I., Dimidschstein, J., Fishell, G., Traynelis, S., and McBain, C. Discrete interneuron subsets participate in GluN1/GluN3A excitatory glycine receptor (eGlyR)-mediated regulation of hippocampal network activity throughout development and evolution (2025).
5. Luo, F., Jiang, L., Desai, N. S., Bai, L., Watkins, G. V., Eldridge, M. A. G., Plotnikova, A. S., Mohanty, A., Cummins, A. C., Averbeck, B. B., Talmage, D. A., and Role, L. W. (2024). Comparative physiology and morphology of BLA-Projecting NBM/SI cholinergic neurons in mouse and macaque. J Comp Neurol 532, e70001.
6. Shin, J. H., Goldbach, H. C., Burke, D. A., Authement, M. E., Swanson, E. S., Bocarsly, M. E., Hernandez, S., Kwon, H. B., Cerveny, S. E., Mehr, J. B., Plotnikova, A. S., Mohanty, A., Cummins, A. C., Pelkey, K. A., McBain, C. J., Khaliq, Z. M., Eldridge, M. A. G., Averbeck, B. B., and Alvarez, V. A. (2025). Local regulation of striatal dopamine release shifts from predominantly cholinergic in mice to GABAergic in macaques. J Neurosci 45.
7. Caccavano, A. P., Vlachos, A., McLean, N., Kimmel, S., Kim, J. H., Vargish, G., Mahadevan, V., Hewitt, L., Rossi, A. M., Spineux, I., Wu, S. J., Furlanis, E., Dai, M., Leyva Garcia, B., Wang, Y., Chittajallu, R., London, E., Yuan, X., Hunt, S., Abebe, D., Eldridge, M. A. G., Cummins, A. C., Hines, B. E., Plotnikova, A., Mohanty, A., Averbeck, B. B., Zaghloul, K. A., Dimidschstein, J., Fishell, G., Pelkey, K. A., and McBain, C. J. (2025). Divergent opioid-mediated suppression of inhibition between hippocampus and neocortex across species and development. Neuron 113, 1805–1822.e7.
8. Vargish, G. A., Rice, H., Yuan, X., Hunt, S., Caccavano, A. P., Hines, B. E., Plotnikova, A., Mohanty, A., Furlanis, E., Wang, Y., Dai, M., Garcia, B. L., Cummins, A. C., Eldridge, M. A. G., Averbeck, B. B., Zaghloul, K. A., Dimidschstein, J., Fishell, G., Pelkey, K. A., and McBain, C. J. A novel and evolutionarily conserved inhibitory circuit selectively regulates dentate gyrus mossy cell function (2025).
9. Kim, J. H., Vlachos, A., Mahadevan, V., Caccavano, A. P., Banke, T., Crawley, O. C., Navarro, A. I., Yuan, X., Abebe, D., Hunt, S., Vargish, G. A., Chittajallu, R., Eldridge, M. A. G., Azadi, R., Cummins, A. C., Tangen, A.-C., Harmon, P., Plotnikova, A., Mohanty, A., Furlanis, E., Wang, Y., Dai, M., Garcia, B. L., Liu, D., Zhu, Z., Yuan, H., Summer, S. L., Epplin, M. P., Liotta, D. C., Pickel, J., Averbeck, B. B., Perez-Ota˜ no, I., Dimidschstein, J., Fishell, G., Traynelis, S. F., McBain, C. J., and Pelkey, K. A. Discrete interneuron sub-sets participate in GluN1/GluN3A excitatory glycine receptor (eGlyR)-mediated regulation of hippocampal network activity throughout development and evolution (2025).
10. Walbridge, S., Murad, G. J. A., Heiss, J. D., Oldfield, E. H., and Lonser, R. R. (2006). Technique for enhanced accuracy and reliability in non-human primate stereotaxy. J Neurosci Methods 156, 310–313.
11. McBride, J. L., and Clark, R. L. (2016). Stereotaxic surgical targeting of the nonhuman primate caudate and putamen: Gene therapy for huntington’s disease. Methods Mol Biol 1382, 409–428.
12. Azadi, R., Bohn, S., Eldridge, M. A. G., and Afraz, A. (2023). Surgical procedure for implantation of Opto-Array in nonhuman primates. Curr Protoc 3, e704.
13. Fredericks, J. M., Dash, K. E., Jaskot, E. M., Bennett, T. W., Lerchner, W., Dold, G., Ide, D., Cummins, A. C., Der Minassian, V. H., Turchi, J. N., Richmond, B. J., and Eldridge, M. A. G. (2020). Methods for mechanical delivery of viral vectors into rhesus monkey brain. J Neurosci Methods 339, 108730.
14. Jung, B., Taylor, P. A., Seidlitz, J., Sponheim, C., Perkins, P., Ungerleider, L. G., Glen, D., and Messinger, A. (2021). A comprehensive macaque fMRI pipeline and hierarchical atlas. Neuroimage 235, 117997.
15. Seidlitz, J., Sponheim, C., Glen, D., Ye, F. Q., Saleem, K. S., Leopold, D. A., Ungerleider, L., and Messinger, A. (2018). A population MRI brain template and analysis tools for the macaque. Neuroimage 170, 121–131.
16. Furlanis, E., Dai, M., Leyva Garcia, B., Vergara, J., Pereira, A., Pelkey, K., Tran, T., Gorissen, B. L., Vlachos, A., Hairston, A., Huang, S., Dwivedi, D., Du, S., Wills, S., McMahon, J., Lee, A. T., Chang, E. F., Razzaq, T., Qazi, A., Vargish, G., Yuan, X., Caccavano, A., Hunt, S., Chittajallu, R., McLean, N., Hewit, L., Paranzino, E., Rice, H., Cummins, A. C., Plotnikova, A., Mohanty, A., Tangen, A. C., Shin, J. H., Azadi, R., Eldridge, M. A., Alvarez, V. A., Averbeck, B. B., Alyahyay, M., Reyes Vallejo, T., Soheib, M., Vattino, L. G., MacGregor, C. P., Banks, E., Olah, V. J., Naskar, S., Hill, S., Liebergall, S., Badiani, R., Hyde, L., Xu, Q., Allaway, K. C., Goldberg, E. M., Nowakowski, T. J., Lee, S., Takesian, A. E., Ibrahim, L. A., Iqbal, A., McBain, C. J., Dimidschstein, J., Fishell, G., and Wang, Y. (2024). An enhanceraav toolbox to target and manipulate distinct interneuron subtypes. bioRxiv. doi:10.1101/2024.07.17.603924.
Acknowledgements
We thank the Section on Instrumentation (NIMH) for their critical support.
Anatomical MRI scanning was carried out in the Neurophysiology Imaging Facility Core (NIMH, NINDS, NEI).
This research was supported by the Intramural Research Program of the National Institutes of Health (NIH) ZIA MH002928 (to B.A.).
This research was supported by the Intramural Research Program of the National Institutes of Health (NIH). The contributions of the NIH authors are considered Works of the United States Government. The findings and conclusions presented in this paper are those of the authors and do not necessarily reflect the views of the NIH or the U.S. Department of Health and Human Services.
Author contributions:
A.T. and P.H. prepared the illustrations and original manuscript with guidance from R.A.; A.T., P.H., R.A., A.P., A.M., M.E. developed and performed the surgical procedure; A.C., K.P., C.M., and M.E. developed and performed the terminal brain extraction. K.C. and C.R. helped with developing the injection circuit; K.G. performed and supervised the anesthesia and medical procedures; B.A. supervised the overall project; all authors reviewed the manuscript.